Monday, April 30, 2018

Looking Back with Island Batik

Welcome to April's Island Batik challenge: Looking Back Vintage Quilts Inspiring New Creations.


I have always wanted to make a 6 pointed star quilt. There's something about them that draws me. While I love English Paper Piecing, there isn't a lot of time in my world for that right now, so my take on creating something new from vintage was to search for a way to make the 6 pointed star without needing the paper piecing part.  If you do a search, you will see I'm not the only one who has had that thought, but thankfully, we can use their methods and not come up with something new. Frankly, they had me at strip piecing.


Fancy numbering system

I chose to use the method shown here by Carla of Kits by Carla. After watching her video I ordered the shortcut sheet, downloaded it and got started.


I chose to use the bright colors from the Southern Blooms fabric given to me from Island Batik as part of their Ambassador program. I chose the brightest colors from the grouping I received, because I felt they had a less vintage-y feel. Of course, I think I zeroed that out with the yellow background, which always makes me think of vintage.


While she shows you how to trim a 60 degree angle, if you have a 60 degree ruler, save yourself some time and use it. It's just easier. Don't be like me and take 24 hours to remember you actually HAVE a 60 degree ruler.


This time when sewing, and quilting, my batiks I used a 70/10 size needle. My longarmer recommended going smaller, not larger with my needle, as recommended by those that sell the longarm machines. It sewed and quilted fabulously, and didn't sound quite so much like punching through the fabric.


Once your stars are pieced you get to do my favorite thing: trim to size. I love trimming to size for the pure accuracy of it.


Once I had my stars made it was time to decide on a layout. Part of the reason I chose the on-point layout was becasue I liked how it looked, the other part was, I could get away with only making ten stars (per the instructions, though I only used nine)  and still reach the required size. Shhhhhh.


I kind of felt like the plain setting squares were, well, plain.


I added a few colored pieced to them to see if I liked it better and decided against it. I really preferred the plain in the end.


Quilting, as always, was the hard part. I struggle with quilting motifs, and always go back to the good ole walking foot. This time, while I still did "lines" I did do it free hand. I found the perfect yellow verigated thread at my LQS, and just went for it. I didn't quilt the border or the stars, and did a scrappy binding.


I used a piece of the batting given to me from Hobbs Batting through the Island Batik Ambassador program. For this one I used their Heirloom Premium 80/20. It's a very soft batting, that feels a little thinner than the batting I usually get, but I think it would be perfect for a summer quilt, or a baby quilt that you want to be soft and cuddly.


Voila! My vintage inspiration made new.
PS 20 mph winds *will* blow through a fence and mess up your nice quilt.

Would you have added the added color in the setting squares? Let me know in the comments.
Happy Stitching!
Jen


New to Patterns By Jen?

Find paper and digital patterns in my Etsy shop.


The Border Quilt Quilt Along is coming August 2018


Follow me on Instagram and Facebook for daily sneak peeks and updates.


Sunday, April 29, 2018

Crossing Borders Quilt Shop Hop 2018

My daughter and I went on our annual shop hop hosted by the shops of SW Minnesota and SE South Dakota.

We hit 8 of the 9 shops in one day and traveled many, many miles. 468 to be exact.


Our first stop was Prairie Quilting in Windom, Minnesota. This unique shop is one side of a feed mill (cute story, you should read the "about us," we should all have a husband so supportive)  and has a great fabric selection. In this shop I picked up two fabrics to make a new cover quilt for my Criss Crossing pattern. I've always wanted to do it in just one color and a background and I think this yellow is going to be perfect.


Next stop was in Sherburn, Minnesota at the Old Alley Quilt Shop. This is a little gem I had no idea was here. If you are in the Southwest part of Minnesota it's worth the stop. Right off Interstate 90 it's convenient, too. Here I started my goal to add to my white/grey/black stash. I love geometric patterns on my black and whites.


Crafty Corner in Worthington, Minnesota was our next stop. Bolts and bolts of fabric and a few more bolts after that. I picked up some blacks and greys here as well.  I got 1/2 yard of each black/grey/white to build up my neutrals.


A hop, skip and a jump later and we found ourselves in Luverne, Minnesota at the Sewing Basket. They had some fun blacks to add to my growing pile. I wish I had more time in each shop, because each one has their own special feel. When you're fitting in 8 shops in one day, though it doesn't leave a lot of time for enjoying.  Luverne is our usual lunch stop, so we grabbed some Subway for the road and kept on.


All the way to Beresford, South Dakota. This shop, Shanty Stitchers, has quilting fabrics as well as many cross stitching designs. I had to pick one up. I loved to do cross stitching and haven't for a long time. This one is a little bigger than I have ever done, but Nativities are kind of my thing, so I had to grab it.


Along with some more fabrics.


The Dutch Rose in Sioux Falls, South Dakota was our next stop. Take a moment to go through each of the rooms they have so you don't miss all of the goodies.


Continuing north on Interstate 29 we stopped at Always Your Design in Dell Rapids, SD. A large, open store, you could get lost in here if you don't pay attention. ;)  We grabbed a few black fabrics here.


Our last stop for Saturday was in Watertown, SD at Dakota Quilt Shop. Head upstairs for a selection of marbles, batiks and more.  Here I switched it up and instead went for a couple of fabrics in my favorite color.  Now I'm thinking instead of keeping those fabrics for my neutrals stash I may need to cut them all up, add these purples and make myself a quilt.


Sunday I ran to Fabrics Plus in Marshall, Minesota, my local quilt shop. I have all the love for this shop, full of thousands of bolts of beautiful fabric, this is my second happy place only behind my sewing room.  Here I ended up purchasing some fabrics to replace some that I lost in a "water incident" that happened in my sewing room while I was shop hopping on Saturday.

While I didn't get any photos of the inside of these shops, I hope if you are in the area you stop in and show them some love.  Without our beloved brick an mortar stores we lose the chance to feel those fabrics, meet face to face with fellow fabric lovers, and get in person support. Love my LQS ladies!


The Crossing Borders Spring Fling 2018 ends May 5th, so head out and visit these great shops. PS you could win a Bernina. What, what!!??


Happy Stitching!
Jen

New to Patterns By Jen?

Find paper and digital patterns in my Etsy shop.


The Border Quilt Quilt Along is coming August 2018


Follow me on Instagram and Facebook for daily sneak peeks and updates.

Friday, April 27, 2018

Against The Grain Pattern

Introducing Against The Grain PBJ - 115


Against The Grain was first seen in McCall's Quick Quilts last summer and now it's finally time to release her as a stand alone digital pattern.


Currently available at 72" x 84" it's the perfect size for wrapping up in.


Change it up using a dark, dark background.


Or white.


Or keep it really soft and use the same colorway throughout in different values.


These blocks are quickly put together using strip piecing and when following the pressing instructions, nest together like butter.


Details:

Fabrics: Mixed Bag from Studio M for Moda Fabrics

Quilted by Fabrics Plus with a funky all over design called Contempo

Photography: Handmade Boy

Available for 20% off now through May 4th. No code needed!


Happy Stitching!
Jen

Don't miss out on the link up for the April Color Challenge! Open until April 30th!


New to Patterns By Jen?

Find paper and digital patterns in my Etsy shop.


The Border Quilt Quilt Along is coming August 2018


Follow me on Instagram and Facebook for daily sneak peeks and updates.


Wednesday, April 25, 2018

April Goal recap

Sharing progress on my One Monthly Goal.


I am not entering the link up for April, because I was a day late getting my One Monthly Goal posted. I want to share though, to try and keep up with it. To see my April Goal you can read this post.  I've finished April's block, as well as one extra block and two Quilt of Valor Blocks. Since I didn't share March's blocks I'm adding those as well.


The March block for my local Block of the Month (BOM) class was made in purple.


It turned out gorgeous, and I don't just say that because it's my favorite color. Love that beveled unit.


The extra block I chose was from 20....12. Shhhhhh


It was a quick block and I love the Civil War reproduction prints.


I also made two QOV blocks for March, but apparently I didn't take a picture. I promise I made them though, because I had to turn them in to grab a couple more!


April's color is yellow for my LQS BOM.  It was a much needed burst of color for this month of snow.


It's a funky block that makes me smile.


The extra block was again from 2012 and used Civil War reproduction fabrics.


This one was a little more difficult and made me appreciate that there is now a ruler for that funky corner. Marking dots was not fun. ;)


I also finished two more QOV blocks.

I'm caught up with my sharing, and am determined to get May's goals listed on time. Side note: How is it May already?!


The link up for the April Monthly Color Challenge from Patterns By Jen is open until April 30th, so if you made something orange, go link up! Information in this post.

Happy Stitching!
Jen

New to Patterns By Jen?

Find paper and digital patterns in my Etsy shop.


The Border Quilt Quilt Along is coming August 2018


Follow me on Instagram and Facebook for daily sneak peeks and updates.

Monday, April 23, 2018

April Color Challenge Link Up

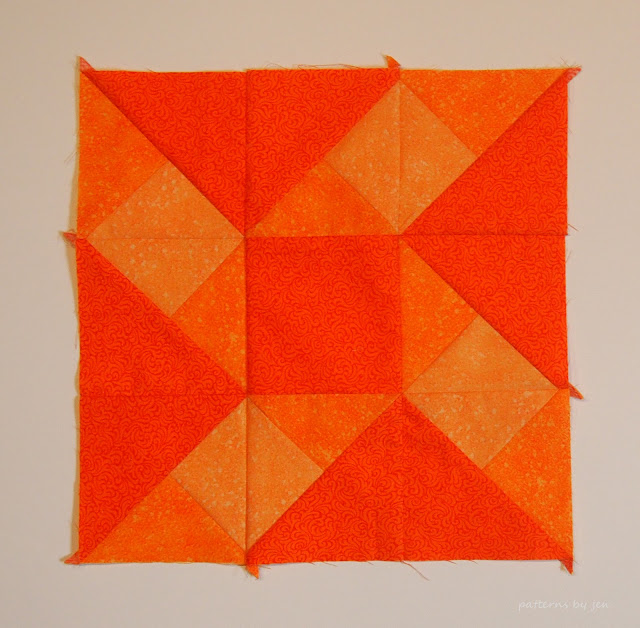
It's here! Time to link up your orange for a chance to win!


Did you make the free block provided or did you choose to make something else? Show us by linking up below, and you could win.


This month's sponsor was Island Batik...


...and by linking up your orange make you could win...


...a fat eighth bundle of their Pumpkin Patch line. Scrumptious!

The link up will run from April 23 - April 30th with the winner being announced May 1st.

If you are having trouble linking up read this post. If you are still having trouble please email me directly; patternsbyjen(at)gmail(dot)com and I will happily get you added.

Good luck and Happy Stitching!
Jen


New to Patterns By Jen?

Find paper and digital patterns in my Etsy shop.


The Border Quilt Quilt Along is coming August 2018

Follow me on Instagram and Facebook for daily sneak peeks and updates.

Monday, April 16, 2018

Sew Much Fun Blog Hop - Adding flange to your borders

Welcome to the Sew Much Fun Blog Hop hosted by Faith and Fabric!


I'm going to show you how I add a flange to my binding. This little extra touch can really add a little flare to your project and it's really easy to do. Note, I hand stitch all of my bindings, so this is not for those who machine bind. Sorry, I struggle with machine binding!


You can read about the table runner I added the flange to HERE. It uses fabrics given to me by Island Batik as a part of their ambassador program.


I share how I square up my quilts in my Beginners Unite Series in this post.


I've changed my set up since that post, and am still figuring out how to use my cutting mat in the space I have, but if you have a longer piece to cut, make sure it's not hanging off and pulling it out of alignment.


Once you've squared up your quilt measure the sides and ends.  You will cut out four strips exactly to this size.  For my sides I need to sew two strips together, I did a straight seam, not a diagonal one, but you can do either.


What width do you use for flange? It's going to depend on what size you use for binding. I always use a 2" binding width. Which when all is said and done will give me a 1/4" binding on the front. I need my flange to be wider than 1/4". In the pictures, the flange is pretty thin, this is because I did the math after only 3 hours of sleep. I *highly* recommend not doing that. I ended up cutting it at 3/4 inch instead of 1" inch, but if you are careful, you can make that work. Fold your flange strips, wrong sides together lengthwise, just like you would your binding. (Sorry, I forgot to grab a picture of that step.)


Pin your flange along the longest sides first. I used wonder clips here, because I was working with Batiks, and my pins don't like to go through it very nicely. It should fit perfectly.


Baste these strips on using a long basting strip, making sure to be inside the scant 1/4" inch seam allowance you will be using to attach your binding.


Next sew your flange to the shorter ends, matching them exactly. (Another shot missed.) Once they are all basted on, attach your binding as you normally would. Go HERE to see how I do my bindings. There are helpful videos as well.


When you stitch your binding you will have extra fabric to cover, because of the flange. This will only really be noticeable when you reach the corners. I clip the corner off, carefully, to reduce bulk. The binding still fills up nicely, because there is the added fabric.


Enjoy your beautiful piece with the little added extra.


Happy Stitching!
Jen

Don't forget to hop over to the other bloggers and get their tips for binding!

Karen at Tu-Na Quilts, Travels and Eats
Melva at Melva Loves Scraps

New to Patterns By Jen?

Find paper and digital patterns in my Etsy shop.


The Border Quilt Quilt Along is coming August 2018

Follow me on Instagram and Facebook for daily sneak peeks and updates.