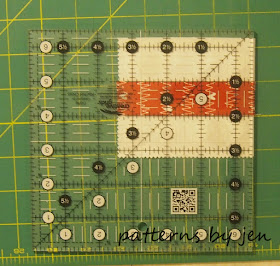
This month's Picked By Jen is Sherri McConnell's, from A Quilting Life, Beginner Charm Pack Place mat that she shares on Fat Quarter Shop's YouTube Channel.
I had some leftover squares from the charm pack of #Love that I used for February's Muggamo pattern and didn't want to just let them sit around. So I went looking for something that was quick and easy. This place mat is definitely that!
My apologies to my photographer for any quilts I have made, or will make, using red. Red is hard to photograph!!
I just quilted using my walking foot and doing stitch in the ditch. When I got it done and flipped it over I immediately thought it looked like a Tic Tac Toe board. Had I realized that earlier on I would have quilted it in red to make it stick out more. Of course it had me thinking I needed to make something to play Tic Tac Toe with. I don't have anything else to do, right?
Yeah. How cute are those hearts??!! (If I do say myself.) Totally worth taking the extra time to make these. Here's a quick tutorial.
You will need twenty-four 5" squares and poly fill. The squares can be all of the same, or different. This is the perfect size for a charm pack. I made mine with one side light and one side dark, but make then however you like.
Draw out a 5" square. When drawing the heart inside the square the bottom point should touch the 2 1/2" mark. Each side touches at the 1 1/2" mark from the top, and the tops touch 1 1/4" in from each side. The inside point comes in about 1/2" on the 2 1/2" line. Fill in the lines between the marks. Cut out the heart.
Place it on the backside of your lightest fabric and trace.
Put two squares right sides together.
\
Pin in place. I am the queen of pinning. If it looks like it needs a pin, if it even looks like it *might* need a pin, it's getting a pin.
I like to start towards the bottom point. Back stitch and then stitch 1/4" from the drawn line all around the heart. Stop about 1 1/2" from where you started, back stitching again. When I'm turning things right side out I like to have that extra strength with the stitching.
Cut the heart out on the drawn line, then snip along the curved pieces of the heart to the stitch line. Be careful not to cut the stitching! Clip that inside point, too.
Turn and push out the points and the seams. Making sure to get the seam allowance press the heart really well. A well pressed seam allowance makes it easy to use a blind stitch to close it up. Stuff the heart, stitch the opening and you are good to go.
I had big plans to make up more place mats (we're a family of 6), and more hearts. What do they say about the best laid plans? Well my over planning is your gain, or someones gain anyway. I have a charm pack of Moda's #Love and 26" each (almost 3/4 yard) of the two fabrics shown. One lucky winner will get these just for commenting below. I will pick a winner on Valentine's Day. Sometimes the winter is a "no-reply" winner, and that is sad, because I have no way of letting them know they won. If you are unsure, you can always email me at patternsbyjen@gmail.com. Or check back here on Valentin's Day. Go comment and good luck!!
Happy Stitching!
Jen
The winner is..... Jen from A Dream and A Stitch! Sending you an email Jen.


