Remember when I said June was busy? It was so busy, I forgot about the Picked By Jen post! Which actually works out, because I can do two Picked By Jen posts in a week, and they match. So cute! The first one is for a sewing machine cover. I chose the tutorial from Purls and Pleats.
There are many, many tutorials out there, but I wanted simple. That's kind of my theme, simple, easy, quick.
Marrie, does a great job walking you through the steps of this sewing machine cover. I did add a touch of my own, because, well, I could. Ha! So can you!
The first change I made, was that I hemmed all the pieces right away, before attaching them. There is no real reason for this, other then I didn't want to mess with the cover when it was put together. Lazy stitcher here. Its definitely a cleaner finish when you hem around the bottom last, though.
I pressed the hem before stitching, making it 3/8" wide, just so I could use my 1/4" foot and not have to worry about catching the fabric.
Who knew I had so many pinks to choose from for the top stitching?
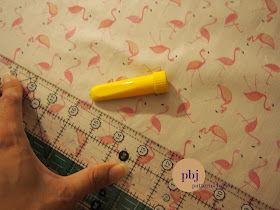
Next, I chose some ribbon to go around the bottom part of the cover. Once hemmed, I measured and marked 2" from the bottom for my ribbon. I marked both sides and front and back.
 |
| pink? |
Don't forget to change your thread color!!! (There is even dust in there, this cover was needed yesterday!)
Lining up my ribbon along the marked line I stitched one end (look how I can use my foot as a guide, easy peasy).
Then flipped it around and stitched the top end. How you stitch this will just depend on the width of your ribbon. I could have just stitched once down the middle and been done with it.
I cut my ribbon about 1/8" longer then my pieces so that I could match them up when I sewed up the side seams.
Once the sides were stitched and my ribbons were matching perfectly, I trimmed the excess ribbon. If I was really truly lazy, I would have just left them, but I think it would have bothered me.
I was hoping to find a cute flamingo button to go on this, but I want it to be perfect, so I chose a sewing charm for now. Still extremly cute!
Now I have my own, cute, totally flamingo sewing cover! Short and sweet.
Happy Stitching!
Jen
I was hoping to find a cute flamingo button to go on this, but I want it to be perfect, so I chose a sewing charm for now. Still extremly cute!
This is the one picture I took outside, it shows off the pretty pink flamingos much better. I think lighting needs to be next on my list, especially as we inch closer to cold winter days when we can't go outside.
If you are a flamingo lover, or fabric lover, head over to Phat Quarters and use the coupon code PBJ25, which is still good until the end of July, and receive 25% off orders of $20 or more.
Now I have my own, cute, totally flamingo sewing cover! Short and sweet.
Happy Stitching!
Jen


Cute! Is the coating of dust a bad thing? Maybe my Bernina needs a cover, too.
ReplyDeleteI think it's better not to have it. In this case, my sewing room is also my laundry room, it gets extremely dusty in there.
DeleteSo cute, Jen! I really should do something like that. Dust is not our friend.
ReplyDeleteThanks, Janice! It was so simple, and quick. I wondered why I hadn't done it before.
Delete