Affiliate Disclosure

Monday, November 27, 2017

Modern Marks Blog Hop

Today is the first day of the Modern Marks Blog Hop.


If you are new to Patterns By Jen, welcome! I hope you enjoy your stop. Sew In Love With Fabric (Benartex's blog) has an interview with Christa to start off the blog hop. Don't miss the rest of the bloggers listed at the end of the post, and the giveaway!


Modern Marks is Christa Watson's first fabric line for Benartex.


The colors are bright and saturated. Pictures just don't do the fabric justice, you really have to have them in hand to appreciate the gorgeousness of this fabric collection.


I love a good, colorful selvage, don't you?


The fabric is like butter, really.  I don't wash my fabrics before I use them, and when the fabric is soft and easy to work with, it makes the process more enjoyable. There was very little "fraying" of the edges while I worked with them, too, and THAT is a huge selling point for me.


I designed Broken Panes to show off the large prints of Modern Marks. Christa's use of interesting and funky shapes within each color makes for great movement throughout each square.


The fabrics work really well in a big block quilt.


These colors just pop!


You can find a list of shops that carry Christa's Modern Marks HERE. If your local quilt shop doesn't carry them, you should definitely recommend it to them.


Thank you, Christa for the great fabrics to work with. The color, the shapes, the fabrics were a bright, fun group to work with.

Giveaway!

You can win a bundle of 8 - 10 fabrics from the Modern Marks line. In the comments let me know your favorite quilt size to make and I will pick a winner Saturday, December 2. Sorry, giveaway is only open to US residents.

Please make sure to leave your email address, as I have had winners in the past who didn't receive their prize, because they were a no-reply commenter. Ex. patternsbyjen(at)gmail(dot)com

Happy Stitching!
Jen

If you are new here you might like to check out the Muggamo series going on now.
Follow me on Instagram and Facebook for daily sneak peeks and updates.


Modern Marks Blog Hop

Monday
HollyAnne Knight- String & Story

Tuesday
Yvonne Fuchs - Quilting Jetgirl
Vicki Holloway-My Creative Corner3

Wednesday
Hilary Jordan - Aurifil
Pam Cobb - The Stitch TV Show

Thursday
Heather Black - Quiltachusetts
Andrea Tsang Jackson - 3rd Story Workshop

Friday
Tara Miller - The Quilt District
Stephanie Kendron - Modern Sewciety

Thursday, November 16, 2017

Road Trippin' with Quiltmakers 100 Quilt Blocks

Welcome to the last day in the Quiltmaker's Road Trip. I'm so glad you have stopped by.


Let me introduce you to my block Cartwheel.


Made from the beautiful Cirrus Solids fabrics from Cloud9 this is a simple and quick block.


The colors remind me of the mountains, the strong grey of the mountain rock, the blues of the changing sky.


I love a block that gives you a secondary pattern when put into a quilt.


Or turn that baby on point and get a who new look.


OK, not Montana, but isn't that a good looking group of kids?


Some of my favorite memories are on trips with my family. One of the best was a trip out to Montana.


Those mountain views never get old, and there are so many things to see and take in while you are road trippin'.


If I could pack up everything, and everyone, this is where I would move, the Montana mountains.

So while I sit in nostalgic memories, share with me a favorite trip you have taken, either by yourself or with friends/family.
**PLEASE make sure to leave an email address so I can contact you, not everyone can receive emails back. EX: jane.doe (at) 123 (dot) com**
Three winners will be chosen from the comments. One will win a copy of the newest Quiltmaker's 100 Quilt Blocks magazine sent directly from them.


One will win a copy of the magazine and this Fat Quarter Bundle of Cirrus Solids from Cloud9 Fabrics.


The last will win a copy of the magazine and their choice of one of Patterns By Jen's patterns.

Giveaway ends 11:59 PM CST, November 19th

Winner of the Quiltmaker's 100 Quilt Blocks Issue 16 is:


Congratulations Mona!

Winner of the Quiltmaker's 100 Quilt Blocks Issue 16 and a fat quarter bundle from Cloud9 is:


Congratulations Linda!


Winner of the Quiltmaker's 100 Quilt Blocks Issue 16 and a pattern from Patterns By Jen is:


Congratulations delaineelliott!

Thank you so much for stopping by! Safe travels and...

Happy Stitching!
Jen

If you are new here you might like to check out the Muggamo series going on now. 

Follow me on Instagram and Facebook for daily sneak peeks and updates.

Go back to Quiltmakers for more inspiration and fun!

Tuesday, November 14, 2017

BU Quilt Along Week 10

It's here, the finish!!  It's time to quilt our Here A Square, There A Square quilt!


First thing we need to do is measure our quilt top so we can get the correct backing and batting pieces. This one should measure about 66" x 78". 

Once measured we want to add a few inches all the way around. If you are taking it to a long armer, they want 4" extra around. This helps them when they are loading your quilt onto the machine, especially if things aren't completely square.

When I'm quilting at home I like to have 3" extra all the way around. I used 2 yards of 108" wide backing and queen sized batting


Quilting Prep

Piece your backing if you need to. I press my seam to one side so I don't have to worry about it pulling open a bit when it's getting quilted. The following instructions are for those that pin. If you are using basting spray you will follow the instructions on your basting spray bottle.


Give the backing a good press, then lay it out flat on your table or floor, wherever you will be basting it. Making sure it's nice and smooth, tape the backing down. 

Tape in the center of one end, then move to the opposite end and place tape in the center of that one. Making sure the fabric is still smooth, place a piece of tape on both sides of the middle you've just taped. Repeat on the opposite end.

Still making sure the fabric is nice and smooth place a piece of tape in the middle of one side, repeat on the other side, and continue as you did for both ends of the backing.


Laying your batting down on top of the backing, take the time to make sure it's nice and smooth. Repeat the same steps with the tape that you did with the backing fabric.


Now lay your quilt top out on top of the backing and batting. Smooth.
Once you are happy with how the quilt is laying begin to pin. I like to start in the middle and work my way out around the quilt. Keep your pins about 4" apart from each other, basically a hands width.


Curved pins and the Kwik Klip really help speed up the process of pinning a quilt. A cup of hot coffee, in a matching color, just makes more enjoyable.

Once you have pinned your quilt, carefully remove the tape.

Quilting set up

I'm not great at quilting my quilts, but I firmly believe in making it as easy for myself as I can. As with all things, everyone has what they like and what works for them. This is what works for me.


First I wrap my ironing board in garbage bags and tape them tight. Once the board is covered I lower it so it lines up with my desk and sewing table. The garbage bags help the quilt slide, and having everything at the same level keeps it moving smoothly, too.


I have an old teachers L shaped desk. My machine is on the lower part of the desk, that means the higher/longer side is available to hold the quilt.


I love the extra space this desk gives me...


...but I still need to scrunch, pull and shove.


There are many how tos for machine quilting on your domestic machine. For this quilt I am simply using my walking foot. It's less stress for me. I stitched in the ditch, using the navy around the hourglass blocks and inside the green square around the snowball block. I used a beautiful marching rose to stitch in the ditch of the snowball block.

Let me know how you are planning to quilt your Here A Square, There A Square quilt in the comments and don't forget to share your progress in the Quilt and Learn with Patterns By Jen Facebook page.

Happy Stitching!
Jen

Follow me on Instagram and Facebook for daily peeks into Patterns By Jen!

This week Quiltmaker's 100 Quilt Blocks is having their blog tour, introducing you to Issue 16 of their magazine. Meet the designers, sign up to win prizes, and come back here on Friday for my stop on the tour!


Friday, November 10, 2017

October 2017 Finishes

Just like that October is done. There were a few finishes this month, lets take a look.


To start with we have the October Muggamo. Love those glow in the dark ghosties.


I participated in the Sew Much Fun Halloween Blog Hop this year and shared a fun oven mitt pattern.


I also finished and released my newest pattern, The Border Quilt. Love this pattern!


Use LUCKY13 to receive 13% off your entire purchase from my Etsy store. Now through November 13th! Who says 13 isn't lucky?


That's it! It seems like there was more, ha! I did finish a new pattern called Broken Panes, but it will be releasing this month, so I'll share it in November's Finishes post. Though, you've seen it if you follow me on Instagram, if you don't, you're missing out!

Did you accomplish everything you set out to do in October? Share one thing, or more, that you are proud to have accomplished.

Happy Stitching!
Jen


Follow me on Instagram and Facebook for daily peeks into Patterns By Jen!


Linking up with Sarah and her Can I get a Whoop Whoop! 

Linking up with Thank Goodness its Finished Friday!

Tuesday, November 7, 2017

BU Quilt Along Week 9

It's border time baby!


By the end of this week we will have a full quilt top, which when not quilted, is referred to as a flimsy. So exciting to have reached this point.


It's important to measure your quilt to get the correct border measurement. I'll be going over that in this post. It may take a bit longer than just trusting the pattern, but it will keep the wavy border problem away, and we definitely want that!

In this quilt we are adding two borders, an inner and an outer. I mearsure for both of them.


This pattern calls to add the side borders first. To get that measurement I'm going to measure the length of my flimsy in three places. Side. Middle. Side.

I'm using my hard quilting rulers, because those soft measuring tapes can stretch, and I want to know I am as accurate as can be.


When stitching my borders I pin each end, find the middle, pin there and then pin half way between the middle and each end. This keeps my border from shifting or getting stretched, it all makes a difference in how flat your borders lay after you have added them.

When I get those three measurements I add them together and divide by 3, this will give me the average of the three measurements and this is what I'm going to cut my border at.
**Please note: there was a mistake and you will need to cut SEVEN 1 1/2" strips for the inner border, not four**


Once I have stitched and pressed those side inner borders I'm going to measure the width of my flimsy in three places. Side. Middle. Side.  Add them and divide as above and use that measurement.


Once the top and bottom inner borders have been added I  will repeat the process again to get the measurements for the outer borders.


We're done!!! Next week I will go over how I get my quilt ready for quilting on my domestic machine. Thank you so much for joining me on this quilt along!

Happy Stitching!
Jen

Friday, November 3, 2017

A Winter Cheer Makeover

Have you seen Winter Cheer? Pattern By Jen's 8th pattern, released in 2016?


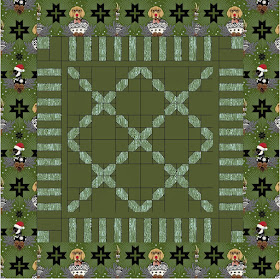
I'm giving the "old girl" a makeover and wanted to share my ideas with you.


First up is Winter Cheer in Tula Pink's Holiday Homies. These guys are awesome. Obviously my scale is a bit off, I'm still working on that skill. Ha!


I changed up the quilt simply by making the appliqued holly/snowflakes into Christmas tree balls.  These fellows are so handsome, aren't they? *Please note this is not part of the pattern, but simply cutting around the piece you want to focus on and stitching it down is all you need to do.*


What about a funky background? This could be dizzying.


Admittedly, this is more my style, nice and calm, but with a touch of fun.


This pattern works all year round, though,  so don't just focus on Christmas or winter prints. What about a patriotic quilt?  This mock up is done using the Lost and Found America prints from Riley Blake. My Timeless Day has them HERE.


I love the idea of using the striped fabric instead of doing the piano key border. The background is the Riley White Confetti cotton found HERE.  The stars would just be drawn free hand, or print out a coloring book page to use as a template. Would you use stars alone, or would you add something else?


This Chivelely fabric from Lewis and Irene is so gorgeous. Combined with Cloud9 Glimmer fabric and you have a stunning quilt.


I seriously think I'm going to have to make this one. Find the fabrics at Phat Quarters Fabric. Try not to drool while ordering.


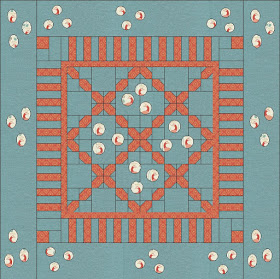
Since I've been working with Christa Watson's new fabric line, Modern Marks, I had to do a couple mock ups with it, too. I love the thought of a "floating" center.


Skipping the applique and just making a pieced quilt, is definitely an option with this quilt, it isn't a needed part to make it look finished.

If you were to give Winter Cheer a makeover, what fabrics would you use? Would you skip the applique altogether, or transform that, too? Let me know in the comments for a chance to win a copy of Winter Cheer. A winner will be chosen November 6th!

*Giveaway closed*

Happy Stitching!
Jen