Showing posts with label Flamingos. Show all posts

Tuesday, March 12, 2019

Picked By Jen - Buttercup Bag


It's been a while since I've written a Picked By Jen post. The Buttercup Bag from Made By Rae is the perfect make to start with. I LOVE this pattern.


So much so that I made it a second time after my first one became....ummmm....embarrassingly over used? That's the *same* fabric, too. I used this poor thing to it's last breath, I hadn't realized it has faded that much. Woah!


This purse though! It makes me so happy! I used the small pattern, because after 12 years of carrying a diaper bag I said "No More!" A small purse is all I've carried for the last 12 years. It does come in a larger version though if you need to be able to carry more.


Flamingo key chain made by my good friend Kelly of Handmade Boy.


This pattern is FREE when you sign up for Made By Rae's newsletter. I found this out when I had to go find it to print off a few missing pieces. I happily signed up for the newsletter, because seriously, this pattern is worth it.


I reused the metal snaps from the old purse, since that one is obviously not going to be used again. I chose this adorable polka dot fabric for the inside. I always use a light fabric on the inside of bags to make it easier to find whatever may be inside. Confession, even though this is the small version, I am able to fit way too much in there and lose it.


Now I need your help! I need to remake my wallet so it doesn't feel bad about being embaressingly overused as well.


It was a gift and I need to remake it, probably in flamingo fabric, the one thing I hoard. ;) Anyone know what the pattern is??!! Please!


It's very sad now. Hahahaha 

Get your pattern, I would love to see your Picked By Jen makes!

Happy Stitching!
Jen


Friday, July 29, 2016

Testing is done, time to play!

Getting patterns ready for testing makes Jen a boring girl, blog wise and social media wise anyway. Yesterday, though, I got to play with fabric. Of course it had to be flamingo fabric, but look at this too cute little pouch! It demanded flamingo fabric!


This pouch is called Charming Tinsel Pouch, and is too cute for words. Amista from Hilltop Custom Designs designed this darling thing. You can find her blog here, and her store here.

I did have an issue with the instructions for the zipper. If it were morning I would say it was because I hadn't had enough caffeine, but since it was in the evening I'm going to go with too much caffeine. Amista was quick with her response and already going though the pattern.

Zipper issue aside, which I know she is fixing so don't let that stop you, this was a quick and easy sew. A couple of hours and you have this sweet little pouch ready to hold your make up, jewelry or, lets face it, all our little sewing notions that we can't live without. 


This is why I order extra fabric when I find something I love, so I can put it on the back and not care, because I have more. Plus, why do we hoard our favorite fabric, we should be using it and adoring it out in the open for everyone to see!


Or maybe not to see. Look at those little flamingos peeking out, aren't they fun? Too much flamingo?  Is there such a thing?!


I say nay! Bring on the flamingos! 

Is there a fabric, novelty or not, that you tend to be drawn towards, and maybe have more of then you might want to admit? Is it as cute as my Holiday flamingos? Is there some that you have been hiding/hoarding and should start making plans for? 


As a post script to this post, I want to remind you that Phat Quarters still has their coupon code for PBJ followers!  It is good through the end of the month, which by the way, is right around the corner. SOB! Where is summer going?

 You can get your own flamingo fabric! OK, fine, get something else, that just means more flamingos for me! They have some really cute prints, and you should really go here and check them out. Use coupon code PBJ25 to receive 25% off of $20 or more. 

Then, pull out that fabric you have been saving and make something!
Happy Stitching!
Jen


Saturday, July 16, 2016

July Picked By Jen ~ Thread catcher

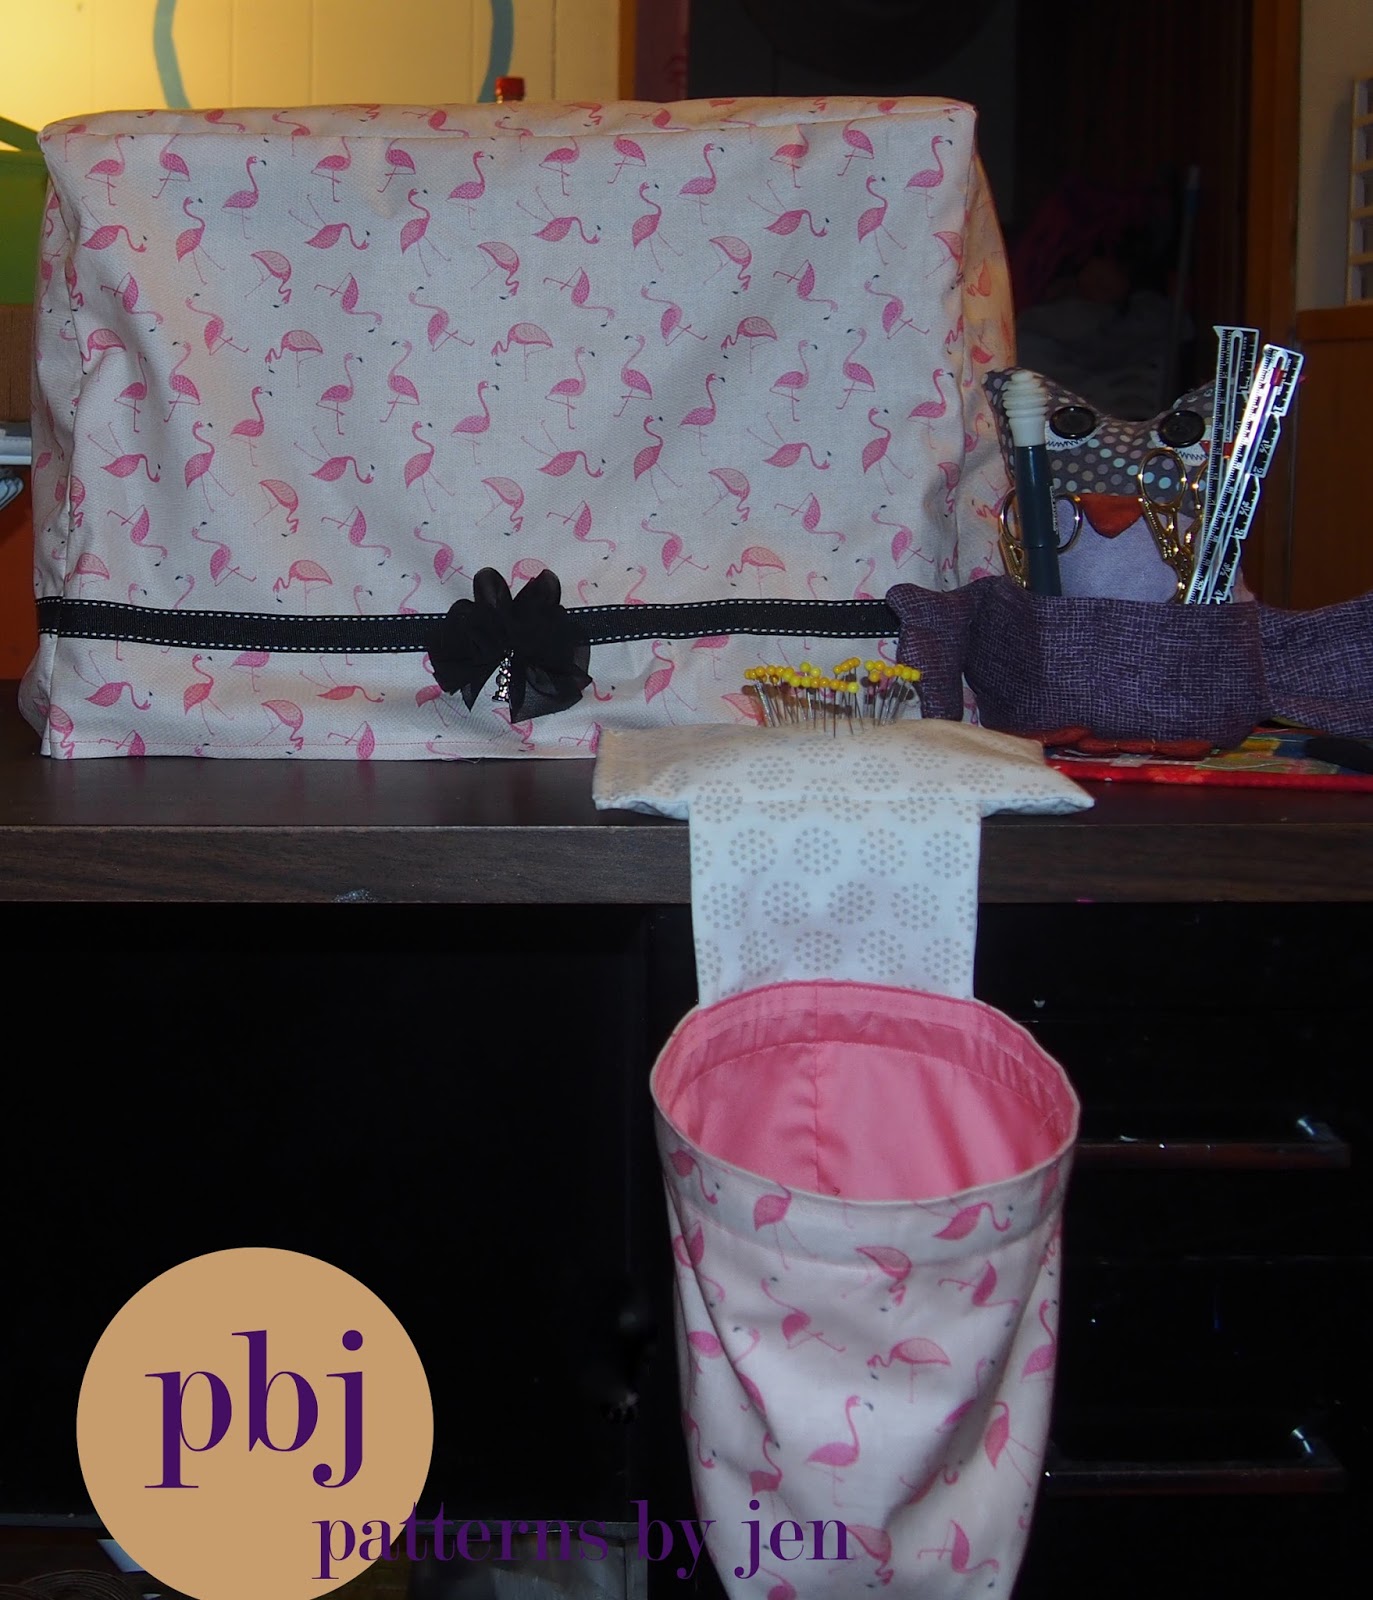
I had to do it. It was time. Past time even. I had to make a thread catcher. I chose Man Sewing - with Rob Appell's Weighted Pin Cushion with Scrap Bag.


A quick and easy sew. I used my new favorite flamingo fabric, this time the fat quarter bundle, from Phat Quarters, as well as emery sand to fill the pin cushion. Y

I followed the instructions from Man Sewing, but I did add an extra piece to hold the emery sand. It's pretty fine, and I wanted an extra layer. 


It looks like a little pillow. Awwww.

I put this pillow into the pin cushion section when the walnut shells are added in the tutorial. 


It works perfectly. 


This was not a set up. My poor Owl You Need Sewing Buddy, found in this PBJ here, was in desperate need of saving. 


Where they should be.


Now I have a set, June's PBJ was the sewing machine tutorial, find out more here. My helpful little owl is all cleaned up and happy again, and only holding helpful tools, not clipped threads.

Find your flamingo fabric at Phat Quarters, and don't forget to use the code JPG25 to receive 25% off of orders $20 or more. This code is good through the end of July.

Happy Stitching!
Jen


Wednesday, July 13, 2016

June Picked By Jen

Remember when I said June was busy? It was so busy, I forgot about the Picked By Jen post! Which actually works out, because I can do two Picked By Jen posts in a week, and they match. So cute! The first one is for a sewing machine cover. I chose the tutorial from Purls and Pleats.


There are many, many tutorials out there, but I wanted simple. That's kind of my theme, simple, easy, quick. 

Marrie, does a great job walking you through the steps of this sewing machine cover. I did add a touch of my own, because, well, I could. Ha! So can you!


The first change I made, was that I hemmed all the pieces right away, before attaching them. There is no real reason for this, other then I didn't want to mess with the cover when it was put together. Lazy stitcher here. Its definitely a cleaner finish when you hem around the bottom last, though.


I pressed the hem before stitching, making it 3/8" wide, just so I could use my 1/4" foot and not have to worry about catching the fabric.

Who knew I had so many pinks to choose from for the top stitching?


Next, I chose some ribbon to go around the bottom part of the cover. Once hemmed, I measured and marked 2" from the bottom for my ribbon. I marked both sides and front and back.

Black ribbon or...


pink?


Don't forget to change your thread color!!! (There is even dust in there, this cover was needed yesterday!)


Lining up my ribbon along the marked line I stitched one end (look how I can use my foot as a guide, easy peasy).


Then flipped it around and stitched the top end. How you stitch this will just depend on the width of your ribbon. I could have just stitched once down the middle and been done with it.


I cut my ribbon about 1/8" longer then my pieces so that I could match them up when I sewed up the side seams.


Once the sides were stitched and my ribbons were matching perfectly, I trimmed the excess ribbon. If I was really truly lazy, I would have just left them, but I think it would have bothered me.

I was hoping to find a cute flamingo button to go on this, but I want it to be perfect, so I chose a sewing charm for now. Still extremly cute!


This is the one picture I took outside, it shows off the pretty pink flamingos much better. I think lighting needs to be next on my list, especially as we inch closer to cold winter days when we can't go outside.

If you are a flamingo lover, or fabric lover, head over to Phat Quarters and use the coupon code PBJ25, which is still good until the end of July, and receive 25% off orders of $20 or more.


Now I have my own, cute, totally flamingo sewing cover! Short and sweet.

Happy Stitching!
Jen


Monday, July 6, 2015

Picked By Jen

Every now and then I will be posting "Picked By Jen". See my play on PBJ? Yep, I think I'm pretty clever. ;)  I would love to make it a weekly or biweekly thing, but we will see. "Picked By Jen" will feature a tutorial that I have found, tried and love. I will post the link so you can try them yourselves and enjoy the plethora of talent that fills the internet.

The first Picked By Jen is (insert drumroll)...

The The Microwave Bowl Cozy with tutorial from Lisa Lewis Koster at True Hope and a Future. This is my favorite tutorial for this fun project. It explains things so well and is easy to follow.


What? You don't have pink and purple flamingos in your kitchen?
Well, neither do I, but someday...


How about cats?

This is one thing I love about these, you can make them personal for whoever you are giving them to. I have made some with chickens, apples, and kitchen utensils. The choices are endless. 


Two fat quarters will give you two 10" bowl cozies.
  

**Please make sure you use 100% cotton fabric, batting and thread, because anything synthetic could burn in the microwave.

This is a great chance to use those fancy stitches on your machine if you have them. I need to branch out in this area, but for now I do the trusty back and forth "wave". 


I really like her suggestion to use the first piece as a pattern and save time by not having to draw all of those lines. 


One thing I recommend is using your walking foot. This is a lot of layers for my machine to stitch through, and I had more luck with the walking foot. 


I gave these as teacher gifts at Christmas this year. They are simple to put together, but extremely useful. The teachers loved them.


Enjoy making these and enjoy no more burned fingers when warming things up in the microwave!


Happy Stitching!
Jen