Thursday, August 29, 2024

Guide to Pre-Cuts

If you’ve spent any time wandering through your local quilt shop (or let’s be honest, scrolling online fabric stores), you’ve probably seen those enticing bundles of fabric neatly tied up with a ribbon or stacked like colorful pancakes. They’re called pre-cuts, and they can be a quilter’s best friend—especially if you’re just starting out. But what exactly are pre-cuts, and how do you use them? Let’s dive in!


What Are Pre-Cuts?

Pre-cuts are bundles of fabric that are already cut into specific sizes, making them super convenient for quilters who want to skip the measuring and cutting stage. These pre-cut pieces come in various shapes and sizes, each with its own quirky name, and they’re perfect for giving your quilt that cohesive, curated look without the hassle of picking out multiple fabrics.


Wild Blossoms

Here’s a quick rundown of the most common pre-cuts you’ll encounter:

  • Charm Packs: These little bundles usually contain 42 squares of fabric, each 5” x 5”. They’re a great starting point for simple patchwork quilts.
  • Layer Cakes: No frosting here, but a lot of fabric! Layer Cakes are collections of 10” x 10” squares, often used for larger blocks or to cut into smaller pieces for more intricate designs.
  • Jelly Rolls: Strips of fabric measuring 2.5” x the width of the fabric (usually around 42”). Jelly Rolls are perfect for strip quilts, log cabins, or any pattern that calls for strips.
  • Fat Quarters: These are 18” x 22” cuts of fabric, giving you a bit more versatility for cutting different shapes and sizes. Fat Quarter bundles often come in coordinated collections, making it easier to mix and match.
  • Mini Charm Packs: Think of these as baby Charm Packs, with 2.5” x 2.5” squares. They’re adorable and perfect for tiny projects or to add some variety to larger ones.
  • Honey Buns: Similar to Jelly Rolls, but with 1.5” strips instead of 2.5”. Great for finer details or smaller-scale projects.
  • Layer Cake Samplers: These are like a charm pack but larger, with 12” x 12” squares. They give you a bit more room to play with larger-scale patterns.

Why Pre-Cuts Are Perfect for Beginners

One of the biggest hurdles for new quilters is the cutting process. Let’s face it—measuring and cutting fabric can be intimidating when you’re just getting started. Pre-cuts take out that guesswork and let you jump straight to the fun part: piecing and sewing. They also make it easier to coordinate colors and patterns because they often come in collections designed to work together. So, no more stressing over whether that green fabric clashes with the purple one—you’re all set!

Plus, pre-cuts save time. With everything already cut and ready to go, you can get right to the creative part of quilting. Whether you’re tackling your first quilt or just need a quick project between bigger ones, pre-cuts are your best friend.


Pinwheel Pivot

How to Choose the Right Pre-Cut for Your Project

Choosing the right pre-cut depends on what you want to make. Here’s a quick guide:

  • Charm Packs: Ideal for smaller quilts, baby quilts, or simple patchwork designs. Great for practicing your piecing skills.
  • Layer Cakes: Perfect for larger quilts or projects where you want to show off a fabric’s design. These work well for patterns that require bigger blocks.
  • Jelly Rolls: Awesome for strip quilts, log cabins, or anything that involves sewing strips together. They’re also great for adding borders or sashing.
  • Fat Quarters: The most versatile option, fat quarters give you enough fabric to cut a variety of shapes, making them perfect for complex designs or when you need a bit more flexibility.
  • Mini Charm Packs: These are fun for smaller projects like table runners, mug rugs, or as accents in larger quilts.
  • Honey Buns: Best for detailed work or when you want to create a more intricate design without cutting everything yourself.

Tips for Working with Pre-Cuts

  1. Starch Your Fabric: Pre-cuts can be a bit wobbly around the edges, so give them a light spray with starch to keep them stable.
  2. Mind the Pinked Edges: Some pre-cuts come with pinked edges to prevent fraying. When sewing, measure from the outer tips of the pinking to maintain your seam allowance.
  3. Be Mindful of Your Layout: Because pre-cuts are already coordinated, it’s easy to get caught up in the sewing and forget about your layout. Take a moment to lay out your pieces before sewing to make sure you’re happy with the arrangement.
  4. Keep Them Organized: Pre-cuts can sometimes be slippery little devils, so keep them stacked neatly or in a project bin to avoid losing pieces.
  5. Don’t Be Afraid to Mix and Match: Just because a pre-cut bundle comes as a set doesn’t mean you have to use it all in one project. Mix and match with other pre-cuts or fabrics from your stash to create something uniquely yours.

Final Thoughts

Pre-cuts are like the fast pass at the quilting amusement park—they get you to the fun part quicker and with less hassle. Whether you’re just dipping your toes into quilting or looking for a quick and easy project, pre-cuts offer a convenient and creative solution. So, grab a bundle (or two, or three), and let your creativity take the lead. Before you know it, you’ll be turning those pre-cut pieces into a quilt that’s uniquely yours—one stitch at a time.


Softly Circled


Go make something extraordinary.


Did you get my 5 Free Tips for Accurate Piecing yet? I would love to send it to you, sign up HERE!


New to Patterns By Jen?


Don't forget to sign up for the Bites of PBJ newsletter while you are here for early releases and sales just for subscribers!


Newsletter sign up


2024 Monthly Color Challenge


Find paper and digital patterns in my Etsy shop.


Find fun PBJ merchandise at Teespring


Join the Quilt and Learn with Patterns By Jen Facebook page.

Thursday, August 22, 2024

Quilting Jargon

 The world of quilting has many terms and acronyms specific to its rich history and unique techniques.


Many are self explanatory, some are confusing. I've compiled a list that will hopefully be helpful for you. Be sure to bookmark the page or save it to your quilting Pinterest Board.


Appliqué: A technique where pieces of fabric are sewn onto a larger piece to create designs.

Batting: The layer of material (cotton, wool, or polyester) between the quilt top and backing that provides warmth and thickness.

Bias: The diagonal direction of the fabric, which has the most stretch.


Wild Blossoms

Binding: The fabric strip used to finish the edges of a quilt.

Block: A unit of a quilt, often square, that is repeated to form the quilt top.

Block Of The Month (BOM): A program that offers a new block each month with a finished quilt at the end.

Chain Piecing: A method of sewing blocks or pieces together without cutting the thread between each one.

Charm Pack: A collection of 5-inch fabric squares, often from the same fabric line.


Frayed Edges

Cornerstones: Small squares of fabric placed at the intersections of sashing strips.

Crosswise Grain: The direction of the fabric perpendicular to the selvage.

Design Wall: A vertical surface where quilt blocks can be arranged and rearranged before sewing.

English Paper Piecing (EPP): A hand-sewing technique where fabric is wrapped around paper shapes and sewn together.

Fat Quarter (FQ): A fabric piece that measures approximately 18" x 22", half of a half-yard of fabric.

Foundation Piecing: Sewing fabric pieces onto a paper or fabric foundation to create precise designs.


Pinwheel Pivot

Free Motion Quilting (FMQ): A technique of quilting where the quilter moves the fabric freely under the needle to create designs.

Fusible Web: A material that, when heated, bonds fabric layers together, often used in appliqué.

Grain: The direction of the fabric threads, either lengthwise or crosswise.

Half-Square Triangle (HST): A square made from two triangles, often used in quilt blocks.

Jelly Roll: A collection of 2.5-inch fabric strips, often from the same fabric line.

Layer Cake: A collection of 10-inch fabric squares, often from the same fabric line.

Loft: The thickness or fluffiness of batting.


Winter Trees

Long Arm Quilting (LAQ): The process of using a long arm quilting machine to quilt together a top, batting and backing.

Local Quilt Shop (LQS): A small, independently owned store that specializes in quilting supplies, fabrics, tools, and often offers quilting classes or workshops.

Paper Piecing (PP): A quilting technique in which fabric pieces are sewn onto a paper or fabric foundation following a specific pattern.


The Border Quilt

Patchwork: The process of sewing fabric pieces together to create a quilt top.

Piecing: Sewing together fabric pieces to form a quilt top.

Quarter Square Triangle (QST): A quilt block unit that is made by cutting a square of fabric diagonally twice to create four triangles.

Quilt Along (QAL): A group of quilters making the same quilt at the same time either virtually or in person.

Quilt As You Go (QAYG): A quilting technique where you quilt individual blocks or sections of a quilt one at a time, and then join these pre-quilted sections together to form the final quilt.

Quilt Sandwich: The three layers of a quilt—top, batting, and backing—before they are quilted together.


Diamond Run

Quilting: The process of sewing through the quilt sandwich to create the final quilt.

Raw Edge: The unfinished edge of fabric that can fray.

Right Sides Together (RST): Refers to the technique of placing two pieces of fabric with their "right" or "front" sides facing each other before sewing.

Rotary Cutter: A tool with a circular blade used to cut fabric.

Sashing: Strips of fabric sewn between blocks or rows of blocks in a quilt.

Seam Allowance (SA): The area of fabric between the edge of the fabric and the stitching line in a sewing or quilting project.

Selvage: The tightly woven edge of fabric that prevents it from fraying.

Stitch in the Ditch (SID): A quilting technique where the stitches are placed in the seams of the pieced quilt top.


Harlequin Court

Square In A Square (SIS): quilt block, also known as an Economy Block, is a classic quilting block design where a smaller square is surrounded by four triangles, forming a larger square.

Unfinished Object (UFO): Refers to a quilt or quilting project that has been started but not yet completed.

Work In Progress (WIP): Refers to a project that is currently being worked on, even if it's not completed.

WOF (Width of Fabric): The measurement of the fabric from selvage to selvage, typically 42-44 inches.

Wrong Sides Together (WST): Refers to the side that is not intended to be seen on the finished quilt.


Pinwheel Pizzazz

So many words, so much to learn. Don't forget to bookmark this page so you can refer back to it in your quilting journey.

Did I miss anything important? Comment and let me know so I can add to it!

Go make something extraordinary.


Did you get my 5 Free Tips for Accurate Piecing yet? I would love to send it to you, sign up HERE!


New to Patterns By Jen?


Don't forget to sign up for the Bites of PBJ newsletter while you are here for early releases and sales just for subscribers!


Newsletter sign up


2024 Monthly Color Challenge


Find paper and digital patterns in my Etsy shop.


Find fun PBJ merchandise at Teespring


Join the Quilt and Learn with Patterns By Jen Facebook page.

Tuesday, August 20, 2024

25 Reasons Quilting is More Than Just a Hobby

 If you've ever found yourself lost in the hum of a sewing machine, fabric in hand, you already know: quilting is so much more than just stitching pieces together.


 It’s a creative journey, a stress reliever, and a source of immense pride. But if you’re new to quilting or just need a reminder of why you love it so much, here’s a roundup of the many benefits quilting brings to your life, stitch by stitch.


1. Creative Expression: Quilting is like painting with fabric. You get to mix colors, patterns, and textures to create something uniquely yours. It's a chance to turn your ideas into beautiful, tangible pieces that tell your story.
2. Stress Relief: There’s something incredibly soothing about the rhythmic nature of quilting. Whether it's the steady movement of your needle or the repetition of blocks coming together, quilting has a meditative quality that helps melt stress away.


3. Sense of Accomplishment: Few things compare to the feeling of finishing a quilt. That moment when you take a step back and see all your hard work come together—it’s pure satisfaction. You’ve created something wonderful, and that sense of achievement is worth every stitch.
4. Community Building: Quilting isn’t just a solo activity. It’s a way to connect with others, whether you’re at a quilting bee, taking a class, or sharing your latest project in an online group. The quilting community is full of support, advice, and friendships that make the journey even more special.
5. Heirloom Creation: Quilts have a timeless quality. They can be passed down through generations, carrying stories, memories, and the love that went into making them. It’s a way to leave a piece of yourself behind, a handmade heirloom for your family to treasure.


6. Improved Focus: Quilting demands attention to detail—there’s no room for distractions when you’re cutting, piecing, and stitching. This focus doesn’t just help your quilting; it sharpens your mind, too.
7. Memory Preservation: A quilt can be a patchwork of memories. Whether it’s made from your child’s old clothes, fabric scraps from other projects, or textiles with personal significance, quilting is a way to preserve moments in a unique and meaningful way.
8. Therapeutic Value: The act of quilting can be incredibly therapeutic. It’s a way to channel your emotions into something productive and beautiful, offering a sense of calm and purpose when you need it most.
9. Skill Development: Quilting is a skill-building journey. From learning how to cut fabric accurately to mastering intricate patterns, each quilt enhances your precision, patience, and problem-solving abilities.


10. Cognitive Health: Quilting isn’t just good for the soul; it’s great for the brain, too. Engaging with patterns, measurements, and designs keeps your mind sharp and active, giving it a healthy workout.
11. Mindfulness: Each stitch you make encourages mindfulness, grounding you in the present moment. Quilting helps you slow down, focus, and enjoy the process, stitch by stitch.

12. Emotional Outlet: Quilting is a creative outlet that allows you to express your emotions through color, fabric, and design. It’s a way to pour your heart into something tangible.

13. Sustainability: Quilting can be an eco-friendly practice. By using fabric scraps, recycling old textiles, or choosing natural fibers, you can create something beautiful while being kind to the planet.


14. Physical Benefits: Quilting isn’t all about sitting still! Cutting fabric, pressing seams, and piecing blocks together involves light physical activity, which can be good for your fine motor skills and overall well-being.
15. Gift-Giving: A quilt is one of the most thoughtful gifts you can give. It’s personal, practical, and a true labor of love that’s sure to be cherished.
16. Cultural Connection: Quilting often connects us to our cultural heritage. It’s a way to preserve traditional techniques, share stories, and celebrate the history woven into each stitch.
17. Income Potential: For some, quilting is more than a hobby—it’s a business. Whether you’re selling quilts, teaching classes, or designing patterns, quilting can be a fulfilling way to earn an income.
18. Problem-Solving: Quilting is all about solving puzzles. Adjusting patterns, fixing mistakes, and figuring out the best layout for your blocks—it all builds your problem-solving muscles.
19. Time Management: Quilting teaches you to manage your time effectively. Setting goals, sticking to deadlines, and finishing projects all require planning and discipline.


20. Environmental Benefits: By choosing sustainable materials and practices, quilting can be a green hobby. It’s a great way to repurpose materials and reduce waste.
21. Personal Growth: Quilting is a journey of growth. It teaches patience, resilience, and the beauty of embracing imperfections, helping you grow both as a quilter and as a person.
22. Legacy Building: Every quilt tells a story, and those stories build your legacy. Whether you’re commemorating an event or simply creating for the joy of it, your quilts will carry your legacy into the future.
23. Joy of Learning: Quilting is a craft with endless learning opportunities. There’s always a new technique to try, a different style to explore, or a skill to master, keeping your creativity alive and thriving.
24. Comfort and Warmth: Quilts aren’t just beautiful; they’re functional, too. They offer warmth and comfort, making them perfect for snuggling up with on a chilly day.
25. Decorative Value: Quilts are art. Whether they’re draped over a bed, hung on a wall, or spread across a table, quilts add color, texture, and a personal touch to your home.


Turning Wheels

Quilting is more than just a hobby—it’s a way of life. It’s about creating, connecting, and finding joy in every stitch. So whether you’re just starting or have been quilting for years, remember: you’re not just making quilts, you’re making memories, connections, and a lasting legacy.

Go make something extraordinary.


Did you get my 5 Free Tips for Accurate Piecing yet? I would love to send it to you, sign up HERE!

New to Patterns By Jen?
 
Don't forget to sign up for the Bites of PBJ newsletter while you are here for early releases and sales just for subscribers!
 
Newsletter sign up
 
2024 Monthly Color Challenge
 
Find paper and digital patterns in my Etsy shop.
 
Find fun PBJ merchandise at Teespring
 
Join the Quilt and Learn with Patterns By Jen Facebook page.

Thursday, August 8, 2024

Cleaning Your Machine

 Nothing tells your sewing machine you love it like frequent cleaning.


Let me first start off by saying that I am not an expert. What I'm sharing with you today is just how I take care of my sewing machine. Check your manual for recommended service times, etc.

I know I say this every time I post some tips, but it's true. Every quilter will have their own opinion about what works best, because that's what they have found works best for them. I'm sharing what works best for me in hopes that if you are a new quilter, or haven't really thought about cleaning your machine, this will help you.

How often

I like to clean my machine after a big project or a few little ones. 

A big project to me is piecing a lap sized quilt or larger. That means piecing all of the units to putting the rows together to adding borders. If I'm going to quilt it on my domestic I will clean my machine first. If I'm going to quilt it on the mid-arm, then I'll wait to clean it until after I've put on the binding.

A few small projects would be two to three wall hangings, pieced, quilted and bound. Or when I'm done piecing all of the Monthly Color Challenge blocks for the How To Videos.

*This is also when I change needles. I don't really pay attention to stitch count, just project size. I know quilters have a hard time changing out their needle, but it does make a difference on how your machine runs and the accuracy of your stitching.*

Tools

There are many different tools you can use to clean your sewing machine, from small vacuums to brushes. I use a pipe cleaner from the art supplies in my child care. It's easy to use, flexible and does a great job of catching the fuzz and small threads that have gathered under the stitch plate. Many sewing machines come with a small brush for cleaning and those work great as well.

*What about using condensed air? This is something you will need to talk to your sewing machine dealer about. So many quilters say to go ahead and use it, other's swear off it. I myself just don't use it. I know what I do with my little pipe cleaner is good enough until I get it in to be serviced by a professional.

Servicing

I am pretty good about keeping up with cleaning out my sewing machine, but that doesn't mean I'm going to skip on the servicing of it. This will depend on how often you sew, what you sew (hello quilt batting fibers) and machine. I have my sewing machine serviced once a year, unless I move, then I miss a year. Whoops. However, I am using my machine a lot for Patterns By Jen. Maybe you don't use yours every day, and you can do it every 18 to 24 months. This is something you will want to discuss with your service repairman.

Cover your sewing machine

Take time to cover your sewing machine when not in use. There is a lot of dust that accumulates; from us, pets, fabric. Throwing a cover or pillowcase over it will help keep your machine clean longer.

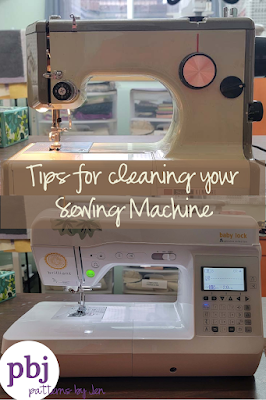
Check out a quick video I did showing how I clean my machine.


Clean your machine and then. . .

Go make something extraordinary.


Did you get my 5 Free Tips for Accurate Piecing yet? I would love to send it to you, sign up HERE!


New to Patterns By Jen?


Don't forget to sign up for the Bites of PBJ newsletter while you are here for early releases and sales just for subscribers!


Newsletter sign up


2024 Monthly Color Challenge


Find paper and digital patterns in my Etsy shop.


Find fun PBJ merchandise at Teespring


Join the Quilt and Learn with Patterns By Jen Facebook page.


Saturday, August 3, 2024

Setting up Your Quilting Space

 Setting up a quilting space, big or small, can be a bit intimidating. How do you know what will work best? How do you know what you need?


Many times the best answer is to just start. You won't always know what you need (especially if you are just starting out), plan for what you have now, and change as you grow.

Affiliate Disclosure: This post contains Affiliate Links. When purchases are made through these links I receive a small commission at no extra cost to you. Your purchases help support my small business and keeps me out of my husband's new truck fund. We are both very appreciative. Thank you! Find out more about Affiliate Links Here.

Where will you be setting up your space? Do you have a whole room to work with? Will you be relegated to one corner of a specific room because of space or will you have to pack up every time you are done sewing for the day? Here are a couple of posts that show some ideas for set up. I can't find photos of my corner set ups, because those are actual pictures you hold in your hand. 😂

Studio Reboot 1 2019

Studio Set Up 2021

Studio Set Up 2022


Pack it up each day

If you have to pack it up each day than storage is going to be your first concern. You may have to get creative, but you're a quilter, you've got this.

1) Sewing machine. Not all machines come with a case. I recommend finding a good sturdy case with wheels. They can be a bit more spendy, and they aren't necessary if you are on a budget, but they will make packing up each day easier. If you can't get one yet, think outside the box; a wagon can hold your machine (throw a pillowcase over the machine as a dust cover). Having something on wheels helps with the heavy lifting, and it's a great way to move your supplies to their storage spot.


2) Sewing supplies. I love the shoe box sized containers for storing all the things. The size is big enough to be able to hold a lot of supplies, but not too big that it gets heavy. One box can hold your rotary cutter, scissors, pins and seam rippers. Mark it as "Sharp" and keep all of those supplies together. It keeps them organized and you won't risk cutting yourself when searching for something. Another box can hold your marking utensils and stilettos, those items that get used a lot, but aren't going to cut you. 😉

3) Cutting mats and rulers. This one can be tough because of the different sizes. You want your mat to stay flat, so it needs to lay flat. Under the bed is a great place to store it. Keep your rulers together and store them under the bed, too. Under the couch is another idea for keeping these items stored, flat and out of the way.

4) Fabric. This is a tough one. Fabric takes up space, and it can get heavy. I still love a shoe box sized container for fabric, especially pre-cuts like fat quarters. They are also great for storing projects that are in progress, you can fit a lot in them. As I cut out squares/rectangles, etc for a pattern I will put them in a shoe box container. When I make Half Square Triangles (HST) or Flying Geese (FG), etc they go right into the project bin as well.

An empty dresser drawer if you have one is a good place to store fabric as well. Just don't forget to go through it every now and then to see what you have. Bins that fit under your bed are another option or if you have closet space, yardage can be hung.


Corner in a specific room

Many of the above ideas will be beneficial if you have a small space. The bonus to being able to be set up in a space is not having to to pack up that sewing machine.

1) Sewing machine. If you get to keep your sewing machine out make sure to take the time to cover it when you are done. Confession: I am *terrible* at this, but it's important, especially if your set up is out in the main living area. We're dusty beings, protect your machine. 😀

2) Sewing Supplies. I still like the idea of separate bins for your supplies. Your supplies should be kept safe from busy hands, and keeping them organized keeps your small area ready to use. Nothing kills creativity more than having to search all the areas just to find your rotary cutter.

3) Cutting Mat and Rulers. In this instance I'm assuming that you don't have a designated cutting area, just a sewing machine area. If so, you will want to make sure that your mat and rulers are stored like above, flat and under something that will protect them. If you have a dresser type piece of furniture included in your sewing corner, storing the mat on top would be ok, too, as long as it's not hanging off the edge.

4) Fabric. Have I mentioned this is the hard one? It's made a little harder for me, because I don't really keep a fabric stash. I use the shoebox bins to hold what I have for fabrics. I also use project bags and I have two small Sterlite bins (link is to something similar, I couldn't find what I have) that hold fabrics for larger projects. All my fabrics have planned uses except my flamingo, Steelers and panels. Those are just for fun. Ha!


Quilting room

Having a room that is just for quilting is very nice. Not necessary, but nice. Keeping it organized is the key to staying creative. That's not to say my space is perfect, there are definitely stages of craziness, but I know if I take 10 mins to straighten up, my time will be more productive.

1) Sewing machine. As stated above, cover that machine. Humans are dusty, but so is fabric.

2) Sewing Supplies. Now that you have space to spread out, don't be tempted to spread out too much. Keep like supplies together. Having said that, I do have pins in two different places. One magnetic pin minder at the cutting table and a pin cushion at my machine.

As you quilt, pay attention to where you tend to put your supplies down, or where you tend to lose them. Can you figure out how to use that to your best organizational ability? I found that I liked to pin units together at my cutting table, but moving the pincushion there meant I had pins floating around my sewing station when I took them out as I was stitching. Having two areas for them meant a better workflow.


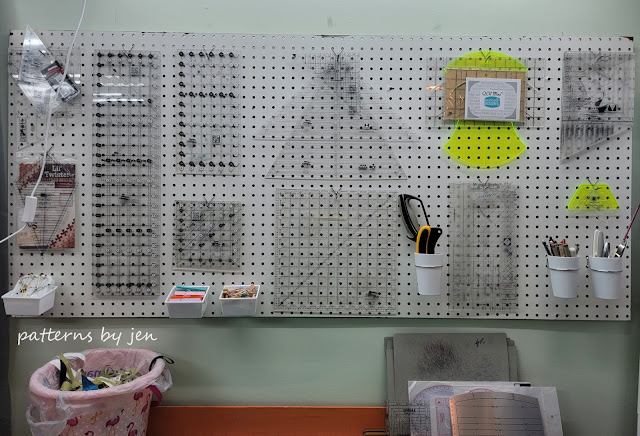
3) Cutting Mat and Rulers. Now that you have space you can have some fun choosing ruler storage. My favorite is a peg board. I love the convenience of having them right there ready to use, as well as the ability to put them up and out of the way in between cuts. There are a lot of ruler storage ideas out there for you to explore. It may take some time (it took me about 15 years to really find the system I liked, but I also didn't have the designated space for a long time), but once you hit on it, you will know it and you will love to be in your quilting space.

4) Fabric. If you like to have a fabric stash on hand, and you now have the space to truly have it, finding a system to keep your fabric organized will do wonders for your creativity, as well as make it easier to actually use the beautiful fabric you have. Are you a pen and paper quilter? Love a good Excel form? Do you tend to buy fabrics because of color, or designer, or pattern (hello flamingos)? Do you prefer yardage over pre-cuts, or vice versa?

 Taking time to discover these things about yourself before starting in on the task of organizing your fabric will help you stay focused and on top of it as you go. Choosing a system that doesn't work for your brain doesn't bode well for future use. I keep my fabrics together by project. I want to be able to find them easily and start when I'm ready. Plus, I don't want to accidently use a fabric I already had a plan for because I forgot. This includes fabric planned for the binding.

All Spaces

If you walk into my quilting space (at least before we moved, now it's still a lot of boxes) you will immediately know I love Flamingos, Steelers and Anne of Green Gables. Just because my room is for quilting doesn't mean that's all it holds. It holds the things I love. There are flamingos everywhere, three Terrible Towels, and Anne of Green Gables quotes. Oh, and possibly a lot of coffee quotes and mugs. Hahahaha


Photo of my coffee corner in my old studio.

Even if you have a space you have to pack up when done sewing you can add little touches to make the space be you. Do you have a favorite scent you can put in a warmer? What about that favorite picture of your favorite people? Set it up right next to your machine after you pull it out of it's case. Little things that bring joy can add to your feeling of contentment and joy in your creative space.

What size is your quilting space? Do you have a problem that you are having trouble solving within that space? Comment below and let the quilting community help. Or head over to Quilt and Learn with Patterns By Jen on Facebook to post your question.

Your space is your quilting sanctuary, whether big or small. Getting it organized will keep it that way.


Go make something extraordinary.


Did you get my 5 Free Tips for Accurate Piecing yet? I would love to send it to you, sign up HERE!


New to Patterns By Jen?


Don't forget to sign up for the Bites of PBJ newsletter while you are here for early releases and sales just for subscribers!


Newsletter sign up


2024 Monthly Color Challenge


Find paper and digital patterns in my Etsy shop.


Find fun PBJ merchandise at Teespring


Join the Quilt and Learn with Patterns By Jen Facebook page.