Tuesday, September 26, 2017

BU Quilt Along Week 3

Welcome back to the Beginners Unite Quilt Along!


This week we are going to be working on Flying Geese. If you missed this post, just a heads up, we are breaking the Flying Geese up into two, two week segments. The post mentioned above also talks about marking tools for marking your diagonals.


Use an old piece of cutting mat to mark your squares on, the mat you use for cutting stays cleaner and last longer.

This week we are going to mark the diagonals on the grey 2 7/8" squares. There are 120 of them, so you can break them up if you want, or do them all at once. If you break them up, you'll want to keep them in groups of four.


These are my "grey" and "black" squares.

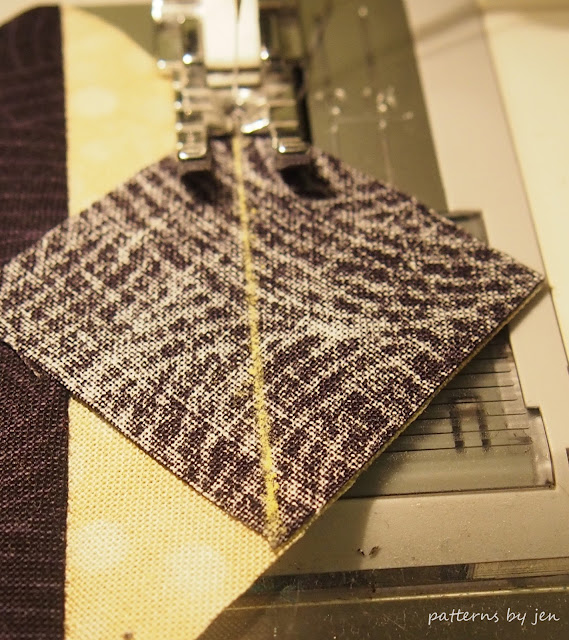
Using the No Waste Flying Geese method explained in THIS POST, we are going to make 120 Flying Geese. It's pretty quick, but you need to stitch accurately on the line, try not to waver. Slow your machine down if you need to, it's more important to have the accuracy than the speed, that will come later.

Here is the back with the dog ears trimmed, you can see there is 1/4" between the edge and the point of the goose.

Once you have your Flying Geese made you can trim that little dog ear off and any edges that are a little bigger than the 2 1/2" x 4 1/2" unit we're going for. 

You are now half way done with the Flying Geese portion of this quilt. If you want to work ahead, you can start on the next set of Flying Geese that are made in step 3 of assembly.

Thank you so much for quilting along with me! Please share your progress with me in my Facebook group Quilt and Learn with Patterns by Jen, or use #buquiltalong on any social media platform so I can see. 

Happy Stitching!
Jen

Beginners Unite Quilt Along

September 12 - Cutting (including fussy cutting the center)
September 19 - Center block 

September 21 - Look at marking tools
September 26 - Flying Geese week 1 ~ You are here
October 3 - Flying Geese week 2
October 10 - Half Square Triangles
October 17 - Corner Units
October 24 - Block Assembly
October 31 - Top Assembly
November 7 - Add borders
November 14 - Quilting and Binding

Follow me on Instagram and Facebook for daily sneak peeks and updates.


Thursday, September 21, 2017

BU Quilt Along ~ Week 2 1/2

Surprise! I'm throwing in an extra post this week.


I'm going to change the schedule up a bit and add a second week to the Flying Geese Unit. While using the No Waste Method does speed things up a bit, we have 240 total units to make. Whew! So we're going to break it up. See the revised schedule at the end of this post. Find the intro post HERE, you can always jump in.


This is my ugly piece of used cutting mat that I make my marks on. 

While I have you here, lets talk about marking the diagonal. I have said that I like to use a mechanical pencil to mark my fabrics, but what if your fabric is dark?


I have always used chalk. It's quick and easy, which, seems to be my mantra, ha, but it can be messy.  


I wanted to give other recommendations for marking tools, so I ran to my LQS (local quilt shop) and asked what they recommend. It's the Clover White Marking Pen <Fine> (no affiliation). 


Well, I'm sold. It was easy to use, but do read the instructions, the mark doesn't show up right away. Here are 3 marked one after the other, you can see the line gets darker/whiter with time. The mark will disappear with heat or water, but I'm not worried about it when using it to mark diagonals like this, because this ends up being the cutting line. Do test it on your fabrics, though, if you are marking other areas.

If you have finished your Snowball blocks, and want to get a head start, we're marking the 120 grey 2 7/8" squares on the diagonal and then making the FG units on Tuesday.

Happy Stitching!
Jen

Beginners Unite Quilt Along

September 12 - Cutting (including fussy cutting the center)
September 19 - Center block 
September 26 - Flying Geese week 1
October 3 - Flying Geese week 2
October 10 - Half Square Triangles
October 17 - Corner Units
October 24 - Block Assembly
October 31 - Top Assembly
November 7 - Add borders
November 14 - Quilting and Binding

Follow me on Instagram and Facebook for daily sneak peeks and updates.


Tuesday, September 19, 2017

BU Quilt Along - Week 2

Week 2! Time to start stitching our blocks, starting with the center unit.


Did you get all of your pieces cut out?
It's a lot of cutting, but I like to get my pattern all cut out, then I can focus on the stitching part. This week we are simply making the center unit which is a snowball unit. It's pretty easy and we *just* need 30 of them. 

First mark the diagonal on the wrong side of your 1" squares. There are different ways to do it. 


I prefer to mark with a pencil.


You can use a laser, or draw lines on your machine like I did on my old machine. ( I don't know anything about the laser method, just that many quilters like it. If you have experience, please share in the comments!)


Or you can press them and get that diagonal line. I prefer pencil because it's a nice thin line and I am more accurate with it.


Once you have your lines drawn (I like to do them all at one time) line up one, right sides together, in a corner. Note the direction of the drawn line. Stitch just to the right of the line to get a nice accurate square in the end.


This is a great unit for chain piecing. Line them up and stitch on the line, one after the other. 


When done with the first square, do the same with another square on the opposite corner. You can press and trim after each one, but with this unit, I like to just get all four corners done and then press. (I also eat one food at a time on my plate. I'm special like that.)


Repeat with corners 3...


and 4.


Next, press the triangle out towards the corner. Do this for all of them, again I like to do opposite corners. Remember press, don't push or stretch,  the fabric. 


After all four corners have been pressed, trim 1/4" from the stitched line. 


Beautiful! You now have 30 center units for you blocks! Share your blocks on the Quilt and Learn with Patterns By Jen Facebook group.

Next week we will make the Flying Geese. Using the No Waste Method it is a quick and easy unit.

Happy Stitching!
Jen

Don't miss the 2 day sale on Cartwheels on the Prairie (only $5) in celebration of it's release two years ago. Sale ends Sept 19 (today) at midnight. Digital and paper available at Etsy. Digital available at https://www.craftsy.com/profile/patterns-by-jen


Beginners Unite Quilt Along Schedule

September 12 - Cutting (including fussy cutting the center)
September 19 - Center block - You are here
September 21 - Look at marking tools
September 26 - Flying Geese week 1
October 3 - Flying Geese week 2
October 10 - Half Square Triangles
October 17 - Corner Units
October 24 - Block Assembly
October 31 - Top Assembly
November 7 - Add borders
November 14 - Quilting and Binding

Sunday, September 17, 2017

Summer 2017 Finishes

When you feel like you haven't accomplished anything, it's time to take a look back and remember all you did accomplish.

I am dealing with burnout. An ugly little thing that shows it's nasty head whenever you don't take care of you. Usually I'm good about that, and break when I need to, this summer though I felt behind from day one, and instead of taking time off and getting my head/heart back in place, I pushed through.

Now I can't sew a thing, even though there are "things" that need sewin'. I've taken the last two weekends to just hang out with my family and I hope that I can start feeling the urge/want to sew again, not just feel like I *need* to. To help with that, I'm going to share the projects I did finish, though some are secret projects and you don't get the whole picture. Sorry!


The first summer finish was the Gradient Stars pattern. Something that took a little time, but was so worth the wait. I love this quilt, especially the relaxing green version. 


Then came the Aug Muggamo pattern.


Fabrics set out for August projects, three were finished, whoo hoo!


A new pattern, but you won't see it until February or so, but it's quick and easy, and I think you will love it.


Mid August we brought that handsome boy in red to Mankato for his first year of college. Not  that this is quilting, but I did make him. ;) My 13 yo doesn't think that's funny, but that's ok.


I made Casserole Mitt for my husband for his birthday. He asked me to!!


We finished the Beginners Unite series.


Christa from Christa Quilts had a blog hop for her new book Piece and Quilt with Precuts and this is my version of Spools, with a pillow for fun.


Here is the center of The Border Quilt. It is currently at the quilters and I can't wait to show you the finished quilt top. It's true love!

A look back at a summer of stitching proves there have been some accomplishments and great finishes. I'm giving myself permission to do only what NEEDS to be done and not try to push forward and get the entire list done, to enjoy family and to not stress the little things, to smell the roses and ignore the thorns. Thank you for sticking around during this little blip in my quilting journey, there are a few exciting things in the works for the rest of the year and I can't wait to share them with you.

Tuesday is the next round in the Beginners Unite Quilt Along. Come back for the next step. You can join the Facebook group Quilt and Learn with Patterns By Jen and share your progress.

Happy Stitching!
Jen

Follow me on Instagram and Facebook.


Visit me at the Magic Needlers Biennial Quilt Festival October 7 and 8 in Watertown, SD.

Friday, September 15, 2017

In My Neighborhood Row 9

It's my turn to share a row with you for the In My Neighbor Hood Row Quilt.


You can get the No.2 Pencil pattern and applique letters in the blog post HERE.


A huge thank you to Cheryl of QuilterChic for having me aboard for the great Row Quilt Along!

Happy Stitching!
Jen

Tuesday, September 12, 2017

BU Quilt Along - Week 1

Welcome to the first week in the Beginners Unite Quilt Along!


After a delayed start date I am so excited to be able to get this party started. First you need the pattern with the fabric requirements. Download the free Here A Square, There A Square pattern HERE

I am using the Haiku 2 from Monaluna, no affiliation, but this fabric is awesome to work with and you should try it. 

There is still time to grab your fabrics, we are just starting to cut out our pattern this week. Here's what you need:

Fabric Requirements

Teal -  1 1/3 yard
White  - 1 ¼ yard
Black – 3 ¼ yard
Grey – 2 yards

Here are the colors I'm using:

Teal - Clover 2 (I used 2 yards for fussy cutting the center)
White - Shimmer 2
Grey - Shimmer Lawn


Grey/Shimmer Lawn

. Cut five strips 5 1/4" x WOF (width of fabric), I leave mine right where they are when cut.


Sub-cut into thirty 5 1/4" squares, because the strips are still lined up nicely, it's easy to sub-cut into squares.


Cut five strips 3" x WOF and sub-cut into sixty 3" squares.
Cut nine strips 2 7/8" x WOF, sub-cut into one hundred twenty 2 7/8" squares.


White/Shimmer 2

We're going to cut four strips 4 7/8" x WOF, and sub-cut into thirty 4 7/8" squares.
Cut once on the diagonal.

Next cut five strips 3" x WOF and sub-cut into sixty 3" squares.

Cut five strips 1 1/2" x WOF and sub-cut into one hundred twenty 1 1/2" squares.


Black/Cherry Blossoms Dusk

Cut five strips 5 1/4" x WOF and sub-cut into thirty 5 1/4" squares.

Cut nineteen strips (in this case I will break the strips I cut into groups of nine or so and cut squares as described above, then cut the next set of strip and so on) 2 7/8" x WOF, sub-cut into two hundred forty 2 7/8" squares.

Cut one hundred twenty of those squares once on the diagonal, leave the other one hundred and twenty as squares.

Cut eight strips 3 1/2" x WOF, set aside for borders (not shown).


Teal/Clover 2

Cut out four strips 4 7/8" x WOF (width of fabric). Sub-cut these into thirty 4 7/8" squares. Cut once on the diagonal.


**If fussy cutting the center block, do NOT cut out the 4 1/2" strips listed below.**
 If not fussy cutting: cut four strips 4 1/2" x WOF, and sub-cut into thirty 4 1/2" squares.

If fussy cutting, here is how I do it.

I make sure I'm working with pieces large enough that I can cut the fussy piece out without too much...fuss.  In this case I know I'm not going to be able to fussy cut each bunch, so I make sure there is at least 4 3/4" width to work with.


I have a 4 1/2" ruler, but any ruler will work, square is easier, but really any will work. Mark the middle, in this case the 2 1/4" point. If you don't have tape, mark it with a sharpie and then cover that mark with scotch tape. This mark will help you find the center of your fussy cut piece quickly.


I use a cut piece of an old cutting mat to do the fussy cutting part. This way I can rotate the piece without picking up the fabric. I feel this helps with accuracy. There are rotating mats that you can purchase, but this works well for me.


Trim the side and top, then rotate and trim the next side and top.


Cut four strips 1 1/2" x WOF and set aside for the border.


That's it!  Cut a few pieces each night and you'll be ready to go next Tuesday when we start with making the center block. I would love to see your progress, join Quilt and Learn with Patterns By Jen and show your stuff!

Sign up for email reminders.

Happy Stitching!
Jen

September 12 - Cutting (including fussy cutting the center) ~ You are here
September 19 - Center block
September 21 - Look at marking tools
September 26 - Flying Geese week 1
October 3 - Flying Geese week 2
October 10 - Half Square Triangles
October 17 - Corner Units
October 24 - Block Assembly
October 31 - Top Assembly
November 7 - Add borders
November 14 - Quilting and Binding


Follow me on Instagram and Facebook for sneak peeks and daily updates.


Friday, September 1, 2017

September Muggamo

September Muggamo is here!


I can't believe it's September. I can't believe I have to send my kids back to school. I'm never a fan of summer vacation ending. However, I don't get a choice, so I'm going to have my early morning coffee, Kleenex and chocolates on my nice new mug rug.

Grab the free pattern HERE.

Fabric Requirements

Black
1)    Two 3” squares
2)    Four 1 1/2” squares
a.    Mark once on the diagonal
3)    Two 1 1/4” x 7” strips

White
4)    One  3 1/2” square
5)    Two 3” squares
a.    Mark once on the diagonal
6)    One 2 x 9” strip
7)    One 1” x 7” strip

Yellow
8)    One 2 1/2” square
9)    One 2” x 9” strip
10) Four 2 1/8”  squares
a.    Mark once on the diagonal


Corner Units


We're going to make the corner units first, starting with the HST (half square triangles) using the 3" squares. See how to make them in THIS POST.


Square to 2 1/2" and then add the 1 1/2" square.


Stitch right on the line. Press out and and trim the excess.


Make four, they should measure 2 1/2" unfinished.

Middle units


Next are the units that look like arrows. FG (flying geese first); use the white 3 1/2" square and the yellow 2 1/8" squares. Our finished FG units are going to be small, so we'll make them oversized first and trim them down, for more accuracy. To see how to make FG with the no waste method go to THIS POST. Once made, trim to 1 1/2" x 2 1/2".


Next strip piece the black and white strips. 


Trim a small bit off the end for a straight edge, then sub-cut to 1 1/2" x 2 1/2" rectangles.


Match up the two units as shown and stitch. 
Press towards the FG unit.

Star block


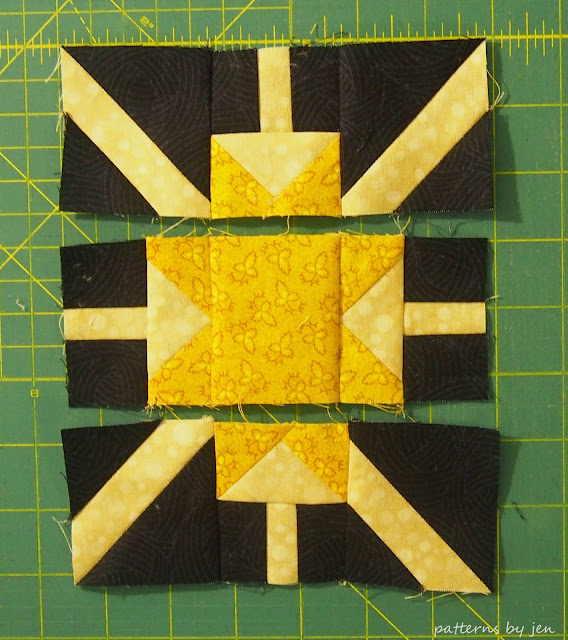
Lay out your block.


Stitch into rows.


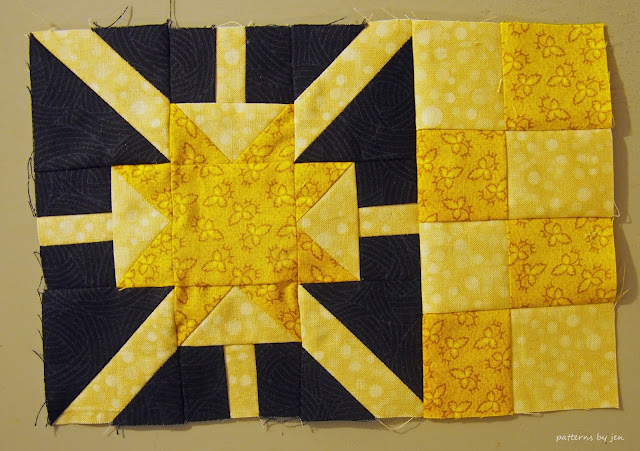
Stitch rows. Your block should measure 6 1/2" square.

Side Unit


Sew the yellow and white strips together length wise. Trim off a bit of the end for a straight edge, then sub-cut into 2" x 3 1/2" units.


Layout in a pattern pleasing to you and stitch.

Mug rug


Lay the star and side unit side by side. Stitch together. Quilt. Bind and Enjoy!


Confession time! I'm not a fan of this one. I like the layout in theory, but not necessarily how it came out in these colors. Ever had that happen to you? I'll have to try again later. What colors would you make it in?

Happy Stitching!
Jen

Follow me on Instagram and Facebook for daily sneak peeks and updates.  Don't miss the quilt along that starts September 5th! It's not too late to grab your fabric choices. Join the Quilt and Learn with Patterns By Jen group to share your choices, get updates and enjoy some quilty talk.