Showing posts with label Star Light Star Bright. Show all posts

Sunday, September 30, 2018

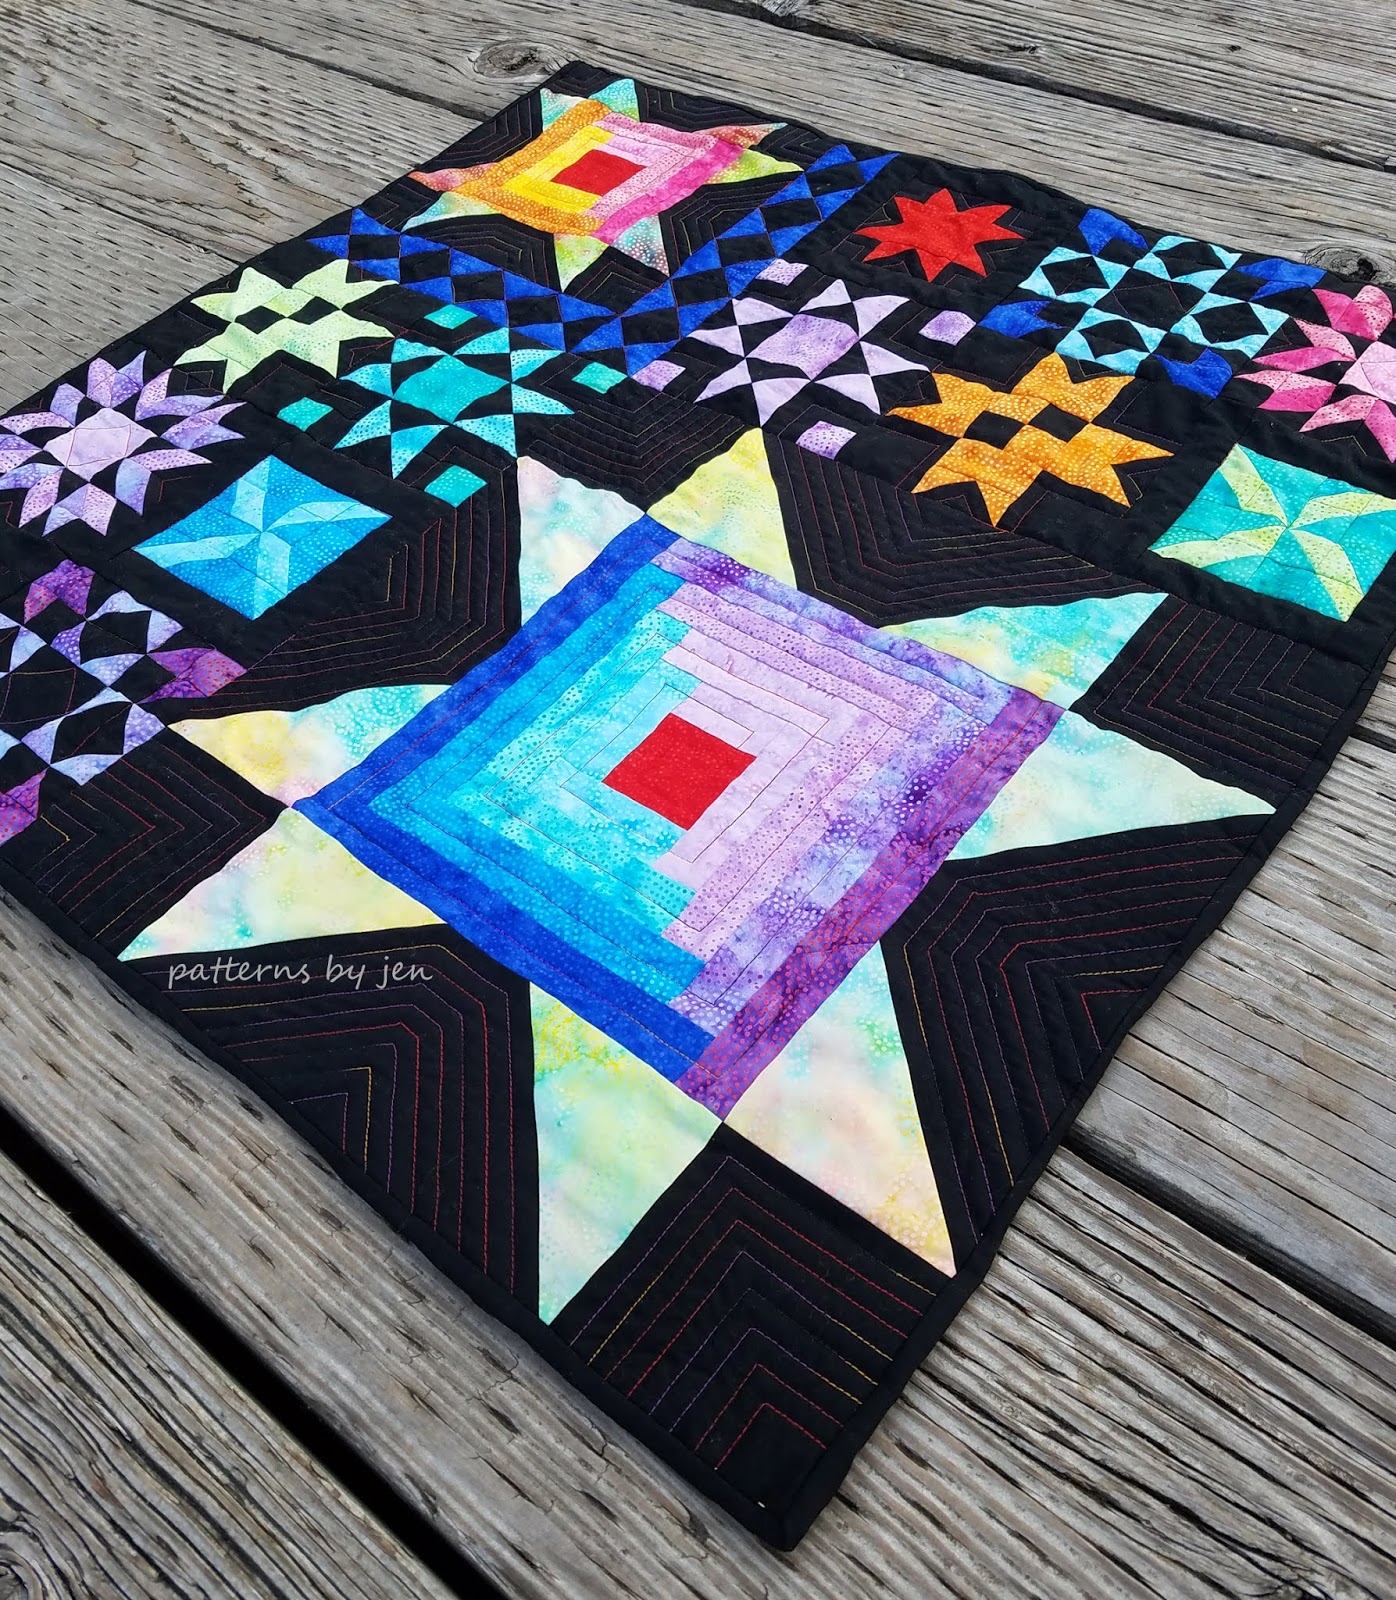
Island Batik Star Struck

Welcome to September's Island Batik Ambassador challenge: Starstruck.


For this challenge I chose my Star Light Star Bright Sampler pattern and used Paisley Dot collection that I was given as part of the Ambassador program as well as their basic black.


I chose to make one log cabin star with warm colors and one with cool.


Using black as my background really brought out how bright and beautiful the Paisley Dot collection truly is. I used a variegated thread for quilting.


This is the 30" square option, but the pattern has multiple options including a 60" sampler, the large log cabin star wall hanging, miniature log cabin star and a table runner.


All the quilting was done on my Husqvarna Lily 555 with a walking foot.


Start Light Star Bright Sampler pattern:


Happy Stitching!
Jen

New to Patterns By Jen?

Find paper and digital patterns in my Etsy shop.


The Border Quilt Quilt Along is coming September 2018

Follow me on Instagram and Facebook for daily sneak peeks and updates.

Monday, June 20, 2016

Winner! Winner! Chicken Dinner!

We have a winner! Lynn S. will receive a copy of Star Light Star Bright Sampler, the newly released PBJ pattern. Congratulations, Lynn! I hope you share with us which option you make.


Didn't win, but want your own Star Light, Star Bright pattern? Head on over to my Etsy Shop and pick one up! From now until June 30, 2016 Use Coupon Code PBJ106 to receive 10% off your order (any pattern or patterns!)

What is next for PBJ? It's been a whirlwind month of June getting a new pattern published, getting the next pattern ready for publishing and sending out the next pattern to the testers. It's hard to find time to write! Well, write more then just "cut so many pieces of fabric and then sew them back together". 

Pattern 7, yet to be named (Hey,it's not easy finding the right name), will hopefully be released in July. I have a few sneak peeks of the two quilts currently at the quilters as we speak.


This fabric!!  I love the silver. (I'm more of a silver then gold person.) This one will be the back cover quilt. Look at those points! I love a sharp point. It make me happy.


The front cover quilt is made using Pat Sloan's Hometown Girl. Man, this fabric is soft! Like, soft soft. Like lay your head down and snuggle it right in the pile of fabric, soft. Yum.


Excuse the blurry cell phone picture. For whatever reason, my Photoshop did not like this picture, but it's a sneak peek, so you aren't supposed to be able to really tell what the pattern is anyway. Right?!

Check back in a couple of days for the next giveaway. That's right, I've got something else up my sleeve and you aren't going to want to miss it! 

Happy Stitching!
Jen


Thursday, June 16, 2016

Introducing Star Light, Star Bright Sampler and a giveaway

 It's here! It's here! Star Light, Star Bright Sampler is now available.


Half-square Triangles, Flying Geese and Hourglass blocks come together to help create this beautiful 60 x 60 sampler. There are instructions to make a 30 x 30 version of this sampler as well. 

Not only do you get the two quilts, you can also make a 36 x 36 wallhanging.


 So many different colorways you can choose from to make this star your own.

Not what you are looking for? What about a miniature version?


10 full inches of cute! Quick, simple and... cute!

Wait! There is more, and no, I"m not talking about the giveaway, though that is coming, too! I think your table is feeling left out. The walls, counters,couch, they all get something, but the table gets left out, again. Not this time table! This time I've got you covered.


Seriously, I LOVE this table runner. I think it's my most favorite thing ever. 


Oh, look! Christmas colors! Tester Sandy chose Christmasy fabrics for her run through of Star Light, Star Bright Tablerunner.


Tester Hyde chose to do the Log Cabin Star Wallhanging in two colors. She now has a great addition to her decor.


Tester Joanne, from Quilts by Joanne, made this stunning 30 x 30 sampler. Loving those colors.


Are you ready for the giveaway? This is your chance to win a Star Light, Star Bright Sampler Pattern. Giveaway closes Sunday, June 19 at midnight. Good luck!


Can't wait for your own copy? You can buy your Star Light, Star Bright Sampler in my Etsy Shop.


Happy Stitching!
Jen


a Rafflecopter giveaway

Sunday, April 10, 2016

Miniature Hanging Sleeve Tutorial and a Sneak Peek


 Today I am going to share how I make my hanging sleeves. There are different ways to do it, and this in NOT the way they like them done for shows. It is, however, quick and easy, which means I'm more likely to finish it and get on the wall, or in the case, the little hanging rack. This little tutorial is for a miniature quilt.

The first thing I do is measure.


I am measuring the inside of the quilted piece, not the binding. In this case it is 9 1/2". I need to add 1/2" for seam allowance, so 10". I'm going to find a scrap piece of fabric that is 2" wide and at least 10" long.


Next I press a quarter inch seam on either end. I just eyeball this. It doesn't have to be perfect.
Close enough is good enough in this case.


Using matching thread stitch each end. As you can see, my folded piece is a little wider then the 1/4", that's ok. I'm not going to worry over it. 

When both ends are stitched. Fold your strip length wise with WRONG sides together and stitch.

(right side showing, this is correct)

I like to start about 1/8" in from the end and back stitch, and when I get to the end I like to back stitch about 1/8" away from the end before clipping. This keeps my threads from showing.


Next we are going to press that long seam open. I maneuver my hanging sleeve so that the seam is centered. 


Your hanging sleeve is done. Now it's time to add it to the back.


Making sure you are adding it to the top of the miniature, you want to place your hanging sleeve with the seam towards the backing. 


I like to start stitching along the top first. I pin to make sure the sleeve stay centered while I stitch.


I start about 1/4" from the edge of the sleeve and come up right at the corner.


I love my thimble for this and for binding. It really saves your finger. 


At the end I go straight down from the corner with the needle and come out under the sleeve to knot off.


Next I pin the bottom. I like to push it up a bit to create a little give, pinning makes sure it's the same all the way across.


When I get to the end I do a back stitch in about 1/4", tie it off and bury the knot. 


You are ready to show off your little miniature. 


This 10" miniature is available with Patterns By Jen's 6th pattern: Star Light Star Bright Sampler. Coming sometime in May.


Happy Stitching!
Jen

Linking up withPatchwork Times and Main Crush Monday over on Cooking Up Quilts

Thursday, January 28, 2016

Slowly moving forward


January was a slow month for Patterns By Jen. While I can't share yet, I'm ending the month with a bang. An exciting bang. There is nothing like crazy, good news to help get you moving forward again. 

The hard thing about pattern designing is that there is so much that goes on behind the scenes, that has to stay behind the scenes for awhile, that I wish I could share with all of you. It is very hard to hold my tongue. So I will just bury myself in pretty fabric.


The quilt that will go on the cover of Pattern 6 is now in construction. Pattern 6 has been named by my youngest, "Star Light Star Bright". It's a sampler and will have a 60 x 60 quilt, 2 wall hangings, a miniature and a table runner as part of the pattern. I hope to have the top ready to go to the quilter Saturday, and then stitch up the extras.


Next, Pattern 7 needs to be stitched up and then sent to the testers. It is another of my patterns that takes just one block, but adds a fun sashing. It's just another step towards reaching those goals I shared with you a month ago. 

Thank you for following along on my journey of pattern designing.

Happy Stitching,
Jen

Friday, January 1, 2016

2016 Goals


I plan on sharing my business goals with you each year, and hopefully, I will be able to come up with a better name for each post. Though, short, sweet, and to the point isn't a bad thing. I hope by sharing these with you, I will keep myself on track, and maybe someone might even have some insight for me. Or encouragement, encouragement is always good. :)

Goal 1: I will publish 6 new patterns this year. 

I feel this is a low number, though it triples what I've done in the last couple of year. I have to remember that this isn't my full time job, yet, and my child care takes a lot of time and energy. And a mom of 4 isn't exactly a quiet "job" either. So hopefully I'm not selling myself short with this number, and at the same time, not setting myself up with too high of a number. It's a fine line isn't it?

The last party favor. So sad.

Goal 2: I will set up 4 trunk shows this year. 

This goal is a bit scary. I don't mind speaking in front of a group of people, but doing the whole one-on-one and talking up my stuff  thing freaks me out a bit. That little voice starts talking about how my patterns aren't good enough, I only have 4 out in print, etc, etc. But... the year is long, so I have time to get a few more patterns out, and a plan together. 

I still love a good, write-in planner.


Goal 3: I will get published in a magazine.

Putting myself and my babies out there, that's a big step. I'm not sure what to expect, but I have a pattern that is done and ready to be submitted. So submit it I will, and then I will see where that take me. I'm just a long for the ride after all.


Goal 4: I will add another distributor.

It seems to me that more distributors is a good thing. I know that I need to get more patterns published to pick up other distributors. Which takes me back to Goal 1. 

The start of 2016 is gloomy and windy in SW Minnesota.


Goal 5: I will find more testers.

I know, in order for me to get these patterns published in this time frame I'm going to need a larger range of testers. This is a tough one, as most testers I haven't even met personally. This can set you up for patterns not getting tested, because they aren't reliable, but having never met them, you just don't know that. I've had that happen a couple of times, which means there is even more pressure on me to make sure these patterns are correct. I have also found some awesome testers along the way, though. And by awesome, I mean AWESOME. They are reliable and always have good information for me. I'm so thankful for their time, work, and thoughts. 


Goal 6: I will work towards blogging once a week.

Blogging is time consuming. Wow! And yet, necessary. So my goal is to get to consistently blogging once a week by the end of the year. Breaking that down into smaller goals of: making a list of possible blog titles, playing with which days are good days for me to plug in blogging time, and which day of the week seems to get the most traffic, and can I fit that in my schedule. 


Sub goal: Scan fabrics for pattern instructions *before* cutting them up.
These are for the cover quilt of Pattern 6: Star Light, Star Bright. Aren't they scrumptious?


I think this list is going to be doable. I have added to my calendar to read it on the 1st of every month, hoping that it will keep me working towards these goals. I also think that if I keep my focus on these goals I will get a better idea of what I am working towards and if these goals benefit that. What should I be doing differently and what is on track. 

I am excited for 2016 and what it holds for PBJ! 

Happy New Year!
Jen