Thursday, January 28, 2016

Slowly moving forward


January was a slow month for Patterns By Jen. While I can't share yet, I'm ending the month with a bang. An exciting bang. There is nothing like crazy, good news to help get you moving forward again. 

The hard thing about pattern designing is that there is so much that goes on behind the scenes, that has to stay behind the scenes for awhile, that I wish I could share with all of you. It is very hard to hold my tongue. So I will just bury myself in pretty fabric.


The quilt that will go on the cover of Pattern 6 is now in construction. Pattern 6 has been named by my youngest, "Star Light Star Bright". It's a sampler and will have a 60 x 60 quilt, 2 wall hangings, a miniature and a table runner as part of the pattern. I hope to have the top ready to go to the quilter Saturday, and then stitch up the extras.


Next, Pattern 7 needs to be stitched up and then sent to the testers. It is another of my patterns that takes just one block, but adds a fun sashing. It's just another step towards reaching those goals I shared with you a month ago. 

Thank you for following along on my journey of pattern designing.

Happy Stitching,
Jen

Friday, January 1, 2016

2016 Goals


I plan on sharing my business goals with you each year, and hopefully, I will be able to come up with a better name for each post. Though, short, sweet, and to the point isn't a bad thing. I hope by sharing these with you, I will keep myself on track, and maybe someone might even have some insight for me. Or encouragement, encouragement is always good. :)

Goal 1: I will publish 6 new patterns this year. 

I feel this is a low number, though it triples what I've done in the last couple of year. I have to remember that this isn't my full time job, yet, and my child care takes a lot of time and energy. And a mom of 4 isn't exactly a quiet "job" either. So hopefully I'm not selling myself short with this number, and at the same time, not setting myself up with too high of a number. It's a fine line isn't it?

The last party favor. So sad.

Goal 2: I will set up 4 trunk shows this year. 

This goal is a bit scary. I don't mind speaking in front of a group of people, but doing the whole one-on-one and talking up my stuff  thing freaks me out a bit. That little voice starts talking about how my patterns aren't good enough, I only have 4 out in print, etc, etc. But... the year is long, so I have time to get a few more patterns out, and a plan together. 

I still love a good, write-in planner.


Goal 3: I will get published in a magazine.

Putting myself and my babies out there, that's a big step. I'm not sure what to expect, but I have a pattern that is done and ready to be submitted. So submit it I will, and then I will see where that take me. I'm just a long for the ride after all.


Goal 4: I will add another distributor.

It seems to me that more distributors is a good thing. I know that I need to get more patterns published to pick up other distributors. Which takes me back to Goal 1. 

The start of 2016 is gloomy and windy in SW Minnesota.


Goal 5: I will find more testers.

I know, in order for me to get these patterns published in this time frame I'm going to need a larger range of testers. This is a tough one, as most testers I haven't even met personally. This can set you up for patterns not getting tested, because they aren't reliable, but having never met them, you just don't know that. I've had that happen a couple of times, which means there is even more pressure on me to make sure these patterns are correct. I have also found some awesome testers along the way, though. And by awesome, I mean AWESOME. They are reliable and always have good information for me. I'm so thankful for their time, work, and thoughts. 


Goal 6: I will work towards blogging once a week.

Blogging is time consuming. Wow! And yet, necessary. So my goal is to get to consistently blogging once a week by the end of the year. Breaking that down into smaller goals of: making a list of possible blog titles, playing with which days are good days for me to plug in blogging time, and which day of the week seems to get the most traffic, and can I fit that in my schedule. 


Sub goal: Scan fabrics for pattern instructions *before* cutting them up.
These are for the cover quilt of Pattern 6: Star Light, Star Bright. Aren't they scrumptious?


I think this list is going to be doable. I have added to my calendar to read it on the 1st of every month, hoping that it will keep me working towards these goals. I also think that if I keep my focus on these goals I will get a better idea of what I am working towards and if these goals benefit that. What should I be doing differently and what is on track. 

I am excited for 2016 and what it holds for PBJ! 

Happy New Year!
Jen

Wednesday, October 21, 2015

Introducing Cartwheels on the Prairie

My newest pattern, "Cartwheels  on the Prairie" was released September 16th.


 This quilt has been in the works for years. Literally. 
She first started out with the name "Spring Stars". She was made with sweet pinks and greens, and a LOT of half square triangles. Even the stars were made of half square triangles. Yeah, that was a Lot of HSTs!

The original.

 So even though she was softly beautiful, I knew I needed to come up with something different. I love a perfect half square triangle, but this was a bit much, even for me. 

Enter the Square-in-a-Square block and Flying Geese block. They saved this quilt from pure craziness. It definitely came together much quicker.

Made with less half square triangles.

This baby is huge. It comes as a queen size pattern, there is a wall hanging option as well, which is also a great size for a baby quilt.

Though I decided to go with a different colorway for the cover quilt, which meant a change in the name as well, I did choose to use the pink and green for the wall hanging version. Just a tip of the hat to the original "Spring Stars" quilt that grew into "Cartwheels on the Prairie". 


You will notice there are some great open spaces, have fun and add some great quilting. 

You can pick up a "Cartwheels on the Prairie" pattern at my Etsy shop as well as the three other quilt patterns I have available. 

Happy Stitching!
Jen

Sunday, October 11, 2015

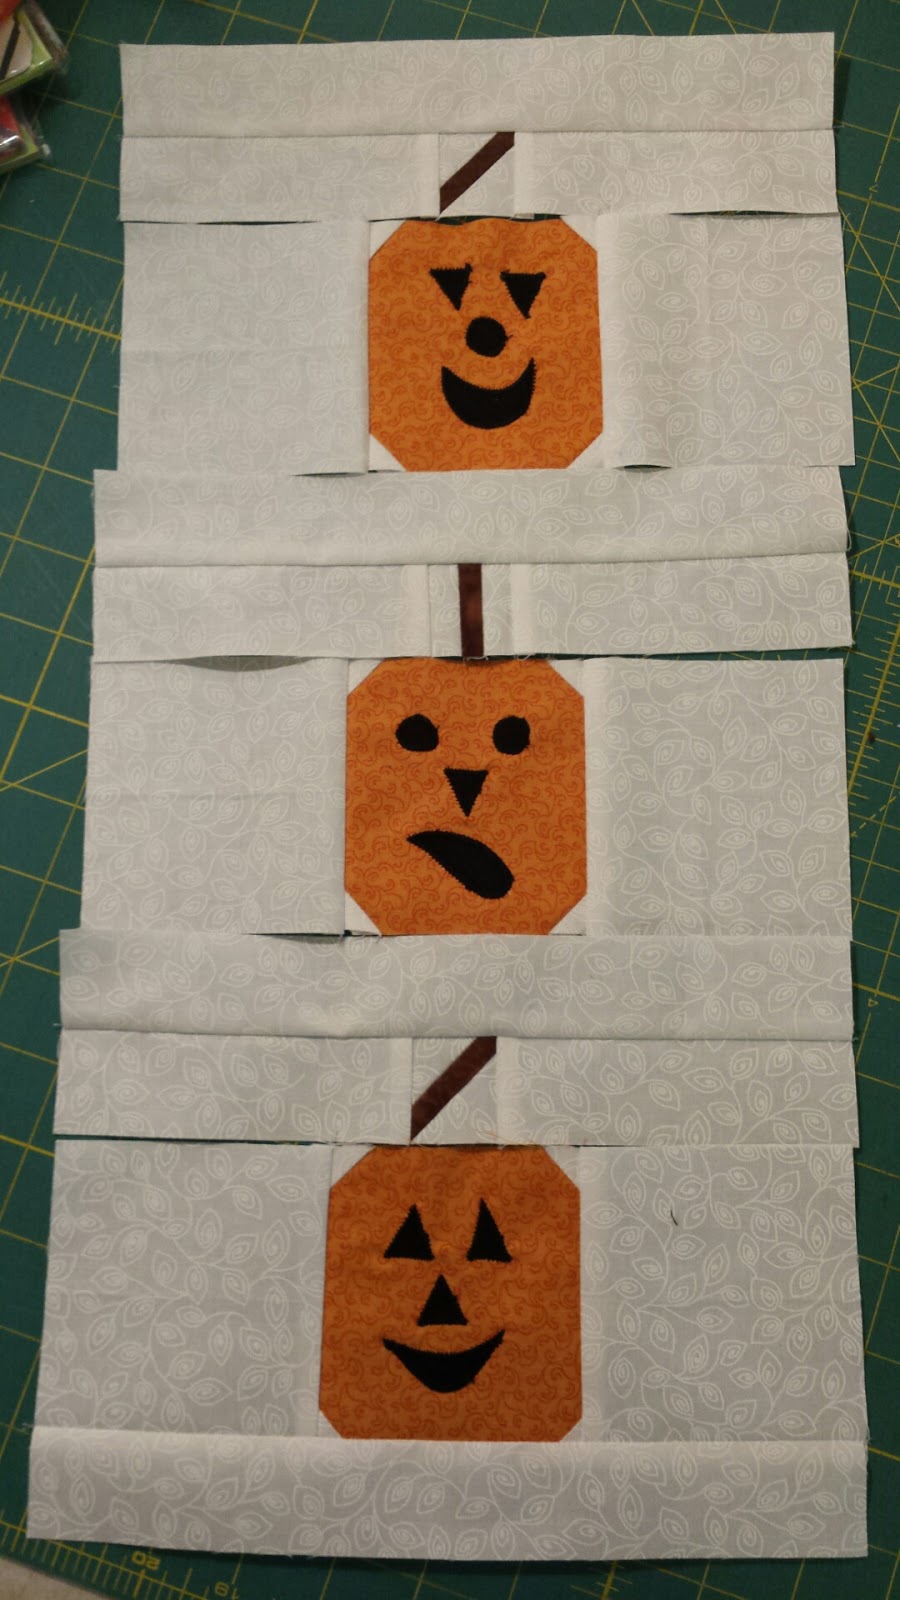
Free pattern! Three Jacks


Just in time for Halloween! A free pattern with tutorial. This is the first tutorial I have ever written, so I hope it is easy to follow. 


This is a quick wall hanging to put together. From first cut to fully pieced (not quilted), it took me about 2 1/2 hours. That includes stopping to take pictures along the way. You could definitely have a cute Halloween wall hanging in one day.


Supplies
Background - 1 Fat Quarter
Pumpkins - 4 x 11
Stems - 1 x 6 1/2
Faces - scraps
Border - 6" x Width of Fabric
Batting - 18 x 28
Backing - 18 x 28
Binding - 1/8 yard
Wonder Under - for faces

Cutting

From background fat quarter:
 1) Cut six 3 1/2" squares
2) Cut two 1 1/2" x 9 1/2" rectangles
3) Cut four 1 1/2" 4 1/2" rectangles
4) Cut two 2" squares
a) Cut on the diagonal


5) Cut two 1 1/2" x 7/8" rectangle (this is the right size, teeny!)
6) Cut twelve 3/4" squares

 Yes, more teeny tiny squares. 

From pumpkin fabric:
7) Cut three 3 1/2" squares

From stem fabric:
8) Cut two 3/4" x 2 1/4" rectangles
9) Cut one 3/4" x 1 1/2" rectangles

From face fabric:
10) Follow the instructions for Wonder Under
 (or whichever adhesive you are using)
and attach it to the back side of your scrap
11) Draw your faces on the paper side
(Draw them larger then you think;
you can always make them smaller.)


From Border fabric:
12) Cut two 2 1/2" x 16 1/2" rectangles
13) Cut two 2 1/2" x 13 1/2" rectangles


Assembling

Pumpkins

Mark your 3/4" background squares on the diagonal.


If you are confident in your sewing skills, these are certainly small enough to skip drawing the line.


You are going to sew a square to each corner of your pumpkins, following the line you drew.

After you have sewn the squares on you will press towards the square, then trim off the excess.


Line up your quarter inch line on the seam and trim that little triangle off.


 It doesn't seem like a lot, but just taking off that little bit helps with the bulk when you are putting all the pieces together.

(It all adds up, and I know my machine is not a fan of sewing through a lot of layers.)

Next we will cut out and place our faces. You could skip this part and just have pumpkins, then you could have a wall hanging that would work for November as well.


After you cut your faces out, you will peel the paper off, and place that part onto the pumpkins. Press them onto your pumpkins, making sure to put the side with the glue on the pumpkin.

Stitch the faces down now.


I like to start in the middle of the piece and not on the end. Go slowly.

Next are the stems. Using the 3/4" x 1 1/2" stem rectangle and the 1 1/2"x 7/8" background rectangles, sew a background piece to each long side of the stem.

(Sorry, I don't have a picture of this step.)

For the next two stems it's a little more difficult. Line up your pieces as so:


Yes, the triangles should be that much larger. Find the middle of each triangle and stem piece. I finger press these.


Match up the middle and pin.


Stitch and press towards stem. Do the same on the other side.


Press towards the dark. 

Next, using your 45 degree mark on your ruler, line it up with the mark going through the middle of the stem.


Make sure the corner is on the stem. Trim.


Turn the square, line up the 1 1/2" marks on the newly cut sides and trim.


Lay out your pumpkins, stems and background pieces.


Stitch a background strip to each side of the stem square. Stitch a background square to each side of the pumpkin.

Lay out the strips and pumpkins. I stitched the stem strips to the pumpkins first, then strips. 


Last add the borders. First add the side borders (2 1/2" x 16 1/2" strips).
Then top and bottom ( 2 1/2" x 13 1/2" strips).

(CUTE!)

To get it ready for quilting, layer your backing, batting and then top, I tape my backing to the mat (or floor for the large quilts), then tape the batting, and just lay the top on top. Pin, leaving no more then 4 inches in between pins. 


Quilt as you desire. I always stitch some on the side to get warmed up and make sure the tension is right.

(My bobbin wasn't threaded right, thank goodness I practiced first!)


I tend to bunch my quilt as I quilt, I don't roll it.


Gloves are so helpful in moving the piece around. I have "quilting gloves" and I have gardening gloves. As long as they have the little rubber nubs, they work. These are from my mom, perfect for quilting in October.


I quilted spider webs and spiders. 


At least I tried. My spiders look more like ticks, which my husband kindly said are scarier then spiders.


Add your binding. I cut mine at 2". And then your hanging sleeve.

Hang and enjoy.


I hope you enjoy this little pattern. I love my little Jacks!

After you make one, don't forget to add your Jacks to my flickr page. 

Happy Stitching!
Jen

Friday, August 21, 2015

Feeling thankful

How about a new blog post? It's been a while, but two "no signal" vacations later and I am ready to start again. We spent a beautiful 3 days in Northern Minnesota and then spent 8 days traveling through South Dakota, Wyoming and Montana. I encourage everyone to take a "no signal" vacation. Especially with your children. It was great to unplug.

Beautiful view at the Big Hole Battle Field in Montana.

I'm going to share with you a project that I worked on, off and on the last few months, and just finished this week. I love all things hexagon. I also love the Noteworthy fabric line. I don't usually feel the need to buy a ton of fabric, but I would buy every bolt in this line if I could. This was a great combo of my two favorites.

I have a friend who I met online when we were both expecting our "Junebug" babies back in 2001. Kelly is a fabulous sewing queen and photographer. She has a blog Handmade Boy you need to check out. Not only does she sew and take pictures, she can design things on the computer. How is that for technical jargon? That's how much I can't design things on the computer. So she has also designed the cover for my patterns and my business cars (with hexis of course). Yeah, she's pretty awesome.

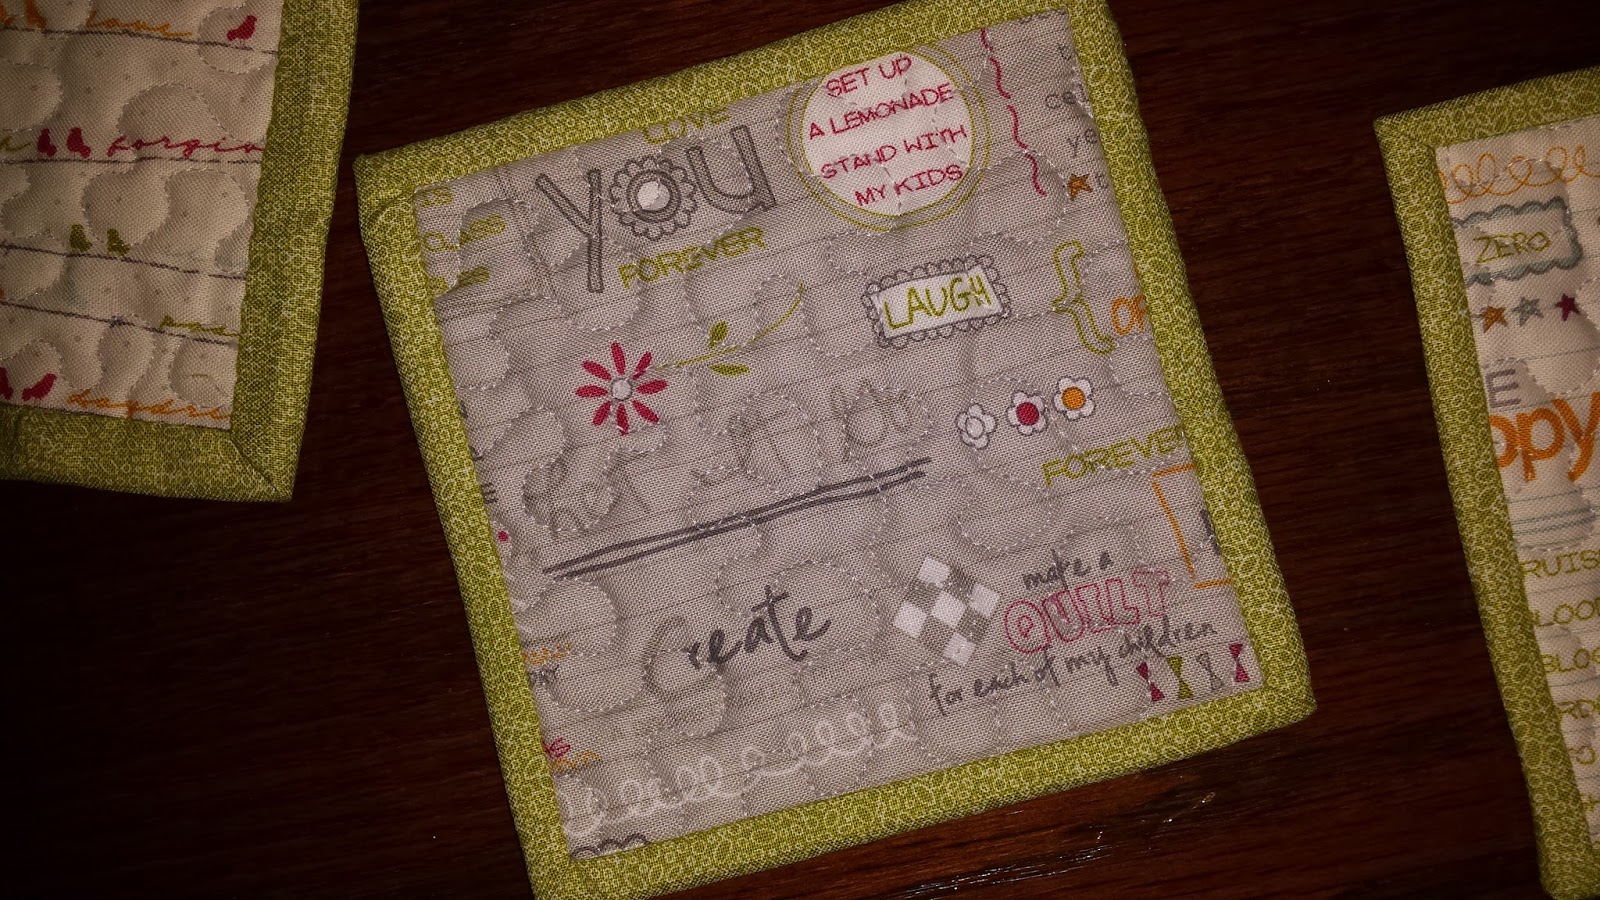
As a thank you for her amazing work and support, I sent this table runner to her, along with some coasters. Which were also super easy to put together. 
You an see why I hired a photographer. ;)


These coasters are made from leftovers of a charm pack. No cutting, no measuring, just quilting and finishing. Yeah, nice and simple. I used the same backing and just lined up the batting and charm squares.


Then I used my walking foot and did a basting stitch around the outside of each one. That made quilting them much easier, as they will slide. 


Once they were quilted I did square them up, because I'm particular that way, but you would certainly be able to leave them as is. 


I used this tutorial from Crazy Mom Quilts to bind the coasters. It worked pretty well, and I think they turned out pretty cute. 


I used English Paper Piecing for my hexis and put them together in a pleasing to me pattern. Then added borders and quilted it. I love the backing. I stuck in an extra piece, because when I was cutting I wasn't really paying attention, and I could have lined up the birds on the wire perfectly, had I paused just a moment. But since I didn't, and I'm kind of a perfectionist about those things, I faked my way through to the perfect backing. ;)

Of course I forgot to take a picture of the back when it was finished.

I hope she enjoys the gifts, but really I hope she feels how appreciated she is in this crazy adventure called quilt designing.


Happy Stitching!
Jen


I have linked up with Crazy Mom Quilts for Finish It Friday. That Hexi Pin cushion she shares today is from a Hexi Love class I taught at a quilt retreat she was also teaching at. How cool is that??!!