Saturday, July 1, 2017

July Muggamo

July's Muggamo pattern had to be red, white and blue for the good ole US of A!


You will need:

Red

Four 2 3/8" squares - on wrong side mark once on the diagonal
One 1 1/2" x 8" strip

White

One 4 1/2" square
Two 2 1/2" squares - on wrong side mark once on the diagonal
Four 2" squares
One 1 1/2" x 8" strip

Blue

Two 2 1/2" squares
One 1 1/2" x 8" strip


Flying Geese


Place two red squares on the large white square, right sides together. Note the direction of the drawn lines.


Stitch 1/4" on both sides of drawn line. Cut apart on the drawn line.


Press towards triangles.


Place a red square on the new unit. Note direction of drawn line.


Stitch 1/4" on each side of drawn line. 


Cut on the drawn line, Press towards triangles. Repeat for last three units.


Half Square Triangles


Place a white and blue square, right sides together. Stitch 1/4" on each side of drawn line. 


Cut on line.  Press towards blue. Square to 2". See how HERE. Repeat for last two squares.

Assemble block


Lay out your pieces.


Stitch rows.


Then stitch rows together.

Side piece


Lay out your red, white and blue strips. Stitch. Press away from white strip.


Trim off one edge.


Sub-cut your sewn strip to two 3 1/2" squares.


Lay them next to each other to check placement. Stitch.

Mug Rug


Lay your star piece next to the side unit. Stitch. Press towards star.


Sandwich your piece. Quilt. Bind.


Enjoy!
If you share on social media, please use #muggamo. I would love to see your creations!

Happy Stitching!
Jen

Thursday, June 29, 2017

McCall's Quick Quilts - Against the Grain

Introducing Against The Grain, available now in the August/September issue of McCall's Quick Quilts. 


This pattern is made from one block and three colors.


I love this cover! Find it in stores now. OR! Scroll down to enter for a chance to win a copy.
Find more information on this pattern HERE.


As an added bonus I have a little miniature pattern for you. There are a lot of trimmed HST pieces left from these blocks. Go HERE to see how I trim my HST units. These trim nicely to 1 1/2" squares.

Using leftovers from the top you will need:

Twenty-four 1 1/2" HST units

From yellow:
Four 2 1/2" squares
Four 1 1/2" x 6 1/2" rectangles

From grey:
Two 2 1/2" x 8 1/2"
Two 2 1/2 x 10 1/2"

Backing and Batting:
One 12 3/4" square each

Binding:
 One 2" x 56" strip

To make a hanging strip for your mini go HERE.

Ready to win a copy of the August/September 2017 issue of McCall's Quick Quilts?  Simply leave a comment sharing your favorite quilt size to make. A winner will be announced Wednesday, July 5th. Please leave an email address, many commentors are "no-reply" and that means I cant tell you if you are a winner. Good luck!

Happy Stitching!
Jen

If this is your first time visiting you might like to check out the Beginner's Unite! Series as well as the Muggamo Quilt Along, which has a new pattern coming on Sat!


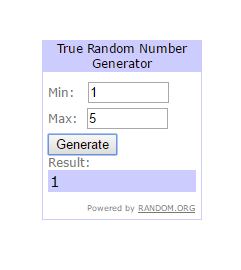
WINNER!

Congratulations to Angie&Gary Short!!  


Tuesday, June 27, 2017

Beginner's Unite! Blocks that don't match

What do we do when our blocks aren't the same measurement?


Many people say trim them all the same size, but then you run the chance of losing your points. If you have used the same seam allowance for all of your stitching, then I say, don't even think about trimming!


Here are two squares. One is 8 1/2" square and the other 8 3/8" square.

When I come upon blocks that are off just a bit, my go to tip is: pin, stretching just a little bit if you need to, and stitch with the larger unit on the bottom.


I pin each end first. Then holding each end I pull the blocks straight to find the middle, and pin. If the block needs a lot of work, I will pull the block straight between the end and middle pins and put in another pin. With these blocks I had seams that I needed to match up as well.

Once pinned, stitch with the larger unit on the bottom. In this case, the 8 1/2" block. The feed dogs will pull the bottom fabric more than the presser foot will pull the top fabric, and this will help make the blocks the same size.


Blocks are now matching at 8 1/2".

Press, and continue.


If you are putting blocks with sashing, the same tip applies. Pin ends, then middle, and in between. Stitch with the longer piece on the bottom.

When you put your units and/or blocks together in this manner, there is no need to trim before piecing them together. However, if your blocks are 1/4", or more, off I recommend grabbing your faithful seam ripper and fixing the block. Trying to stretch that much fabric will distort your finished block.

Share your tips for dealing with units/blocks that are not the same size in the comments.

Happy Stitching!
Jen

1) Intro - May 2
6) Sewing strips and squares - June 6
7) HST - Half Square Triangles (My one true love) - June 13
8) Flying Geese - June 20
9) What about those blocks that are just a tad off? - You are here
9) Strip Piecing - July 11
12) Adding Borders - July 18
13) Sandwich that top - July 25
14) Quilting - August 1
15) Binding - August 8
16) Labels  - August 15


Tuesday, June 20, 2017

Beginners Unite! Flying Geese

Flying Geese is the next unit in the Beginners Unite! series.


Flying Geese units are heavily used in quilt patterns and it's worth getting them trimmed and perfect. Just like half square triangle units (HST) there are different ways and rulers to use when making Flying Geese.  In this post I will show you how to  make them the old fashioned original way and how to make them using the No Waste method. I will also show how to trim them if you make them over sized, using a Wing Clipper® from Deb Tucker 180 Design Studio (no affiliation) and just a square from Creative Grids. 

No Waste Flying Geese

The measurements I'm using in this tutorial are for over sized FG units. but the instructions for piecing are the same even if you make them to be exact. 

For this tutorial you need:

1 - 5 1/2" square
4 - 3" squares


On the wrong side of the 3" squares draw a diagonal line.


Place two of the 3" squares on the 5 1/2" square, right sides together, as shown.


Stitch 1/4" on either side of the line.


Cut apart on the drawn line.


Press towards triangles.


Place a 3" square on each of the units made. 


Stitch 1/4" on either side of line.


Cut on the drawn line.
Press towards triangles. This method will give you four Flying Geese units.

Trimming with a Wing Clipper® ruler

The lines on the Wing Clipper® make it really easy to know where to trim. 


We are trimming these to 2 1/2" x 4 1/2". Find the little diagonals for the 2 1/2" mark and line it up with the point. Trim.


Rotate the FG unit and line up the lines again on the point. Trim

Trimming with a square


I like to make a mark on the half way point on the ruler. Use a sharpie and put a piece of scotch tape or packing tape over it if you have a lot to trim, because it will wear off.


Line the half way mark (in this case 2 1/4") with the point, making sure to give yourself 1/4" seam allowance as well. Trim.


Rotate FG unit and line up the cut edge on the 4 1/2" line. Trim.

Original Flying Geese Unit

For this unit we need:
1 - 2 1/2" 4 1/2" rectangle
2 - 2 1/2" squares


Draw a diagonal line on the wrong side of the 2 1/2" squares.


Place one square right sides together on the rectangle. Note direction of drawn line. 


Stitch. I like to stitch just a tish off the line, towards the outside corner.


Press and trim.


Place the other square on the rectangle, noting direction of drawn line.


Stitch. 


Press and trim. This will give you one Flying Geese unit.


All 3 Flying Geese units, and you can't tell which one is which, so do the one you enjoy doing. Quilting is about joy and beauty.

Happy Stitching!
Jen


1) Intro - May 2
6) Sewing strips and squares - June 6
7) HST - Half Square Triangles (My one true love) - June 13
8) Flying Geese - You are here
12) Adding Borders - July 18
13) Sandwich that top - July 25
14) Quilting - August 1
15) Binding - August 8
16) Labels  - August 15