Surprise! I added a topic, because I realized when I was writing the post on how to sandwich your quilts I hadn't talked about the borders.
Have you ever put borders on your finished top and ended up with waves? It can be so frustrating to have a beautiful top end up with bunched up borders, or sides that are waving at you. This can be easily avoided, and easily fixed if it happens.
Designers give you measurements for your borders, but it is important to measure your top first, before cutting to those measurements.
Here is how I put on borders. This is on a smaller scale, but it is the same for larger quilts, too.
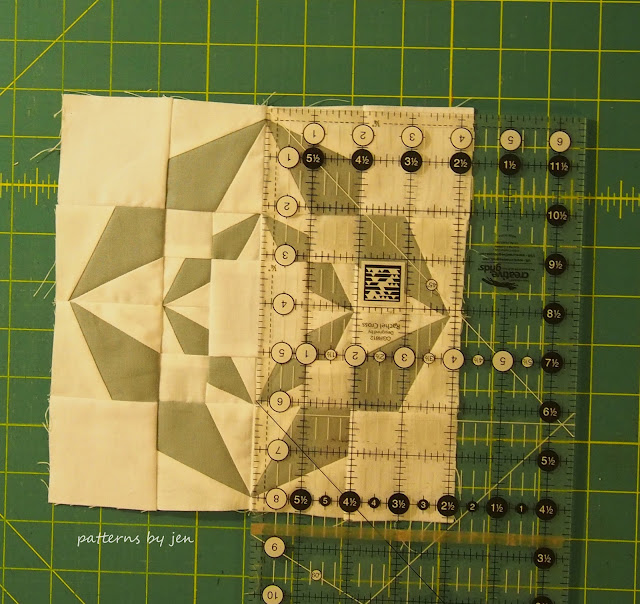
If you are putting on the side borders, first measure vertically. You need three numbers:
Left
Middle
Right
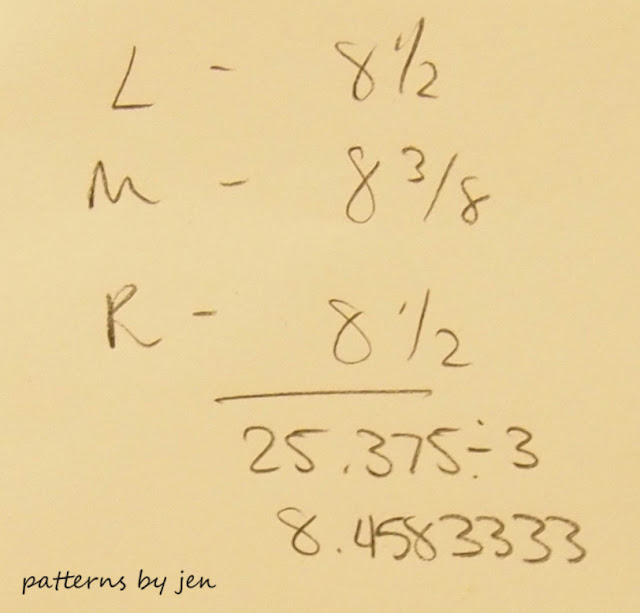
Write those measurements down. Add them, and then divide the total by three (finding the average means you divide by the number of measurements you've taken).
In this case the number is 8.458333333333, so I am going to cut my piece at 8.5" because it's close enough it won't make a difference.
I'm going to pin my border on. First I put a pin in each corner, then I pull the whole thing taut (do NOT stretch) and pin in the middle. Once I have those pins in I will pull the fabric between one corner and the middle pin taut and pin that middle. Repeat for the other side. In a larger quilt, you will use more pins. Pinning keeps the fabric from stretching and becoming wavy.
To add the top and bottom borders you will do the exact same thing, but take these measurements:
Top
Middle
Bottom.
Add those three numbers, divide by three and use that number to cut the length of your border. Pin, stitch and press. Remember to lift and press, not push and press, that will cause wavy borders, too, by stretching the fabric.
You now have beautiful borders to frame your beautiful top. This block is a test block from Softly Circled. I made one and quickly decided the block needed to be bigger or it was going to send me to the loony bin way earlier than I have planned.
As in all things quilty, there are many ways to measure and add borders. You will get different advice from many different people. This is what works for me, I encourage you to use different techniques to find what works for you!
Happy Stitching!
Jen
I'm linking up with Tips and Tutorials from Quilting Jetgirl and Late Night Quilter.
1) Intro - May 2
2) Quilting supplies ~ What makes the process easier - May 9
2a) Side Trip ~ Maintenance - May 11
3) Choosing fabric and color - May 16
2a) Side Trip ~ Maintenance - May 11
3) Choosing fabric and color - May 16
5) That crazy scant 1/4 inch seam allowance - May 30
6) Sewing strips and squares - June 6
7) HST - Half Square Triangles (My one true love) - June 13
8) Flying Geese - June 20
11) Is there a trick to keeping those points? - July 13
12) Adding borders - You are here
12) Adding borders - You are here
13) Sandwich that top - July 25


Thank you for sharing this tutorial! The photos really show the process so well and it can make such a difference to attach the right size border to a quilt top.
ReplyDeleteThank you, Yvonne!
Delete