Wednesday, May 27, 2020

Spinning Bow Ties Quilt Along - Quilting

It's quilting time!


Your top is pieced, borders added and now it's time to quilt it. If you have chosen to have your top quilted by a longarm quilter, the backing requirements on your pattern should give you enough to have the required extra 4" around the top.


I have started doing more quilting on my domestic machine. I currently prep my top for quilting on the floor, but due to an issue with my back I have not been able to quilt my top. For a detailed look at how I prep my backing and top for quilting read BROKEN PANES QUILT ALONG QUILTING PREP. I apologize for the switch in quilts, but the prep is the same for each quilt I do.  You can find more tips for quilting by reading BROKEN PANES QUILT ALONG QUILTING.


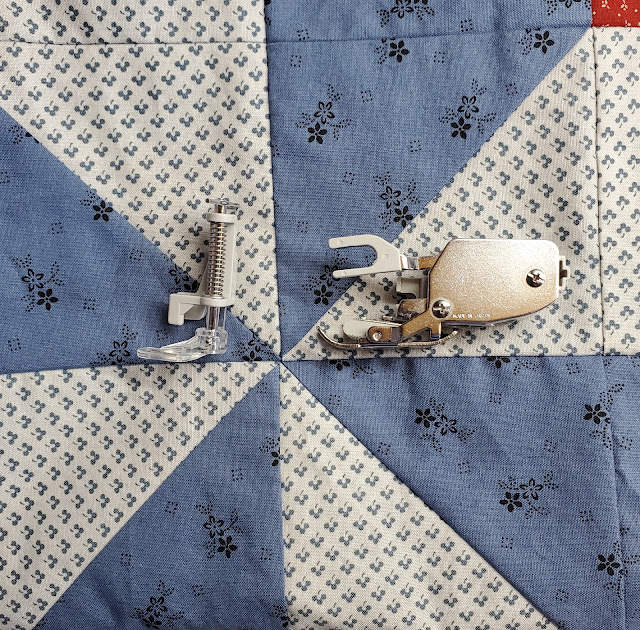
I usually wait until my quilting prep is done before I start planning my quilting, although every now and then the quilting plan comes to me as I am piecing. I won't be able to choose the foot I'm going to use until I have my quilting plan in place. I have a walking foot and a free motion that I use, but before these I used my regular presser foot and it worked just fine, just make sure you put the teeth down if you can to help move the fabric evenly.


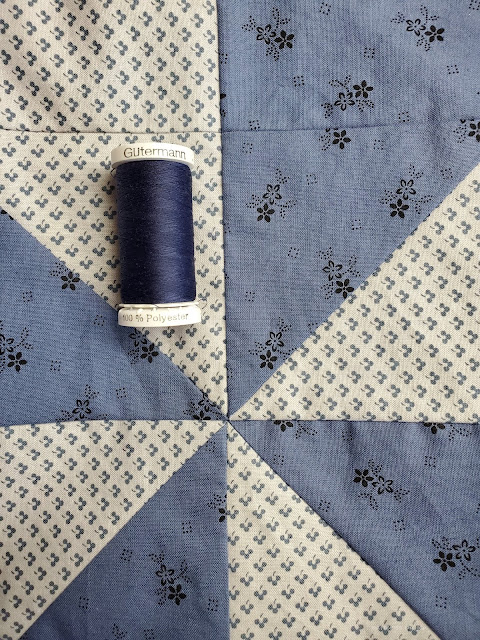
When choosing thread I focus on the color I want, not whether it's cotton or polyester. I use Gutermann thread for the simple reason that it's what my LQS carries, which means it's easier and faster to match the thread I need.  I've also used Superior Thread and Aurifil and I have truly used polyester and cotton threads for quilting, sometimes even mixing them.

It's time to decide how we are going to quilt. When I am struggling to decide how I am going to quilt a top I hit Pinterest. I've started a board for quilting ideas for pinwheels that you can find on my PINTEREST PAGE.


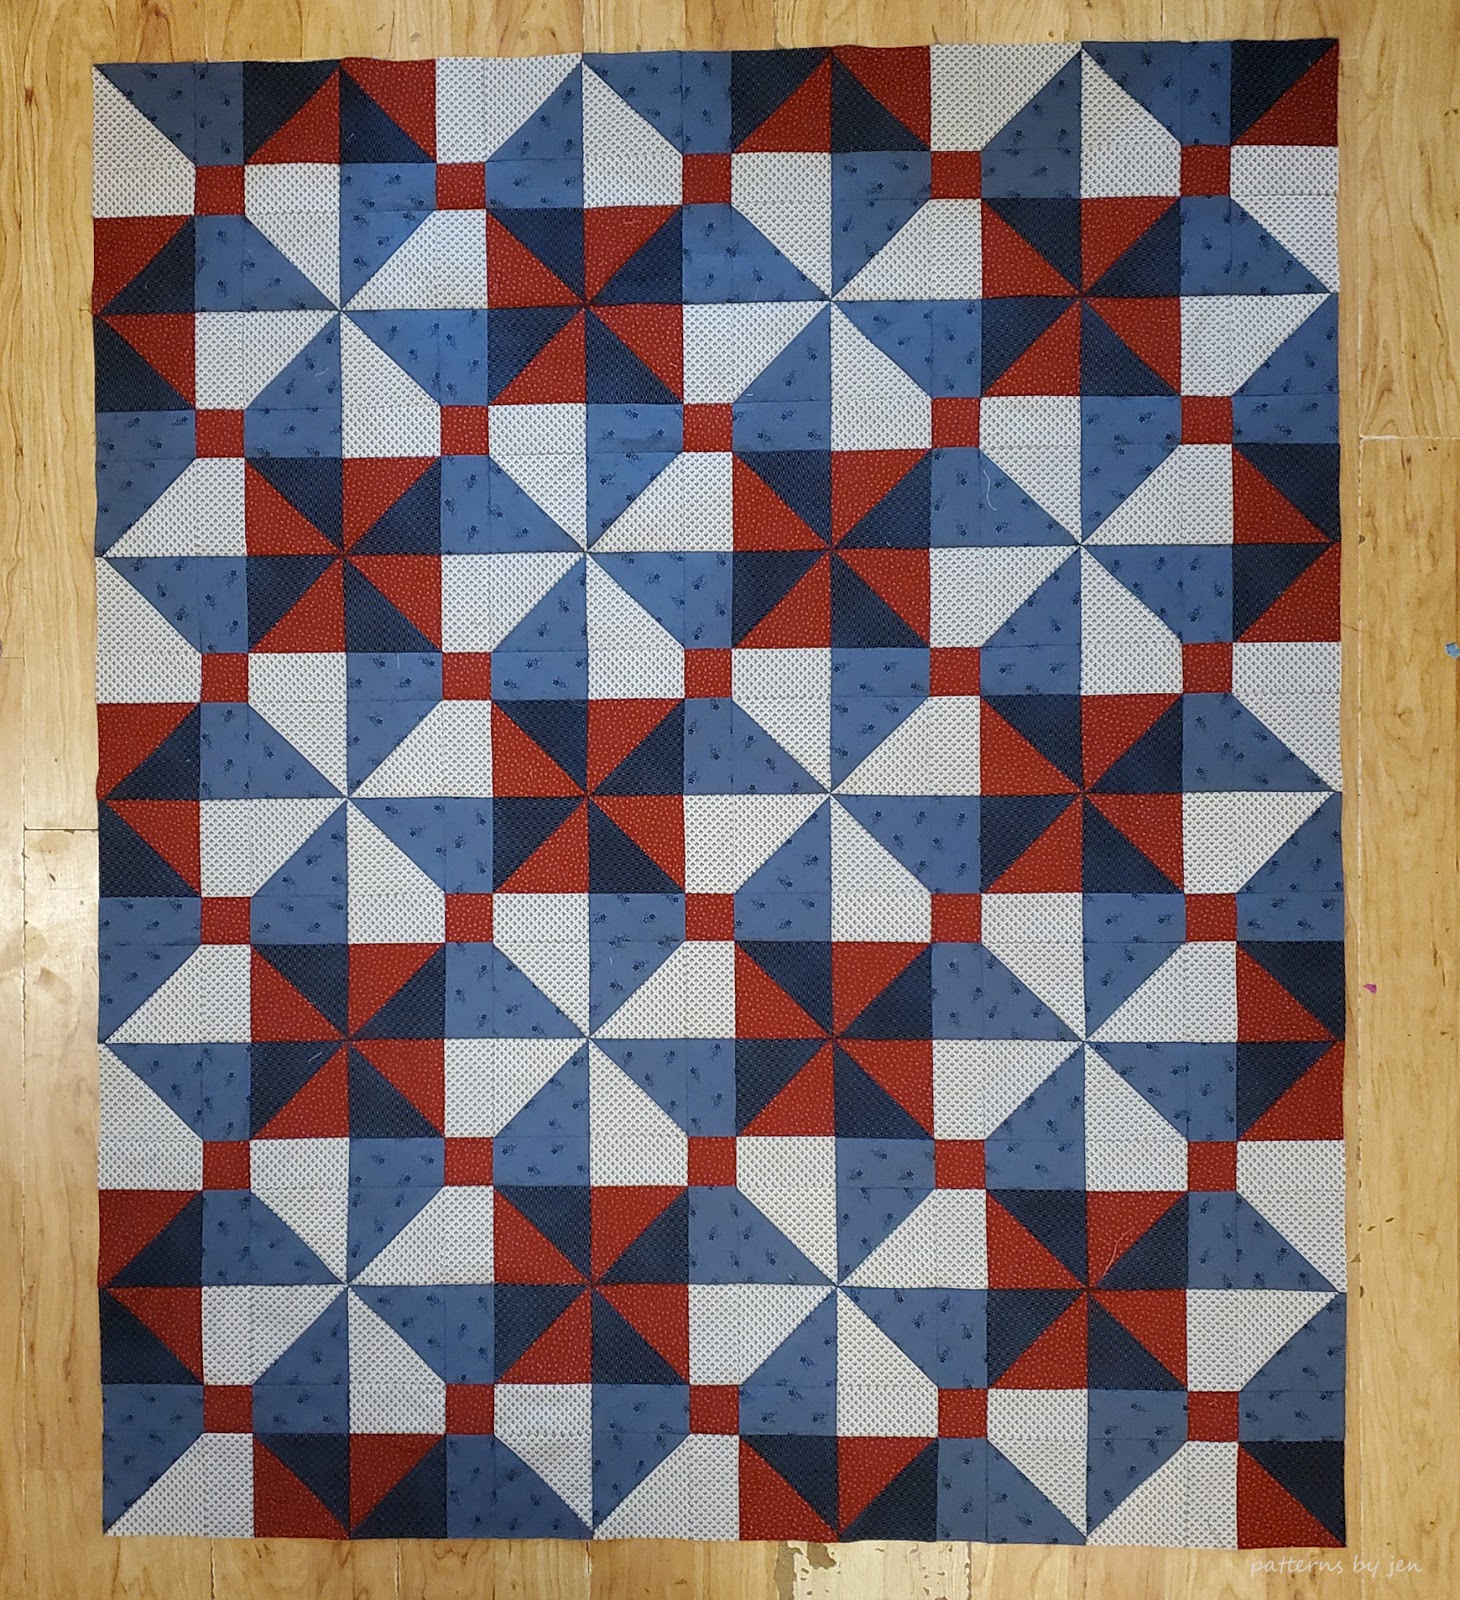
For my Spinning Bow Ties quilt I'm just going to do a simple "stipple" in a blue thread. You can find a free sample at Craft Gossip.  This will give me a fairly quilt finish, but also keep the the pattern of the quilt top at the forefront.

If you have any questions about quilting this top, or any other top you are working on, please feel free to ask them in the Quilt and Learn with Pattern By Jen Facebook group.

Looking for more information on the Spinning Bow Ties Quilt Along? Just click!

Happy Stitching!
Jen

New to Patterns By Jen?


Find paper and digital patterns in my Etsy shop.

Find fun PBJ merchandise at Teespring


Join the Quilt and Learn with Patterns By Jen Facebook page.

Follow me on Instagram and Facebook for daily sneak peeks and updates. 

Tuesday, May 26, 2020

May Monthly Color Challenge Link Up

We're linking up our May Color Challenge Blocks!


The world has turned green around me here in SW Minnesota USA. It has been a pleasure to watch it slowly happen over the last few weeks.


Thank you for sewing along with the Monthly Color Challenge! You may not know, but "in real life" I'm a family child care provider. Right now my house is full of children whose parents are essential workers and my time is spent cleaning more than sewing. I have loved being able to live vicariously through you. Thank you so very much.


Sponsors April thru June

Quilters Chic - PDF Pattern
Said With Love - PDF Pattern


Quilter Dream Batting - Dream Poly 60" x 60"
Cherrywood Fabrics - Two $40 gift certificates
Warm Company -  100 Warm - 100% Natural Cotton 55" x 60"


Island Batik - Garden Party Fat Quarter Bundle
Patterns By Jen -  PDF pattern and Superior Thread S - Fine 50


Our sponsors are new for the 2nd quarter, but the giveaways are still awesome! Please take a moment to visit them and see what they offer. ☺


The Link Up is open through May 31. The link up is open through April 30th. If you have a problem linking up, please use the "question mark" button next to the log out button. If you are trying from your phone, try it from a laptop/tablet if you have one.


2nd quarter giveaway winners will be chosen July 1st. Good luck and thank you so much for stitching along with me!

Missed the block? Find it HERE!

Happy Stitching!
Jen


New to Patterns By Jen?


Find paper and digital patterns in my Etsy shop.

Find fun PBJ merchandise at Teespring


Join the Quilt and Learn with Patterns By Jen Facebook page.


Follow me on Instagram and Facebook for daily sneak peeks and updates. 


Please make sure to add your first name!
You are invited to the Inlinkz link party!
Click here to enter

Wednesday, May 20, 2020

Spinning Bow Ties Quilt Along - Adding Borders

I'm ready to add my borders to my top, what about you?


It can be easy to want to add the borders quickly and finish your quilt. You've been working on it for days, weeks, months and you are so close to being done, but nothing is more frustrating than a wavy border when you are ready to start quilting.


On Spinning Bow Ties we're going to add the top and bottom inner border first. To keep away the waves you should measure your quilt before cutting your border pieces. To figure out the measurement needed measure along the top, middle and bottom of your quilt, then take average of those measurements. Many times you can just take the middle measurement, but if you are new to quilting I recommend taking all three for each quilt you make until you are comfortable getting those measurements.


Once you have your border pieces cut, and stitched if they need to be, you'll want to pin it to the quilt top. As we know, the fabric doesn't always feed through the machine evenly, this is even more true when your top is getting larger and heavier. I enlist a family member to help with this part. If you don't have someone to help you can see how I pin borders on when I'm on my own: Read this post.


To add borders I pin the corners, then have someone help hold the top up and keep it taut, not stretched. Then I pin in the middle. If it's a large top I keep pinning the border in even intervals. Even, because that's how my brain works, but you can do it however you like. Just make sure you are keeping the top and border taut.


After you have put the top and bottom borders on it's time to measure again. We're measuring the same way, only the length this time. Right side, middle, left side and take the average of these measurements. Pin the same way. (The above picture is of the outside border because I got caught up stitching the borders on and forgot to take a picture of the inner border. Measuring looks the same though. ☺)


I am using a border with words printed in a straight line. Unfortunately that line is not on the grain on the fabric I am using. It happens. So what do you do? I chose to cut so the lines were straight and not worry about the fabric being on grain.


With the selvedge off so much because of how I lined up the fabric I need to trim off that selvedge carefully. I open up the strip, line up the ruler on one edge of the cut to make sure my cut will be straight, and trim off the selvedge.


Repeat these steps for the outside borders. That's it! Now you get to start to plan your quilting. We are so close to finishing our quilts!


Happy Stitching!
Jen


New to Patterns By Jen?

2020 Monthly Color Challenge


Find paper, digital patterns, and Studio 180 Design rulers in my Etsy shop.

Find fun PBJ merchandise at Teespring

Join the Quilt and Learn with Patterns By Jen Facebook page.

Follow me on Instagram and Facebook for daily sneak peeks and updates.


Wednesday, May 13, 2020

Spinning Bow Ties Quilt Along - Piecing the top

Did you get all of  your blocks pieced?


I think these go together pretty quickly and make an easy top to piece, so lets get to it!


I don't have a design wall, between the cats and the kiddos there's not a safe wall to be found, ☺ so I just use the floor. Please note that the floor I use is also the floor in my child care. It's not pretty, but we're not replacing it any time soon either. Ha.


When laying out your blocks that you are rotating them. This gives you the "spinning bow ties" look. I recommend taking a picture, before you sew, to check that your layout is correct.


If you are not sure that you will be able to sew your top right away, mark your rows. I use pieces of paper with number written on them. I pin them in the middle of the block because I don't want to have to remove them to stitch the rows together.


Once you've marked your rows, if you aren't going to sew them together start making your stacks.


After I have made the stacks I just put them in a pile with number one on top. When I'm ready to sew I start with the first stack. Stitch, follow pressing instructions, then move on to stack two.

Tips for piecing blocks into rows


Pin the "sashing" seams to keep them lined up.


If you pressed your HST units in the same direction they will nest up to make a great point.


They should just lie nicely together.


Tips for piecing the rows


Once all of my rows are stitched I lay them out again. When I'm sewing the rows together I first sew the top two rows, and the bottom two rows. In the picture row 1 is flipped over row 2 and row 6 is flipped up over row 5.


Then I flip row 3 up over row 2 and row 4 down over row 5.


Last I flip the top half down over the bottom half. This helps to keep the bulk down are you stitch the rows togther. It also makes it easier to press as we sew the rows together.


Once you are done, step back and just enjoy your accomplishment. We'll add borders next week!

Happy Stitching!
Jen


New to Patterns By Jen?

2020 Monthly Color Challenge


Find paper, digital patterns, and Studio 180 Design rulers in my Etsy shop.

Find fun PBJ merchandise at Teespring

Join the Quilt and Learn with Patterns By Jen Facebook page.

Follow me on Instagram and Facebook for daily sneak peeks and updates.


Wednesday, May 6, 2020

Spinning Bow Ties Quilt Along - Block Construction

It's time to put the block together.


What did you think of the HST tips shared last week? Were they helpful? Is there anything I missed? I would love to hear in the comments. Now that we are done with the HST units we are ready to put our blocks together.


When the quilt pattern is made from one block I like to get all the pieces laid out to see how the block will look. That way I can also do a lot of chain piecing, which is my favorite way to piece blocks.


Using the Color 1 and 2 HST units and the Color 1 rectangle you can sew all of these together in one long chain. Make sure you double check the layout of the HST units. Press towards the rectangle.


Next add the Color 3 and Color 4 HST units. 


The "sashing" is next. To chain piece these simply use all of the squares and half of the Color 2 rectangles. Press towards the rectangle.


Add the second rectangle.


Sew your rows together. Pin the seams and sew with the row of HST units on top.


Doing so means you can see where the points are and can make sure to sew so that you don't lose that point.


That's it! Your block is done. The awesome part of making a quilt with just one block is that you can chain piece all of these steps and end with an amazing group of  blocks ready to be put into a quilt top.


Next week we are putting our quilt top together! See you then!

Happy Stitching!
Jen

New to Patterns By Jen?


Find paper and digital patterns in my Etsy shop.

Find fun PBJ merchandise at Teespring


Join the Quilt and Learn with Patterns By Jen Facebook page.

Follow me on Instagram and Facebook for daily sneak peeks and updates

Friday, May 1, 2020

May 2020 Monthly Color Challenge

Did April bring May flowers to your area?


Here in SW Minnesota I'm still waiting for some pretty flowers, but thankfully we have a pretty bird to brighten our month. Inspired by their gracious flight, unique and sometimes vibrant color, I chose birds to guide us in our challenge this year. To see the full year in preview read the 2020 Monthly Color Challenge Announcement.
Our bird inspiration for May is the Budgerigar.

Some facts about our bright green Budgerigar from Wikipedia.

The budgerigar is a long-tailed, seed-eating parrot usually nicknamed the budgie, or in American English, the parakeetNaturally, the species is green and yellow with black, scalloped markings on the nape, back, and wings.

The origin of the budgie's name is unclear. First recorded in 1805, budgerigars are popular pets around the world due to their small size, low cost, and ability to mimic human speech.

It is found wild throughout the drier parts of Australia, where it has survived harsh inland conditions for over five million years. Its success can be attributed to a nomadic lifestyle and its ability to breed while on the move.

Now it's time for the May Color Challenge Block. I'm so in love with this green!


The instructions include a link to a How To video, but if you like pictures better you might find this post helpful. It's for the Spinning Bow Ties Quilt Along, but has some helpful tips.

This year I am offering instructions for making the background the same throughout with a neutral. You can download the yardage amount and instructions HERE.


May bloggers

Stephanie - Quilt'n Party

Kris - Scrap Dash

Tammy - Tamarinis


Quarter 2 Sponsors

Have you heard?! We have sponsors for the 2020 Monthly Color Challenge! Meet all of them in THIS POST! 


Prizes will be given quarterly: April 1, July 1, Oct 1 and January 1 2021. To enter you must link up your block at the end of the month. Each month you enter gives you a chance to win. If you miss one month, don't despair, you can still enter the other months for a chance.I would truly appreciate if you would let these amazing sponsors know our appreciation in the comments below and/or on their social media pages.


Sponsors April thru June

Quilters Chic - PDF Pattern
Said With Love - PDF Pattern


Quilter Dream Batting - Dream Poly 60" x 60"
Cherrywood Fabrics - Two $40 gift certificates
Warm Company -  100 Warm - 100% Natural Cotton 55" x 60"


Island Batik - Garden Party Fat Quarter Bundle
Patterns By Jen -  PDF pattern and Superior Thread S - Fine 50

I would truly appreciate if you would let these amazing sponsors know our appreciation in the comments below and/or on their social media pages.


Now it's time! Follow the Payhip Link to the May block and get stitching!

Thank you so much for sewing along with me and the amazing 2020 Monthly Color Challenge Bloggers!

Happy Stitching!
Jen


New to Patterns By Jen?


2020 Monthly Color Challenge


Find paper, digital patterns, and Studio 180 Design rulers in my Etsy shop.

Find fun PBJ merchandise at Teespring

Join the Quilt and Learn with Patterns By Jen Facebook page.

Follow me on Instagram and Facebook for daily sneak peeks and updates.