Wednesday, June 26, 2019

June Monthly Color Link Up

It's time to link up your orange June blocks!


We have reached of the 2019 Monthly Color Challenge. I can't believe it, can you? It has gone so fast! This year the link up is available just for you to share your gorgeous blocks, there are no prizes. You will need either an Instagram account, a Flickr account, or you will need to email me directly so I can put your block on my Instagram account and get you added. patternsbyjen(at)gmail(dot)com


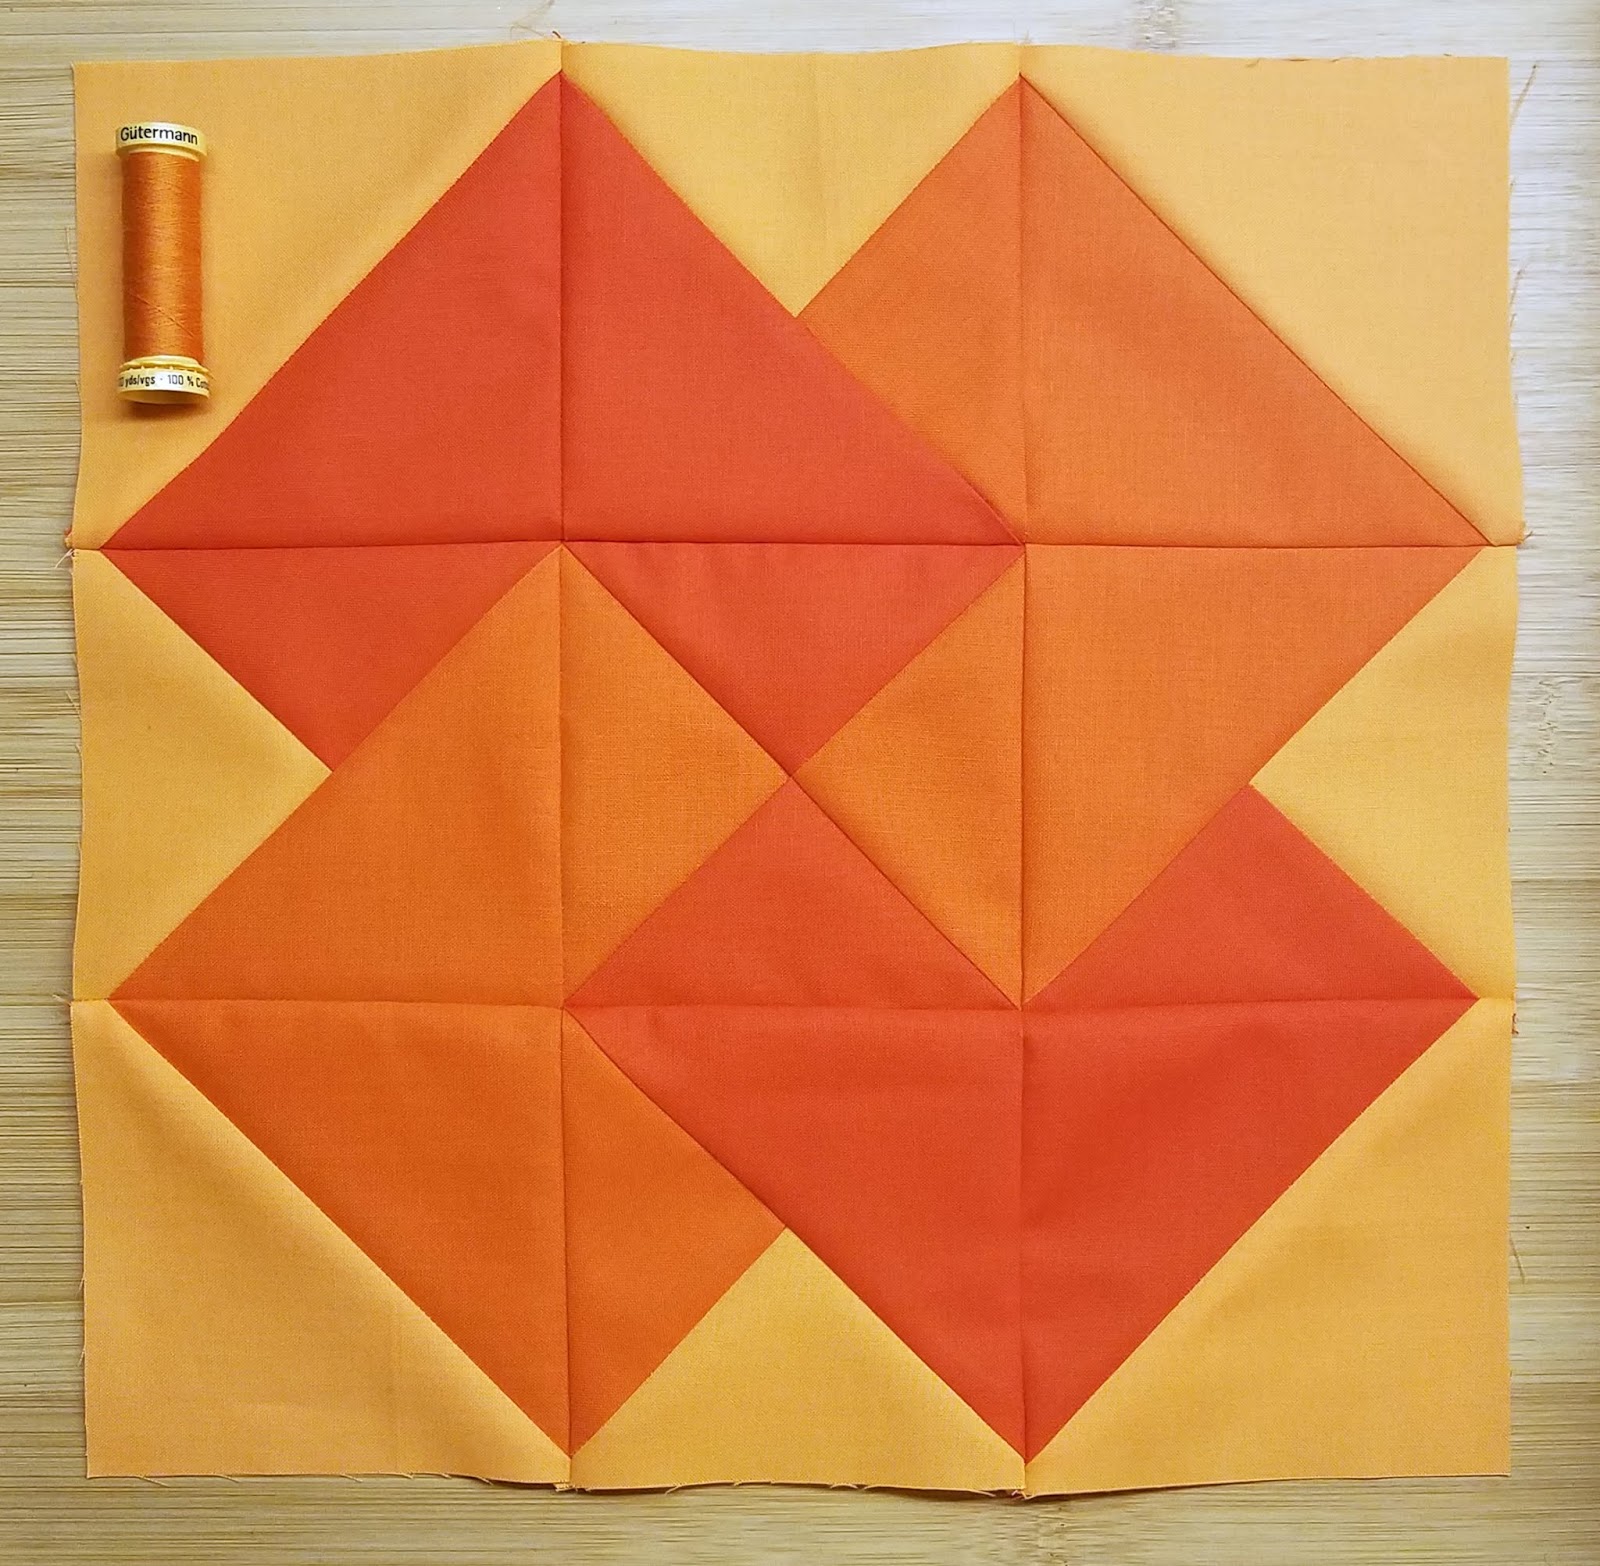
If you haven't downloaded your June block yet, it is still free through the end of the month. You can find it in my Payhip store HERE. Each block now comes with a link to a full video how to!


You can also have the block instructions delivered directly to your inbox on the first of each month. Please make sure to add patternsbyjen(at)gmail(dot)com to your address book so you get the email.


If you are having trouble getting the link up to work please read THIS POST.


If you haven't already, you can join the Quilt and Learn with Patterns By Jen Facebook group to get inspiration for you blocks as well as tips, advice and encouragement from quilters sewing along with you.

If you missed the introduction post you can find it HERE. This post will be updated each month with a link to the new Color Challenge post, so you may want to bookmark it.

I can't wait to see your blocks! Thank you for stitching along with the 2019 Monthly Color Challenge!


Are you interested in a quilt along? The Broken Panes Quilt Along is perfect for beginners, I hope you will join in the fun!

Happy Stitching!
Jen

New to Patterns By Jen?


Find paper and digital patterns in my Etsy shop.

Find fun PBJ merchandise at Teespring


Join the Quilt and Learn with Patterns By Jen Facebook page.

Follow me on Instagram and Facebook for daily sneak peeks and updates. 

Tuesday, June 25, 2019

Broken Panes Quilt Along - Block Assembly

Time to put our blocks together!


The great thing about big block quilts is how quickly they go together. First we're going to follow the instructions in the pattern for sewing our sub-cut units. Make sure you note the direction of the color blocks.


These strips need to match up with the units they are being sewn to, so unlike when we sewed the strips together for strip piecing, I suggest pinning the ends so one doesn't get pulled shorter or longer than the other.


Chain piecing works well here.


I keep my chained pieced units connected when I bring them to my ironing board.


I run the iron over to set my seams, then start pressing each one in the direction required in the instructions.


Once they are all pressed, then I cut the thread holding them all together.


Once the units are sewn together, lay out your block. Take a minute to make sure you have them lined up correctly. Each block is laid out the same, so I just lay one on top of another and sew them all the same. While this can be quicker, if you don't make sure that each one is placed correctly you could end up ripping seams. If you're good like me, you'll rip the same seam THREE times. Oy!


I like to sew row by row. For Broken Panes I sew Row 1, Units 1 - 2 and then Units 3 - 4. Press following the pressing arrows.


Then I stitch the Units 2 and 3 together for each row. Press. Then I sew rows together for a great block. Follow the sewing and pressing directions.


You should now have four, six, nine or twelve blocks, dependent on the size you are making.

Next week we are piecing our top! Just like that, easy peasy.

Still need the pattern?

Etsy Printed

Etsy Digital

Payhip Digital


Sign up for email reminders

Schedule and supply list

Share in Quilt and Learn with Patterns By Jen Facebook Group

Use #brokenpanesquiltalong on social media.

Next week we will go over strip piecing, sub-cutting, and how to plan for directional fabrics.

Happy Stitching!
Jen


New to Patterns By Jen?


Find paper and digital patterns in my Etsy shop.

Find fun PBJ merchandise at Teespring


Join the Quilt and Learn with Patterns By Jen Facebook page.

Follow me on Instagram and Facebook for daily sneak peeks and updates. 

Friday, June 21, 2019

Introducing Criss Crossing!

Criss Crossing is here!


Well, she's always been here, but she's back and bigger (actually smaller) than ever. Criss Crossing was the very first pattern I had accepted by a magazine for print and so was only written in one size.

In fact, three years ago yesterday is when I shared this McCalls video:

 https://www.facebook.com/McCallsQuilting/videos/10154195113307295/


Since it has been a few years now (though I totally didn't realize it had been almost exactly 3 years) I decided to give her an upgrade by adding multiple sizes. As a big block quilt it is easy to take away a couple of blocks to get a nice lap quilt or floor quilt for the baby.


This quilt is beginner friendly, has no paper piecing and because it is made up of big blocks, stitches together pretty quickly.

Tester Inspiration


Joanne used a dark background for her Criss Crossing. It really sets off her fabric choice, making it almost jewel like.


Melva used scraps for her Criss Crossing quilt. How fabulous did this turn out?


Dandelions are my favorite and this picture is my favorite because of them. Plus it also shows Melva's fabulous quilting job.


Fawn's monochromatic quilt just tickles me pink, or teal. She made an extra block to use as a pillow sham and this set is being donated to help raise money for an inclusive playground at the child care center she works for. Chills!!


Gina is making the largest version and shared a couple of finished blocks. She says the background fabric makes her think of Monet. I have to agree. I'm sooooo thankful she stepped up to test the larger version and  I can't wait to share the finished to with you.


Gina also pointed out that if you added the small quilt to the largest quilt you would have a king. So get stitching. :)


Inspired to make your own Criss Crossing? Patterns are on sale now through June 27th.  The printed patterns will ship in about a week while digital patterns are available to download as soon as they are purchased.

Etys printed

Etsy digital

Payhip digital


Happy Stitching!
Jen


New to Patterns By Jen?


Find paper and digital patterns in my Etsy shop.

Find fun PBJ merchandise at Teespring


Join the Quilt and Learn with Patterns By Jen Facebook page.

Follow me on Instagram and Facebook for daily sneak peeks and updates. 

Tuesday, June 11, 2019

Broken Panes Quilt Along - Strip Piecing

This week we are sewing our strips and sub-cutting.


For the beginners among us my tip is to slow your stitching speed down to the slowest speed. I don't sew my strips at the highest, I use the medium speed. The faster you the sew the more wibbly, wobbly your stitching can get. We want it to be a nice straight seam allowance for the next step.


NOTE! If you are using directional fabric for one or more of your color choices, please skip to the "Directional Fabric" portion of this post. Do NOT sew the strips together if you using directional fabric if you want it to be facing the right way. If you aren't worried about the direction, then sew away!

Strip Piecing


Since we cut our strips WOF and didn't trim them down to size we aren't worried about the ends matching up, we will trim them next.


When pressing long strips I like to finger press first. This means I flip open my strip and press the fabric over, the same direction I would if using the iron, with my fingers. Doing this keeps the strip from bowing and gives you a nice straight strip to work with. After I have pressed the whole strip with y fingers I hit it with a hot iron.


Once our strips are sewn we are going to trim off one edge. Line up a mark from the ruler along the seam line.


Trim off just a bit to give a straight edge to work with.


Rotate your strip. Now, lining up the needed measurement on the ruler on the straight edge of the fabric you just cut, as well as on the seam, cut. Repeat.


Continue to sub-cut your strips until you have the number of units you need. Place them in your storage bin, we're ready to assemble the block next!


Directional Fabric

If you are using directional fabric then you will be cutting the strips into squares and rectangles before sewing. First read through Assembly Step 1 in your pattern to determine how many cuts you will need. For example, if I was making the smallest quilt and my directional fabric was for the "red" color, I would cut the number of units needed for that step for both the color strip and the background strip. Since the strips aren't sewn together you just need the width, not the length.


Next take a look at the diagrams that show which side the background strip will be on. For the red I would look at Assembly Step 4 and see that they would be sewn to the bottom of each red. After pressing towards the "red" I am done and they can go into our storage bin.

If you have questions please feel free to email me patternsbyjen(at)gmail(dot)com

OR

go to the Quilt and Learn with Patterns By Jen group.


Important Links

Broken Panes pattern:

Etsy Digital

Etsy Printed

Payhip Digital


Sign up for email reminders

Schedule and supply list

Share in Quilt and Learn with Patterns By Jen Facebook Group

Use #brokenpanesquiltalong on social media.

Happy Stitching!
Jen


New to Patterns By Jen?


Find paper and digital patterns in my Etsy shop.

Find fun PBJ merchandise at Teespring


Join the Quilt and Learn with Patterns By Jen Facebook page.

Follow me on Instagram and Facebook for daily sneak peeks and updates. 

Tuesday, June 4, 2019

Broken Panes Quilt Along - Cutting

Welcome to the first week of the Broken Panes Quilt Along!


We're taking it nice and slow for this quilt along, with a few weeks added in for extra sewing time. For the complete schedule and supply list see THIS POST.


This week we are simply cutting our strips. Our goal is to get good, accurate cuts. The Accurate Cutting post shows where to place the lines of your ruler on your fabric when cutting, there is also a helpful video.

Beginners  might find the Beginners Unite series helpful as well.


We start with cutting strips. WOF = Width of Fabric and simply means to cut from the fold to the seam allowance. Cut the required number of strips for each color. If you are using directional fabric, for this step you are simply following the instructions, there isn't anything to change yet.

In the photo above you can see that my selvages are lined up together but that the edge isn't straight any more. This is why it's so important to get straighten the edge first. I'll line up my ruler on that 17" mark and cut off the funky edge. Now I can start cutting my strips.


When sub-cutting the background strips I like to lay a few of them together to cut. Many like to layer a couple of strips on top of each other, but I prefer one layer for accuracy. Another one of those "personal preference" moments in quilting.


The instructions call for some of the strips to be cut in half. I simply use my scissors and cut on the fold. This cut doesn't have to be very accurate, because next week we will be strip piecing and trimming.


Once you have finished cutting the required amount of strips for the size you are making simply set them aside for next week. I like to use a shoe box sized tub for my cut quilts. You will be amazed how how much they will hold.

Still need the pattern?

Etsy Printed

Etsy Digital

Payhip Digital


Sign up for email reminders

Schedule and supply list

Share in Quilt and Learn with Patterns By Jen Facebook Group

Use #brokenpanesquiltalong on social media.

Next week we will go over strip piecing, sub-cutting, and how to plan for directional fabrics.

Happy Stitching!
Jen


New to Patterns By Jen?


Find paper and digital patterns in my Etsy shop.

Find fun PBJ merchandise at Teespring


Join the Quilt and Learn with Patterns By Jen Facebook page.

Follow me on Instagram and Facebook for daily sneak peeks and updates. 

Saturday, June 1, 2019

June Color Challenge - Orange

June is here!


If you are new to the 2019 Monthly Color Challenge you can hop over quick to read through the introduction and also see the colors coming up in the months ahead.


This month's flower inspiration is the Sundaze Blaze Starflower. Look at that beautiful, bright color! What is not to love? The best part of deciding to use flowers as the color inspiration is finding new-to-me flowers. I need these all over my yard.


Are you a beginner? For this month's blocks you might find these posts helpful:


For this months block you will need:

Mat
Rotary cutter
Ruler
Marking pen/pencil

Specialty rulers that are NOT required, but helpful:


A great group of bloggers joins us each month. Please make sure to visit each one and see their blocks and read their stories.


This is a great way to meet new quilty bloggers!


Ready for your free June Monthly Color Challenge block? Find it HERE. Remember there is a change this year and the block is available for free only through June 30th. Use #2019monthlycolorchallenge on social media so we can see your blocks.

**NEW** Each months set of instructions comes with a full video tutorial!

To get the block instructions delivered right to your email sign up HERE.

This will not give you any of the previous month's blocks, you still need to go to Payhip and download those, but from this point on it will come directly to your inbox on the first of each month. Make sure to add patternsbyjen(at)gmail(dot)com to your email address book.

Happy Stitching!
Jen

New to Patterns By Jen?


Find paper and digital patterns in my Etsy shop.

Find fun PBJ merchandise at Teespring


Join the Quilt and Learn with Patterns By Jen Facebook page.

Follow me on Instagram and Facebook for daily sneak peeks and updates.