What if you have just a couple of 10" squares left over from a project?
Fabrics for this project were provided by Benartex Fabrics as part of their Ambassador program. It is called Bluezette and is designed by Jan Shore
Once you have decided on which 10" squares you are going to use, find either a matching or a coordinating thread for your top stitching.
Press your edges towards the wrong side of the fabric, just a 1/4" inch wide.
Lengthen your stitch length. You don't want it as long as your basting stitch, but longer than your piecing stich. My piecing stitch length is usually set at 2, basting for this machine is 5. I set my stitch length at 4 for top stitching.
Top stitch about 1/8" from the pressed edge.
PS. Taking Pictures of napkins is not as easy as it may sound.
Especially when your photography skills are lacking. Ha!
Oh well, they look good in person. You'll just have to trust me!
If you love this Bluesette fabric line as much as I do, don't miss the giveaway on THIS POST!
Let's make something extraordinary!
Jen
New to Patterns By Jen?
Don't forget to sign up for the Bites of PBJ newsletter while you are here for early releases and sales just for subscribers!
I love using up as much fabric as I can for a project, and pieced backings are my go to for doing that.
Fabrics for this project were provided by Benartex Fabrics as part of their Ambassador program. It is called Bluezette and is designed by Jan Shore
I grabbed another pack of 10" squares and a pack of 5" squares and started planning my pieced backing for the Bluesette Picnic Quilt.
I had decided I would tie this quilt, which means the backing doesn't have to be quite as large. I still planned it to be a bit over sized, just to made sure that I wouldn't make more work for myself by having it too small. Quilt math is hard for me.
It's also a bit messy.
I also like to plan my pieced backing to be easy to use, which means I don't want to have to worry about anything needing to be centered. I almost always plan my pieced backings to be off centered. I also make sure to set it off centered enough that it is obviously meant to be that way.
Remember when I said quilt math is hard for me? I ended up being short on one side and had to add a few more 10" squares to the right side. 😂
Once the backing was pieced I took it and the top to the only flat surface available to me: the driveway. For the Bluesette Picnic Quilt I laid the pieced backing right side up. Then laid the top right side down on top of that. I made sure you could see a couple of inches of the backing all around and then used stick pins to keep it in place.
Next I brought it inside and stitched 1/4" from the edge of the quilt top.
My mom shared a tip from my grandma to stitch 3 or 4 stitches at each corner, instead of going right to the corner. This gives you a nice sharp corner.
Trim the excess backing from around the top, 1/4" from the stitching.
Clip the corners.
I left an opening of about 18" to turn the quilt top, and when it was turned I pressed the seam allowance and then stitched about 1/8" from the edge. You could do a ladder stitch if you wanted it to be invisible.
Next use embroidery floss to tie, then enjoy your picnic quilt!
If you love the Bluesette fabric line from Benartex as much as I do, don't miss out on the giveaway happening in THIS POST.
Let's make something Extraordinary!
Jen
New to Patterns By Jen?
Don't forget to sign up for the Bites of PBJ newsletter while you are here for early releases and sales just for subscribers!
A quick tutorial for a precut friendly picnic quilt.
Fabrics for this project were provided by Benartex Fabrics as part of their Ambassador program. It is called Bluezette and is designed by Jan Shore
My second quarter project needed to be based on precuts. I knew the quilt would have to be scrappy, which is not my strength, in order to use up as many pre-cuts as I could.
To start I used two packs of 5" squares to make 21 four patch blocks. I flipped one stack over and proceeded to stitch them in that order.
When using precuts, don't trim off the jagged edges, they are part of the measurement.
Instead, sew with the tips against your quarter inch foot.
Chain stitch all the things to make your quilting life happier.
There's something so satisfying about a pile of stitching. I like to "chain press," too.
To do this I simple leave the units stitched together. I hit the seams with a hot iron to set them.
Then I press them, clip the threads between each unit, and lay out the next set to be pressed.
Pin the seams on the four patch units to match up your centers. In all honesty though, this fabric is busy enough no one would notice if you didn't.
I wanted to also put the 10" squares to use, but because they are 10" and the 4-patch blocks end up 9 1/2" because of seam allowance, I had to trim off 1/2" from two sides.
To do this I used my 12 1/2" square ruler, lined up the 9 1/2 mark on one side and the bottom and just trimmed of the other sides. You need 21 of these
I *also* wanted to use the 2 1/2" strips. I cut them down to 9 1/2" for the sashing and also cut a few 2 1/2" posts. You need 71 sashing strips and 30 posts.
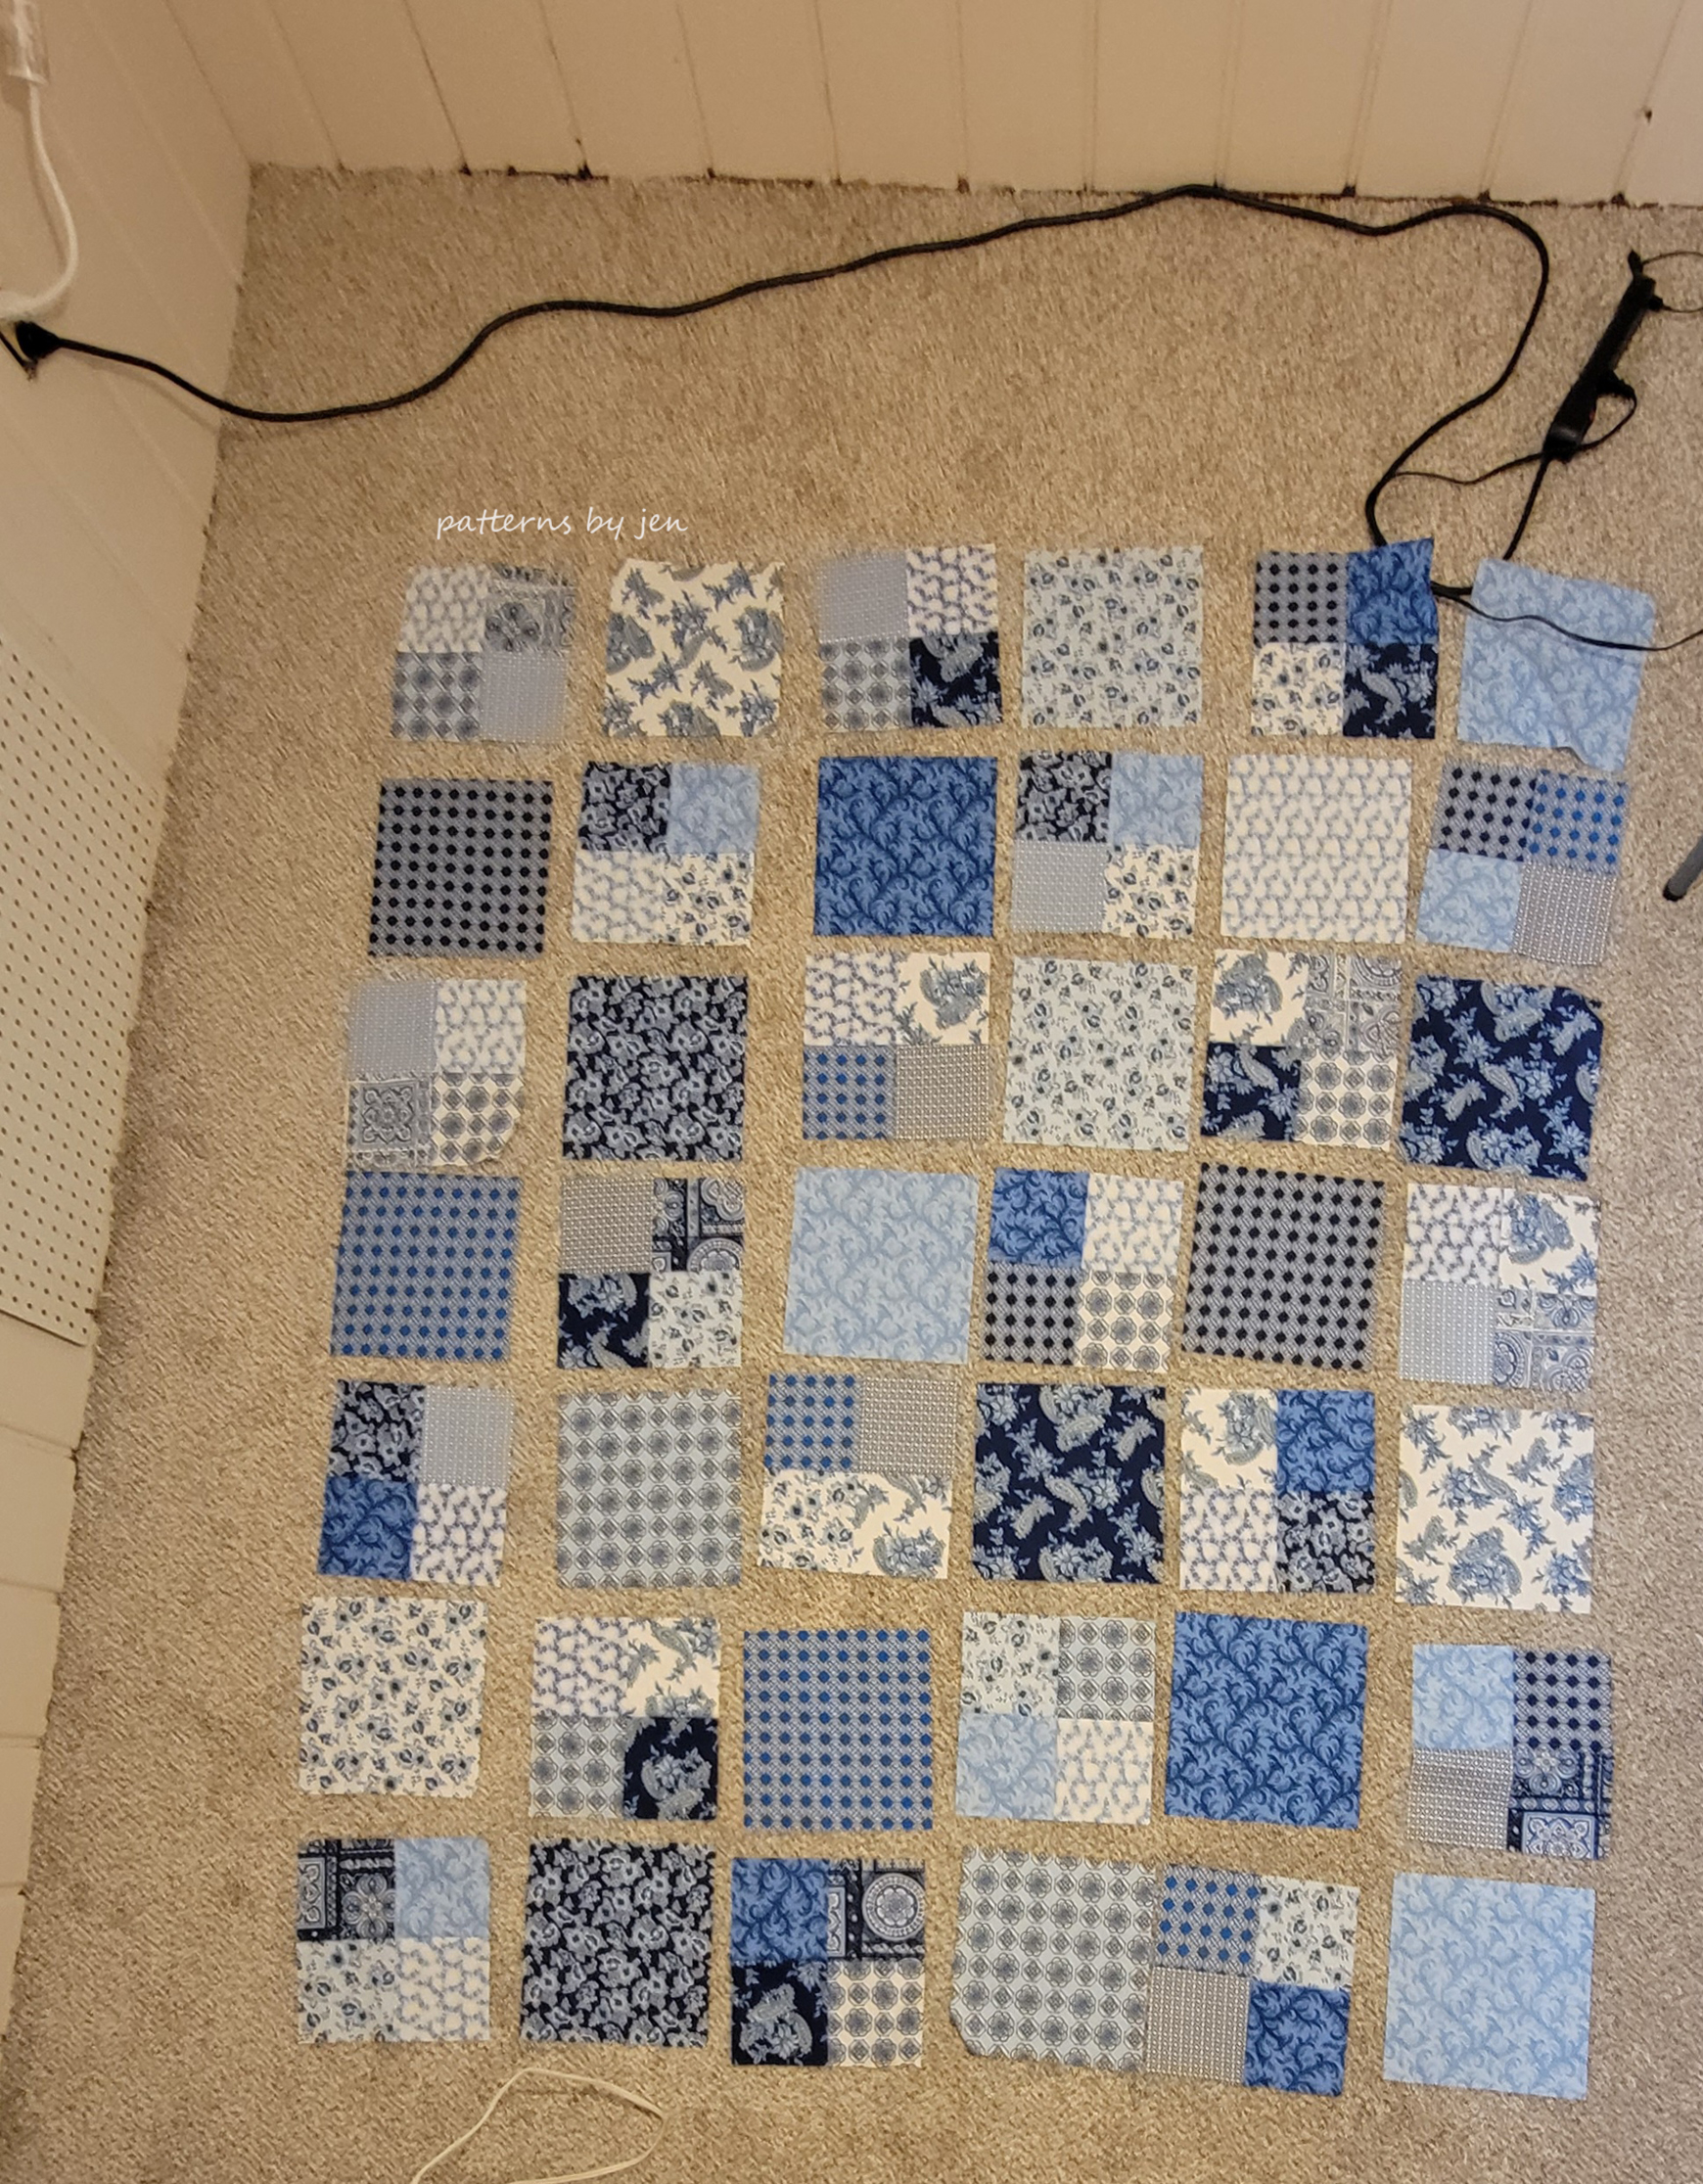
When I first laid out all of the pieces, it was a bit overwhelming and I admit to questioning my decision to use all the things.
I might need to fire my photographer, this is the ONLY picture taken of the sashing and posts.
After years of quilting though, I know that you never know how it will truly look until the last stitch is made, so I started stitching.
In the end, I LOVE how it turned out.
The last step was to add a 2 1/2" border strip around the whole thing.
If you love these Bluesette blues from Benartex, don't miss the giveaway happening in THIS POST!
Let's make something Extraordinary!
Jen
New to Patterns By Jen?
Don't forget to sign up for the Bites of PBJ newsletter while you are here for early releases and sales just for subscribers!
I am excited to share my Quarter 2 Ambassador project(s) with you!
My Quarter 2 project needed to use precuts. To see all the precuts I was given to use you can watch the unboxing video.
I had so much fun planning and stitching the projects I chose to do, but the quilting of one did not go as planned. My Baby Lock Coronet, Carl, was a crabby old man when I needed to quilt and finish one of the quilts, so he's been sent out for cleaning and an attitude change.
If you watched the Unboxing Video above you know I had a plethora of pre-cuts to work with. At first I was a little overwhelmed and had no idea what I would do with all this blue and white gorgeousness.
I wanted something that would be easy to use, because so many quilters have pre-cuts galore, but aren't sure how best to use them. For the Picnic Quilt I used the 10", 5" squares and the 2 1/2" strips.
If you follow me on Instagram you know we had new flooring put in. It ended up taking longer than expected, and this put be behind on my Quarter 2 project. I was worried that I wouldn't have time to quilt this top and reached out to my photographer friend. She immediately saw a picnic quilt, and so, the Bluesette Picnic Quilt was born. Find the tutorial HERE.
I still needed a backing for the Picnic quilt, and knowing this was going to be used for that purpose, I knew a pieced backing would:
1) Hide any dirt/ stains from the ground
2) Could be a pretty quilt as well if the top was dirty
3) Would use up more of the pre-cuts I had left over
Why doesn't the wind ever cooperate?
I used the 10" and 5" squares for the pieced backing and love it. For the Bluesette Pieced Backing Tutorial see THIS POST.
I love how this picnic quilt turned out.
Any good picnic will require napkins and I chose to use the last of the 10" squares for those. Picnic napkins don't have to be big, and because they are made from the exact same fabric as the picnic quilt, it can all be tossed in the washer together if needed.
A quick press and they will be ready to go again. To find the *very* simple tutorial go to THIS POST.
I made a second quilt using the pack of fat quarters.
For this quilt I chose to use a pattern I had already designed called Pinwheel Pivot. Since it's already fat quarter friendly and the quilt math was already done, I knew this would be an easy top to finish.
The top WAS easy to finish, unfortunately Carl was crabby. Sigh. Every 2 to 5 inches of quilting this happened, no matter what I did.
So I didn't get the quilting completely done. When he's back and feeling better though, I will finish quilting the Bluesette Pinwheel Pivot and use the binding that is made from more of the 2 1/2" strips and just waiting to be used.
Pinwheel Pivot is one of my favorite patterns, because it has so many options. Watch for a Bluesette table topper from Pinwheel Pivot coming soon!
***Giveaway***
Do you love these blues as much as I do? You can win a pack of 5" x 5" squares of Bluesette just by commenting below and telling me your favorite pre-cut to use.
Giveaway ends June 15, 2023.
Let's make something extraordinary!
Jen
New to Patterns By Jen?
Don't forget to sign up for the Bites of PBJ newsletter while you are here for early releases and sales just for subscribers!
There is something distinguished about the color grey and it has become one of my favorite neutrals.
This year Benartex is sponsoring the 2023 Monthly Color Challenge with their Basics Line, Cotton Shot. I am loving these fabrics. They are easy to work with and saturated with color.
This month we are using Silver for our light background and Charcoal for our main color.
My husband and I are celebrating our 25th wedding anniversary this month. I chose silver tuxes and dresses for our wedding party, and I will never regret it. 😍 It's just a good month for silver (grey)
This year we are doing things differently with the bloggers. There will be just one quilter a month that will be featured. March's blogger is Kathy. I encourage you to grab your favorite warm (or cold if it's hot where you live) drink and stay awhile to check out what she's working on.
Ready for the block? Here it is! We're making the same Flying Geese units that we made the last two months (though different sizes), but as I did last month I've included a "How To" video, so make sure to scroll all the way down the instructions page and click on How To Video.
I love a good star block, and I wanted to make sure to add one in this year, even if I struggled with giving it a new look.
Join the Quilt and Learn with Patterns By Jen Facebook group (make sure to answer the questions so I know you are a real person 😉) where you will get a lot of support and questions answered! If you aren't on Facebook you can also follow Patterns By Jen on Instagram. Use #2023MonthlyColorChallenge when sharing so I can be sure to see your block.
I can't wait to see all of the grey flood my world this month! I know that sounds weird, but green trees against a grey sky are stunning.
Ready to get the pattern? Go to Payhip and download it now! The block is free for the month of June! Each set of instructions includes a "How To" video.
It's too late to receive the January and June instructions through email, but you can still sign up to have the July - December blocks (and the layout!) sent directly to your email. Sign up HERE.
Let's make something Extraordinary!
Jen
New to Patterns By Jen?
Don't forget to sign up for the Bites of PBJ newsletter while you are here for early releases and sales just for subscribers!