
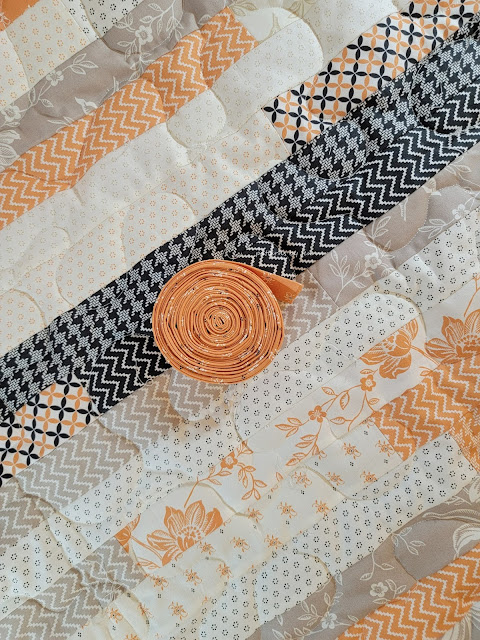
I love the pieced backing on the new Pinwheel Pivot quilt. It was super easy to do and I'm going to show you how I made it.

Affiliate Disclosure: This post contains Affiliate Links. When purchases are made through these links I receive a small commission at no extra cost to you. Your purchases help support my small business and keep my husband's head from exploding every time a new quilting notion arrives in our mailbox. Thank you for that. Find out more about Affiliate Links Here.
I used part of a fat eighth bundle of All Hallows Eve fabric for the front of Pinwheel Pivot.

As a quilter that doesn't like to have a lot of fabric sitting that meant finding something to use the rest of the fat eighths for.
Since every quilt needs a back, that was my answer. However I didn't want to sew squares together, I wanted something with a little more oomph.

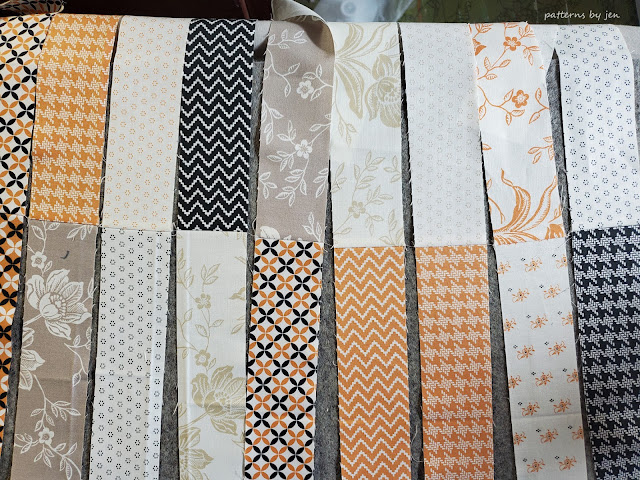
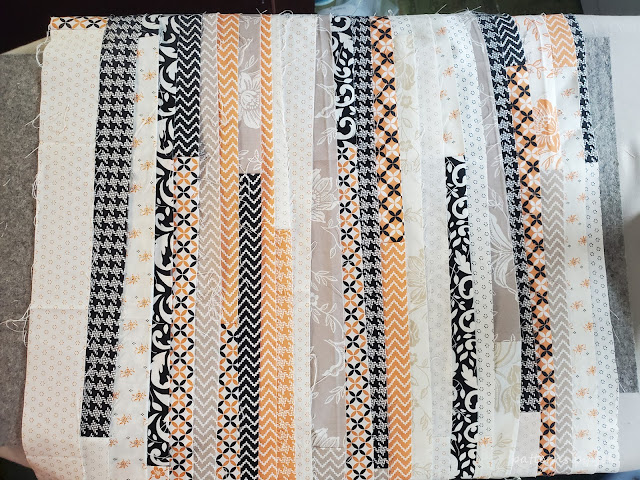
What that meant was cutting each fat eighth into strips.

I folded the fat eighth the long way, trimmed the top just a bit to make it straight and then gave myself another straight edge to work with by trimming off just a smidge from the side. For the least amount of waste I cut my strips 1 7/8" wide.
Once all the fat eighths were cut down to strips I began sewing them end to end. I didn't go in any particular order, just grabbed one from a stack and another from a different stack and stitched.
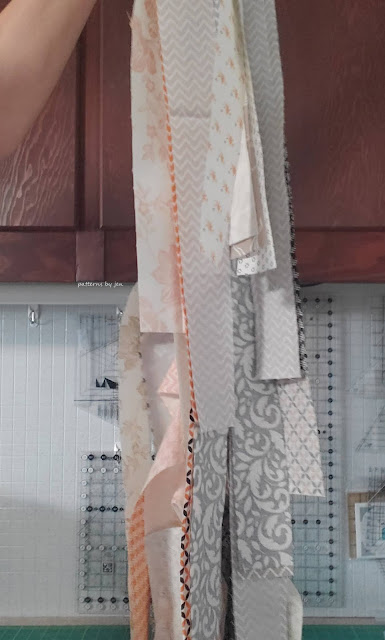
I continued to grab strips and sew them until they were all sewn into pairs. Then I pressed, it doesn't matter which way you press.
 |
| That's me, waaaay at the end. |
Once pressed I continued to sew strips together end to end.
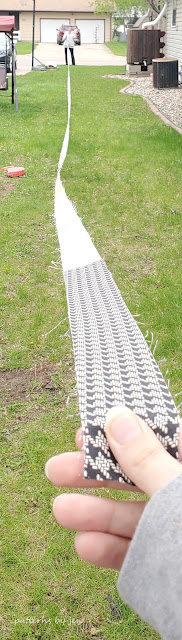
I made the 42" square of Pinwheel Pivot so I needed 50" wide backing. Once I had stitched all of the strips together I began to sub-cut them into 50" strips. I did it this way so that I wouldn't have to worry about the seams lining up.

You don't have to worry if you get a piece that is really small as you sub-cut because these will be trimmed off when you square up to put the binding on. Note the little pink sticky. I put that there so that I could measure the strips quickly.

*Tip* When pressing the length of the strips, finger press the seams before using the iron to help keep them from getting stretched out.

Once I had sewn all of the strips I had together I knew I wouldn't have enough for the length of the quilt. I added yardage to top and bottom because strips can get warped and pulled and this gave me a strong base for the top edges. Notice I wasn't too worried about the strips ending perfectly together because this is made larger than needed and would be trimmed down.

For this quilt I ended up spray basting instead of pinning, but to line up the strips and to top it doesn't matter which you do.

Once I had the backing and batting basted together I laid out the top. I simply lined up the seam of the pieced rows with a seam of the pieced back, and counted to make sure both sides followed the same number of rows. Easy peasy. If you wanted to make sure your quilt didn't shift you could put a pin in at the end of each row to make sure it stays with the back seam it is supposed to be aligned with.

Strip pieced backing done, minimal left over fabric. One happy quilter.
Make something Extraordinary!
Jen
New to Patterns By Jen?
Don't forget to sign up for the Bites of PBJ newsletter while you are here for early releases and sales just for subscribers!
Find paper and digital patterns in my Etsy shop.
Find fun PBJ merchandise at Teespring
Join the Quilt and Learn with Patterns By Jen Facebook page.
Thanks for your post. I am not a strip piece, I like blocks! Would you suggest a boarder for top and bottom if I'm seeing them in point? I'm thinking 8" blocks leftover from the fat quarter and half yard bundle I'll be using.
ReplyDelete