Showing posts with label free quilt pattern. Show all posts

Tuesday, September 19, 2017

BU Quilt Along - Week 2

Week 2! Time to start stitching our blocks, starting with the center unit.


Did you get all of your pieces cut out?
It's a lot of cutting, but I like to get my pattern all cut out, then I can focus on the stitching part. This week we are simply making the center unit which is a snowball unit. It's pretty easy and we *just* need 30 of them. 

First mark the diagonal on the wrong side of your 1" squares. There are different ways to do it. 


I prefer to mark with a pencil.


You can use a laser, or draw lines on your machine like I did on my old machine. ( I don't know anything about the laser method, just that many quilters like it. If you have experience, please share in the comments!)


Or you can press them and get that diagonal line. I prefer pencil because it's a nice thin line and I am more accurate with it.


Once you have your lines drawn (I like to do them all at one time) line up one, right sides together, in a corner. Note the direction of the drawn line. Stitch just to the right of the line to get a nice accurate square in the end.
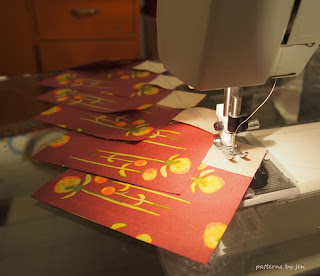


This is a great unit for chain piecing. Line them up and stitch on the line, one after the other. 


When done with the first square, do the same with another square on the opposite corner. You can press and trim after each one, but with this unit, I like to just get all four corners done and then press. (I also eat one food at a time on my plate. I'm special like that.)


Repeat with corners 3...


and 4.


Next, press the triangle out towards the corner. Do this for all of them, again I like to do opposite corners. Remember press, don't push or stretch,  the fabric. 


After all four corners have been pressed, trim 1/4" from the stitched line. 


Beautiful! You now have 30 center units for you blocks! Share your blocks on the Quilt and Learn with Patterns By Jen Facebook group.

Next week we will make the Flying Geese. Using the No Waste Method it is a quick and easy unit.

Happy Stitching!
Jen

Don't miss the 2 day sale on Cartwheels on the Prairie (only $5) in celebration of it's release two years ago. Sale ends Sept 19 (today) at midnight. Digital and paper available at Etsy. Digital available at https://www.craftsy.com/profile/patterns-by-jen


Beginners Unite Quilt Along Schedule

September 12 - Cutting (including fussy cutting the center)
September 19 - Center block - You are here
September 21 - Look at marking tools
September 26 - Flying Geese week 1
October 3 - Flying Geese week 2
October 10 - Half Square Triangles
October 17 - Corner Units
October 24 - Block Assembly
October 31 - Top Assembly
November 7 - Add borders
November 14 - Quilting and Binding

Tuesday, September 12, 2017

BU Quilt Along - Week 1

Welcome to the first week in the Beginners Unite Quilt Along!


After a delayed start date I am so excited to be able to get this party started. First you need the pattern with the fabric requirements. Download the free Here A Square, There A Square pattern HERE. 

I am using the Haiku 2 from Monaluna, no affiliation, but this fabric is awesome to work with and you should try it. 

There is still time to grab your fabrics, we are just starting to cut out our pattern this week. Here's what you need:

Fabric Requirements

Teal -  1 1/3 yard
White  - 1 ¼ yard
Black – 3 ¼ yard
Grey – 2 yards

Here are the colors I'm using:

Teal - Clover 2 (I used 2 yards for fussy cutting the center)
White - Shimmer 2
Grey - Shimmer Lawn


Grey/Shimmer Lawn

. Cut five strips 5 1/4" x WOF (width of fabric), I leave mine right where they are when cut.


Sub-cut into thirty 5 1/4" squares, because the strips are still lined up nicely, it's easy to sub-cut into squares.


Cut five strips 3" x WOF and sub-cut into sixty 3" squares.
Cut nine strips 2 7/8" x WOF, sub-cut into one hundred twenty 2 7/8" squares.


White/Shimmer 2

We're going to cut four strips 4 7/8" x WOF, and sub-cut into thirty 4 7/8" squares.
Cut once on the diagonal.

Next cut five strips 3" x WOF and sub-cut into sixty 3" squares.

Cut five strips 1 1/2" x WOF and sub-cut into one hundred twenty 1 1/2" squares.


Black/Cherry Blossoms Dusk

Cut five strips 5 1/4" x WOF and sub-cut into thirty 5 1/4" squares.

Cut nineteen strips (in this case I will break the strips I cut into groups of nine or so and cut squares as described above, then cut the next set of strip and so on) 2 7/8" x WOF, sub-cut into two hundred forty 2 7/8" squares.

Cut one hundred twenty of those squares once on the diagonal, leave the other one hundred and twenty as squares.

Cut eight strips 3 1/2" x WOF, set aside for borders (not shown).


Teal/Clover 2

Cut out four strips 4 7/8" x WOF (width of fabric). Sub-cut these into thirty 4 7/8" squares. Cut once on the diagonal.


**If fussy cutting the center block, do NOT cut out the 4 1/2" strips listed below.**
 If not fussy cutting: cut four strips 4 1/2" x WOF, and sub-cut into thirty 4 1/2" squares.

If fussy cutting, here is how I do it.

I make sure I'm working with pieces large enough that I can cut the fussy piece out without too much...fuss.  In this case I know I'm not going to be able to fussy cut each bunch, so I make sure there is at least 4 3/4" width to work with.


I have a 4 1/2" ruler, but any ruler will work, square is easier, but really any will work. Mark the middle, in this case the 2 1/4" point. If you don't have tape, mark it with a sharpie and then cover that mark with scotch tape. This mark will help you find the center of your fussy cut piece quickly.


I use a cut piece of an old cutting mat to do the fussy cutting part. This way I can rotate the piece without picking up the fabric. I feel this helps with accuracy. There are rotating mats that you can purchase, but this works well for me.


Trim the side and top, then rotate and trim the next side and top.


Cut four strips 1 1/2" x WOF and set aside for the border.


That's it!  Cut a few pieces each night and you'll be ready to go next Tuesday when we start with making the center block. I would love to see your progress, join Quilt and Learn with Patterns By Jen and show your stuff!

Sign up for email reminders.

Happy Stitching!
Jen

September 12 - Cutting (including fussy cutting the center) ~ You are here
September 19 - Center block
September 21 - Look at marking tools
September 26 - Flying Geese week 1
October 3 - Flying Geese week 2
October 10 - Half Square Triangles
October 17 - Corner Units
October 24 - Block Assembly
October 31 - Top Assembly
November 7 - Add borders
November 14 - Quilting and Binding


Follow me on Instagram and Facebook for sneak peeks and daily updates.