Friday, June 16, 2017

June Muggamo

It's here! June's Muggamo pattern!


Yes, it's very late, but better late than never? In the midst of plan for my son's graduation open house I realized I hadn't posted the pattern. That was June 6th, already late, and decided I had too much going on to fit it in without adding stress. So here we are, half way through the month. Whoops!


Fabric Requirements

Dark Purple
4 - 1 7/8" squares
2 - 2" x 3 1/2" rectangles
4 - 2" squares

Light Purple
 1 - 3 1/4" square
2 - 2" x 3 1/2"rectangles
4 - 2" squares
4 - 1 1/2" squares

Dark Green
2 - 3" squares

Light Green
2 - 3" squares


 Green Half Square Triangles


Draw a line on the wrong side of the light green squares.


Match a light green with a dark green, right sides together.


Stitch 1/4" on either side of drawn line.


Cut on the drawn line. Set your seam with a quick press, then press towards the dark green fabric. Square to 2 1/2".

My tutorial for half square triangles is here.

Purple Half Square Triangles


Draw a line on the wrong side of the light purple squares. Match a light purple with a dark purple, right sides together.


Stitch 1/4" on either side of drawn line. Cut on drawn line. Set your seam with a quick press, then press towards dark purple fabric.

Square to 1 1/2".

Flying Geese


Draw a diagonal line on the wrong side of the dark purple squares. Place two squares on the light purple square, right sides together.


Stitch 1/4" on either side of the drawn line. (Lines in the picture depict stitching lines, because even though I had 5 shots of this one step, they were all this blurry.)


Cut on drawn line.
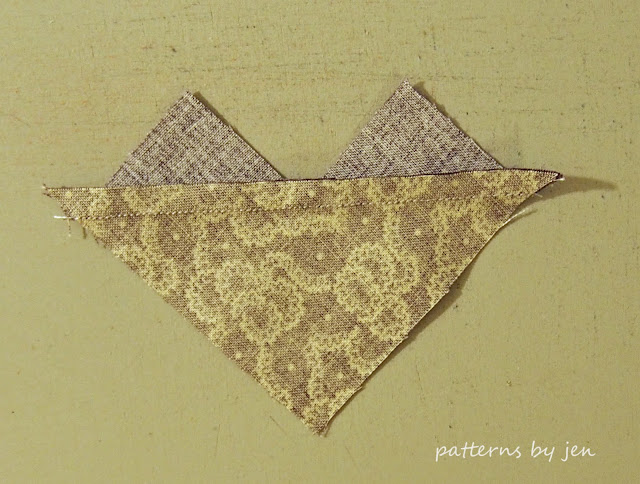


Set seam, press towards triangles.


Place a square on each of the new units.


Stitch a 1/4" on either side.


Cut on drawn line.


Set seam and press towards triangles.

Side piece


Lay pieces in order.


Stitch and press towards dark.

Block


Lay out block Piece rows. Go slowly, when pieces are this small they shift easily. Sew rows together.


Sew side piece to block.


Sandwich the mug rug. Quilt. Bind.


Grab your favorite drink and treat. Enjoy!

Share your finished Muggamo patterns on social media with #muggamo.

Happy Stitching!
Jen

Tuesday, June 13, 2017

Beginners Unite! Half Square Triangles

This is the post I have been waiting for since the beginning. I love making half square triangles, as long as they are "perfect."


There are a ton of different ways to make the half square triangle unit, but this is the only way I have found, for me, that gives me a perfectly squared HST (half square triangle). A perfectly squared HST goes a long way towards making the unit enjoyable. There is nothing worse than a unit that doesn't fit into a block, or a unit where you lose the point. 


We're going to make two 2 1/2" unfinished HST unit. For this you will need:
1) Two squares, 3" each 
See this post for accurate cutting.
2) A marking tool, I prefer a mechanical pencil
3) A ruler with a 45° line
*Any ruler will do, I love my Tucker Trimmer (no affiliation)
4) Rotary Cutter


On the wrong side of the lightest fabric draw a diagonal line.


At your sewing machine we are going to sew a scant 1/4" on each side of the fabric. To sew a scant 1/4" seam for a HST, I line up my foot so the marked line is under it, not next to it.


Turn the square and repeat on the other side of the line.


Cut directly on the line.


Press to set the seam. 


Then press towards the dark fabric.


Now, the fun part! Squaring up.


I have a piece of old cutting mat that I use when I do any squaring up. Our mats do wear out, but they are expensive and I can't bear to throw mine out. So my last one I cut/broke into quadrants and I use them any time I need to trim units. This keeps the mat I'm using as fresh and long lasting as possible. If you don't have an extra piece of mat, flip your mat over and use the back side for trimming.

I will show how to trim using the Tucker Trimmer as well as a square Creative Grids ruler.


What I like about the Tucker Trimmer is how it has just the lines you need, nothing extra. It makes trimming much faster. I will say, I wish it had grips like Creative Grids, be careful that the ruler doesn't slip. 


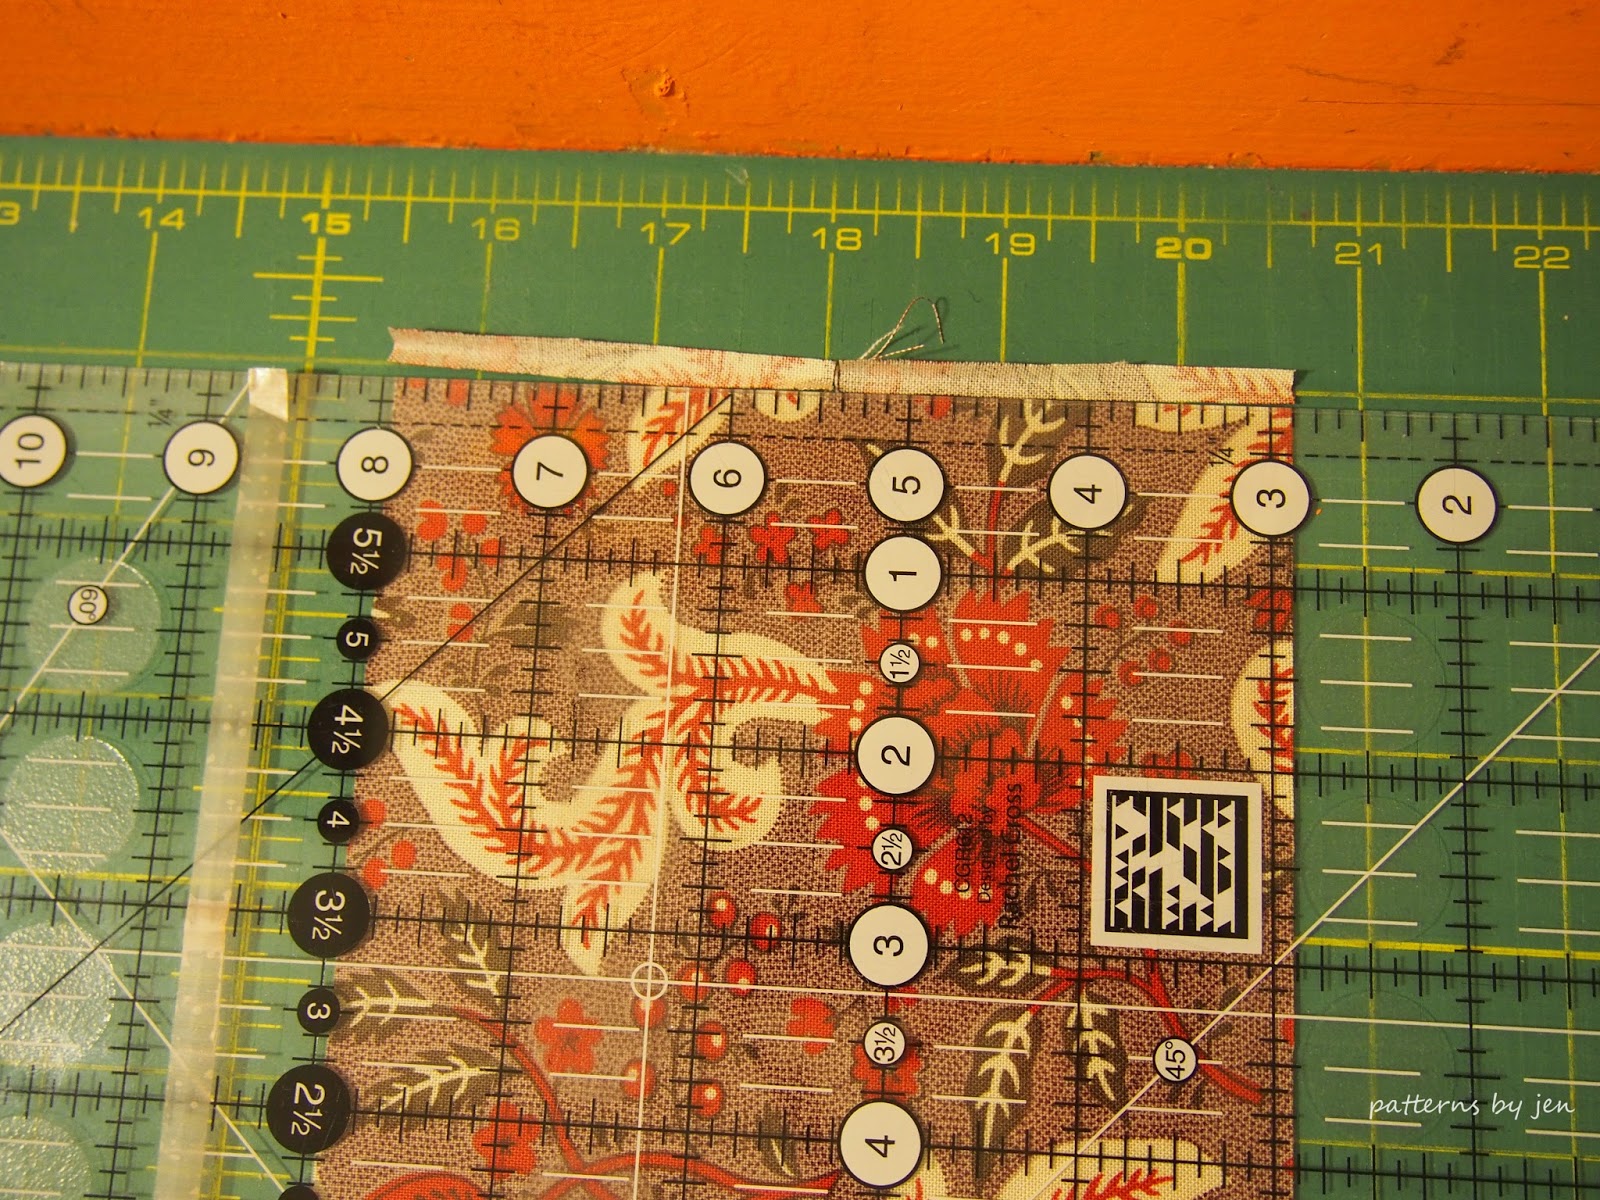
Line up the diagonal along the seam of your HST. This first trim is going to be taking off as little fabric as possible.


We made the square larger than needed, so there should be plenty to trim off, but double check that the measurement you need is inside the fabric. In this case the 2 1/2" mark.


Rotate the HST. Now you want to line up the 2 1/2" mark along the edge of the fabric, lining up the diagonal line on the seam. This trim will have larger pieces. 

You now have a perfect HST.


Using a Creative Grids ruler, you do the same thing. Line up the first trim with as little fabric showing as possible. The diagonal line sits on the seam and the 2 1/2" mark (for this size). 


Rotate the HST, and line up the ruler with the 2 1/2" mark along the fabric. Trim.


Half Square Triangles are an easy unit to chain piece. You can make a lot of them in a short amount of time, and it's worth the time to trim them into perfection.

If you don't like to draw any lines on your fabric, you can use this trick: Draw (or tape) the lines directly on your machine and line up your squares on them. 

I mentioned above that there are a lot of ways to make HSTs, and there are other rulers made just for squaring them up. Please feel free to share your favorite way/ruler for making the perfect half square triangle in the comments.

Happy Stitching!
Jen


1) Intro - May 2
6) Sewing strips and squares - June 6
7) HST - Half Square Triangles (My one true love) - You are here
8) Flying Geese - June 20
12) Adding Borders - July 18
13) Sandwich that top - July 25
14) Quilting - August 1
15) Binding - August 8
16) Labels  - August 15

Tuesday, June 6, 2017

Beginners Unite! Strips and Squares

Sewing strips and piecing squares together is our next topic. 


When sewing strips I  like to work with smaller pieces. While my patterns call to cut the strips by the width of fabric, if I am going to be strip piecing I will cut the strips in half by trimming off the fold.


When piecing I have my stitch length set at 2.5, the needle is set to stop in the down position and my speed is set right in the middle. Sewing at the highest speed can end with wavy stitching lines. 


Strips

I always piece with grey. It's a neutral color that shows up well in all colors. you know, in case I should ever need to rip out some stitching. Ha!


When stitching strips it's important to keep that scant 1/4" seam allowance. I show you in this post how I sew a scant 1/4" seam.


Pressing the strips is important, you don't want to stretch the fabric and end up warping it. I give you a quick look at how I press my strips.


To sub-cut the strips I first trim off one end. I line up a line on my ruler along the seam, not along the edge of the fabric.


Then I flip it and align the ruler mark for the width as well as along the seam. After I make the cut I move that unit off to the side and repeat. 


After awhile I flip the strip again and trim. If you look closely you can see it's off just a bit, and while it doesn't seem like a lot, just that little bit of an angle can through off your accuracy.


Squares

When sewing squares/units together, I am a firm believer in pinning.


I pin with the head of the pin on the right side so I can pull it out easily. I will sew one or two stitches over the seam and then pull the pin. That way I'm not sewing right over the pin, but I am also locking that seam exactly where I want it and I'm not risking it shifting out of alignment. 


I prefer to sew with my bottom seam going with the movement of the fabric, however that isn't always possible. When the bottom seam is gong against the flow that is when you get flipped seams, to prevent that I make sure to check underneath just before the needle is going to go over the seam and push it back the way it should be facing. I also hold it down with my fingers, that way I can feel if it flips again. 

When sewing rows together I do the same thing, pin all the seams, keep my fingers over the seams to feel for flips, sew at medium speed and press carefully.  Share your tips in the comments below.

Happy Stitching!
Jen


1) Intro - May 2
6) Sewing strips and squares - You are here
7) HST - Half Square Triangles (My one true love) - June 13
8) Flying Geese - June 20
12) Adding Borders - July 18
13) Sandwich that top - July 25
14) Quilting - August 1
15) Binding - August 8
16) Labels  - August 15

Tuesday, May 30, 2017

Beginners Unite! Sewing a scant quarter inch

We've covered accurate cutting and the next step for blocks that come together smoothly is sewing that scant 1/4" seam. 


For those that have a quarter inch foot for your sewing machine, it is still important to find that sweet spot. To show what a difference the seam allowance makes in your accuracy, I have sewn two units using a scant quarter inch and using just my quarter inch foot. (I will address finding a scant 1/4" if you don't have a quarter inch foot as well.)


To start, I raided my 1 1/2" scrap bin. If you are looking for that perfect seam allowance I recommend cutting up quite a few strips at 1 1/2" x 4 1/2" or a bit longer. This is a nice, manageable size for easy piecing. 

First, the scant quarter inch.


I know that there are many who want exact measurements for what a "scant" 1/4" means. I am not going to give you that. 1) I have no idea what teeny tiny measurement that is. 2) I truly believe the perfect scant 1/4" for your machine is something you need to take the time to find. Once you find it, you will never go back. On my machine (it's hard to see in the picture) the sweet spot is with the fabric just inside the 1/4" foot. 


If I line the fabric up with the foot, I consider this a 1/4" seam. (If you look closely you can see the fabric in the second picture is a little further to the right.)

So what is the difference?


Can you see it? The top is the scant 1/4" seam. 


Here I have pressed the seam to the dark side. If you look closely at the 2 1/2" marks on the ruler you can see they are on the fabric. 


Here, the 2 1/2" marks on the ruler line up along the outside of the fabric. Does this really make a difference?


Ignoring the fact that I did *not* cut accurately and my pieces don't match up, you can see that the 4 1/2" marks are still on the fabric.


Look at the difference on this one, though. My ruler marks were just on the outside of the fabric after the first seam, now however I've lost almost 1/8" of an inch after just three seams. Imagine what this would mean in a block that has 18 seams, or a top with hundreds.

What if you don't have a quarter inch foot? 


First, grab your ruler. Carefully, and by hand, put your needle down until it is on the 1/4" mark on your ruler. Place a piece of tape along the ruler. This is not the scant 1/4" seam mark, this is your starting point. Once you have your mark you will want to do the same thing as above. Sew 1 1/2" strips together, press towards one side, measure. 

The goal is to have the ruler marks along the inside of the fabric edge. If the marks are on the fabric, but there is fabric showing between the ruler marks and edge of the fabric, your seam allowance is small. If the marks line up along the outside of the fabric edge, your seam allowance is too large.


To help keep the seam allowance correct, line up your ruler along the new, correct line, and either place tape along the edge, or draw a line with a permanent marker.  Eventually you won't need this reminder, you will be able to mark it just by looking at it, but to start you want something to line up your fabric with. If/when you get a new machine, or a quarter foot, you will want to go through the process again to find that sweet spot. 

Happy accurate stitching!
Jen


1) Intro - May 2
5) That crazy scant 1/4 inch seam allowance - You are here
7) HST - Half Square Triangles (My one true love) - June 13
8) Flying Geese - June 20
12) Adding Borders - July 18
13) Sandwich that top - July 25
14) Quilting - August 1
15) Binding - August 8
16) Labels  - August 15