Showing posts with label mug rug. Show all posts

Sunday, October 1, 2017

October Muggamo

October is here! With it comes frosty mornings and chilly evenings, which means YOU need a mug rug. Thankfully, I have you covered with witches, spider webs and glow in the dark ghosties.


Grab your free mug rug pattern HERE.

What you need:

Print:
Five 2 1/2" squares

Black:
Two 3 3/8" squares

Orange:
Two 3 3/8" squares
Mark the diagonal on the wrong side

Side piece:
One 3 1/2" x 6 1/2" rectangle

Back and batting:
One 7" x 10" each

Binding:
One strip 2" x 36"


Assembly:

Match a black square with an orange square.


Sew 1/4" on one side of the drawn line.


Sew 1/4" on the other.


Cut on the line, press towards black.


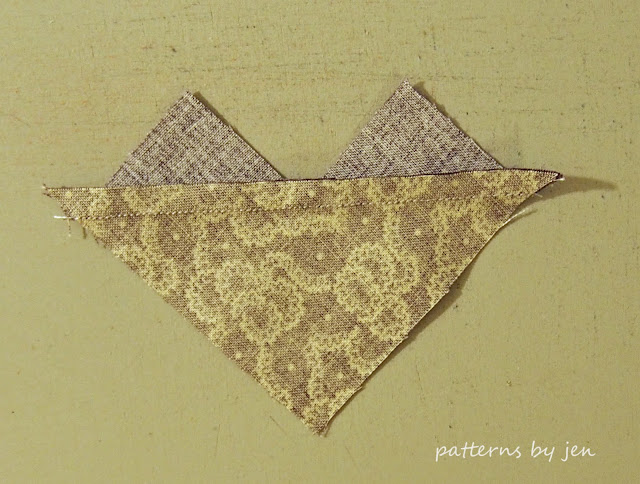
Mark the diagonal perpendicular to the seam. Line half square triangle units together with opposite colors.


Sew 1/4" on one side of the drawn line.


Do the same on the other side.


Trim. The 1 1/4" mark on the diagonal of the ruler should be in the center of the hourglass unit.


Rotate and trim to 2 1/2".


Lay out your block.


Stitch into rows.


Then stitch rows together.


Add the side piece.


Baste to batting and backing. Quilt. Bind. Enjoy.


Only two more to go this year! How did that happen. I hope you've been enjoying them. We'd love to see your mug rugs at Quilt and Learn with Patterns By Jen.

Don't miss the next step in our Beginners Unite Quilt Along coming up on Tuesday. We're on week 4. Grab a cup of coffee, one of your muggamo rugs and take a peek. There is plenty of time to catch up. Come join the fun!

Happy Stitching!
Jen

Follow me on Instagram and Facebook for daily peeks into Patterns By Jen!

Friday, June 16, 2017

June Muggamo

It's here! June's Muggamo pattern!


Yes, it's very late, but better late than never? In the midst of plan for my son's graduation open house I realized I hadn't posted the pattern. That was June 6th, already late, and decided I had too much going on to fit it in without adding stress. So here we are, half way through the month. Whoops!

Grab your free pattern HERE.


Fabric Requirements

Dark Purple
4 - 1 7/8" squares
2 - 2" x 3 1/2" rectangles
4 - 2" squares

Light Purple
 1 - 3 1/4" square
2 - 2" x 3 1/2"rectangles
4 - 2" squares
4 - 1 1/2" squares

Dark Green
2 - 3" squares

Light Green
2 - 3" squares


 Green Half Square Triangles


Draw a line on the wrong side of the light green squares.


Match a light green with a dark green, right sides together.


Stitch 1/4" on either side of drawn line.


Cut on the drawn line. Set your seam with a quick press, then press towards the dark green fabric. Square to 2 1/2".

My tutorial for half square triangles is here.

Purple Half Square Triangles


Draw a line on the wrong side of the light purple squares. Match a light purple with a dark purple, right sides together.


Stitch 1/4" on either side of drawn line. Cut on drawn line. Set your seam with a quick press, then press towards dark purple fabric.

Square to 1 1/2".

Flying Geese


Draw a diagonal line on the wrong side of the dark purple squares. Place two squares on the light purple square, right sides together.


Stitch 1/4" on either side of the drawn line. (Lines in the picture depict stitching lines, because even though I had 5 shots of this one step, they were all this blurry.)


Cut on drawn line.


Set seam, press towards triangles.


Place a square on each of the new units.


Stitch a 1/4" on either side.


Cut on drawn line.


Set seam and press towards triangles.

Side piece


Lay pieces in order.


Stitch and press towards dark.

Block


Lay out block Piece rows. Go slowly, when pieces are this small they shift easily. Sew rows together.


Sew side piece to block.


Sandwich the mug rug. Quilt. Bind.


Grab your favorite drink and treat. Enjoy!

Share your finished Muggamo patterns on social media with #muggamo.

Happy Stitching!
Jen

Saturday, April 1, 2017

April Muggamo

Welcome to April's Muggamo tutorial! The great thing about Mug Rugs is that they are great scrap busters. You don't need much to make a cute, functional piece.


Download the pattern here.


Fabric pieces needed

Fabric 1:
1 square 3 1/2"
1 square 2 5/8"

Fabric 2:
2 squares 2 3/8"
2 squares 2", cut once on the diagonal 

Fabric 3:
1 square 4 1/4"
1 square 3 1/2"

Fabric 4:
4 squares 2 3/8" 
Draw a line on the diagonal on the wrong side of each square.

Backing/Batting:
7" x 10" piece

Binding:
2" x 36" strip

First we will make the middle Square-in-a-square block.


Find the center of the square by folding it in half and finger press.


Do the same to the long side of the triangles.


Match up the folds and stitch.


Using the 2 5/8" square and the triangles, sew two triangles to opposite sides on the square.


Press towards triangles.


Repeat with last two triangles.


I like to trim off the dog ears.


Next we will make the No Waste Flying Geese. Using your 4 1/4" Fabric 3 square and 2 3/8" Fabric 4 squares we are going to make four Flying Geese Units.


Line up up two small squares right sides together as shown.


Sew a scant 1/4" on either side of the drawn lines. To sew a scant 1/4" when following a line, I like to put the edge of the presser foot just slightly over the line.


Cut on on the drawn line and press towards triangles.


Place 1 square on each of the units just made, right sides together. Stitch a scant 1/4" on either side of the drawn lines.


Cut apart on the drawn line.  Press towards triangle.


Units should measure 2" x 3 1/2"


This method gives you four Flying Geese units.


Lay out your block. 

Sew rows. ( I always forget to grab pictures of this step. Always.)

Then sew rows together.


Beautiful block!


Next sew the side piece using your leftover 3 1/2" squares.

Press to either side, your choice. 

Add the side piece to the block, press towards side piece.


Layer it up. Even with a small piece I like to secure it with pins.


Quilt it. I've used a walking foot and just stitched in the ditch for all of the mug rugs so far.


Bind it. *sigh* Even the small pieces get hand stitched binding. I cannot do a nice machine binding. Thank goodness I adore hand stitching!


Enjoy it.

Happy Stitching!
Jen
If you make an April Muggamo mug rug, please share with #muggamo and feel free to link up.