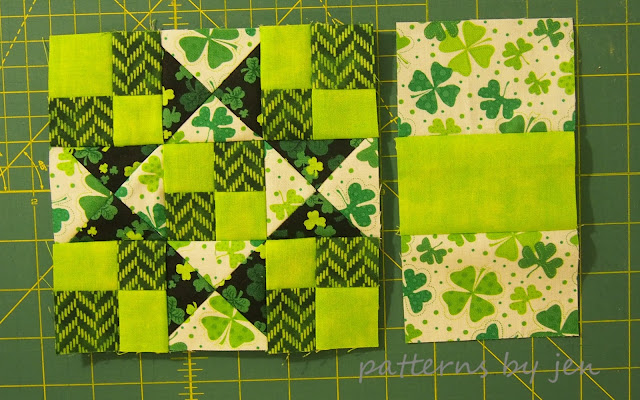
Pieces needed
White background:
Two 2 1/2" x 3 1/2" rectangles
Two 3 1/4" squares
Black Background:
Two 3 1/2" squares
Light Green:
One 2 1/2" x 3 1/2" rectangle
One 1 1/2" x 16" strip
Dark Green:
One 1 1/2" x 16" strip
One 2" x 36" strip for binding
Backing and Batting:
7" x 10"
Start by marking the diagonal on the wrong side of the 3 1/4" white background squares. I use a mechanical pencil for most of my markings.
Match a white background and black background square, right sides together, and stitch 1/4" on each side of the drawn line.
Cut on the line, press towards the dark.
Mark the diagonal on the back of two of the half square triangles. On this one I used a chalk marker, because pencil would not have shown up on the black.
Line up two half square triangles, rotated so colors are opposite. The picture shows them offset a bit, but this is only to show the colors are opposite, they should line up exactly.
Stitch 1/4" on either side of the drawn line.
Cut on the line, and press, it doesn't matter which side you press to. Repeat with the last two squares. You now have four beautiful Hourglass blocks.
I trim the little dog ears off, just to reduce bulk. If you choose to trim off the dog ears make sure you aren't trimming the square under 2 1/2". The middle should meet at the 1 1/4" mark.
Next sew your two strips of light and dark green together, lengthwise. Trim off just a little off one end to get a straight edge.
Flip the piece and sub-cut the strip into ten 1 1/2" x 2 1/2" units.
Using these units make five 4-patch units. This is a perfect opportunity for chain piecing.
Press.
Layout your star block.
Sew rows together first.
Sew rows into a star block. Line up the side unit next to the star.
Pin and stitch together.
Layer your pieced mug rug with backing and batting. Quilt it (I, once again, just used my walking foot to stitch in the ditch), bind it, then grab a hot or cold beverage, and sweet treat and enjoy your quilt finish.
If you make the March Muggamo, please take a moment to link up to this post. I will leave the link-up open until March 31st. I hope you will share! If you share on social media, please use #muggamo2017
Grab the Muggamo button for your blog.


Cute Mug Rug - I've not had time to get ANY done for March. I have been busy with the wedding quilt, a baby quilt and a graduation gift, but I hope to "catch up" on a few other QAL after my daughter's wedding in 9 days. Blessings <3
ReplyDelete