Welcome to the last Beginners Unite!
We're talking labels. As with everything in quilting, there is more than one way to add a label. Have I said that before? ;) There really isn't one way to do anything in the quilting world, you will enjoy it more if you do it your way.
Here are the tools I use for making my labels:
Scrap of muslin or light fabric
Heat n Bond, or any adhesive
Pigma pen/marker
Coordinating fabric strip (here I had extra binding, so I used that)
Here are the tools I use for making my labels:
Scrap of muslin or light fabric
Heat n Bond, or any adhesive
Pigma pen/marker
Coordinating fabric strip (here I had extra binding, so I used that)
For this particular label I used a 4" x 3 1/2" muslin rectangle. I cut my heat n bond at 3 1/4" x 2 3/4". This gives me a 1/4" seam allowance all the way around plus a little extra. Leave the paper on the heat n bond for now, this helps stabilize the fabric when you are writing.
I write on the muslin before stitching my "border" pieces on, of course I forgot to take a picture of that. I will also stick a piece of lined paper behind the fabric to give me nice straight lines to follow when writing.
I like to write the name of the pattern, who it's designed by (still trying to find that info for this one, the perils of not finishing something for 2 years), who it's for, then my name and phone number. On the quilts I mail to my photographer I write directly on the back of the quilt with permanent pigma; name of the quilt, Patterns by Jen, my name, address and phone number.
Once I have written down the pertinent information I will attach the borders, pressing out towards the borders.
When the label is written, the borders are on, then I will remove the paper from the heat n bond and attach it to the back of the quilt. I like the back right hand side. I don't know why, it just feels right.
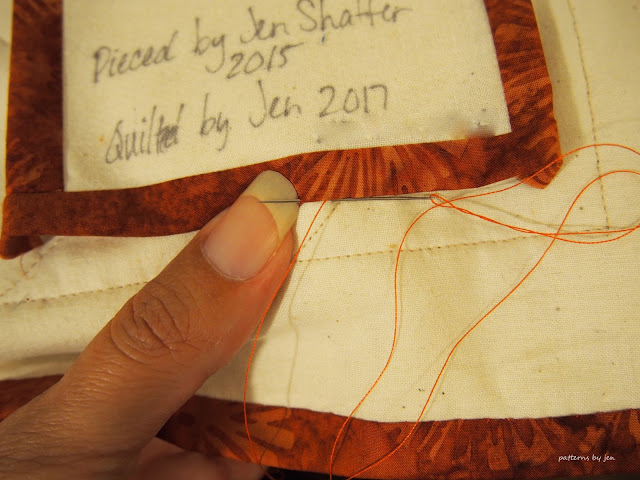
I fold over the border until I can feel the seam allowance in the fold.
I start stitching the label the exact same way I start the binding.
I also stitch 1/4" stitches.
When I get to the corners where the border is folded I make sure to stitch just the border, not the fabric folded under. This keeps that fold under the border and not peeking out the sides.When I get to the end I knot off the same way I do the binding.
Now you have a nice labeled quilt or wall hanging. If you want to add a hanging sleeve to your wall hanging I have a tutorial HERE.
I hope you have enjoyed the Beginners Unite series! Next Tuesday I will go over fabric amounts for the Beginners Unite Quilt Along! I hope you will join me.
Happy Stitching!
Jen
**Here is the info on the designer of this wall hanging, you may have heard of her, Kimberly Jolly of the Fat Quarter Shop. Follow this link and if you page down to the 2015 March mini, you will find it! Thank you, Pat Sloan, for helping me find my way back to this pattern!**


I like to label my quilts too. I print out the message from the computer and use a light box to trace over it onto muslin. Then add borders and stitch to the bottom right of the quilt back! 😀
ReplyDelete