Showing posts with label Picked By Jen. Show all posts

Tuesday, March 12, 2019

Picked By Jen - Buttercup Bag


It's been a while since I've written a Picked By Jen post. The Buttercup Bag from Made By Rae is the perfect make to start with. I LOVE this pattern.


So much so that I made it a second time after my first one became....ummmm....embarrassingly over used? That's the *same* fabric, too. I used this poor thing to it's last breath, I hadn't realized it has faded that much. Woah!


This purse though! It makes me so happy! I used the small pattern, because after 12 years of carrying a diaper bag I said "No More!" A small purse is all I've carried for the last 12 years. It does come in a larger version though if you need to be able to carry more.


Flamingo key chain made by my good friend Kelly of Handmade Boy.


This pattern is FREE when you sign up for Made By Rae's newsletter. I found this out when I had to go find it to print off a few missing pieces. I happily signed up for the newsletter, because seriously, this pattern is worth it.


I reused the metal snaps from the old purse, since that one is obviously not going to be used again. I chose this adorable polka dot fabric for the inside. I always use a light fabric on the inside of bags to make it easier to find whatever may be inside. Confession, even though this is the small version, I am able to fit way too much in there and lose it.


Now I need your help! I need to remake my wallet so it doesn't feel bad about being embaressingly overused as well.


It was a gift and I need to remake it, probably in flamingo fabric, the one thing I hoard. ;) Anyone know what the pattern is??!! Please!


It's very sad now. Hahahaha 

Get your pattern, I would love to see your Picked By Jen makes!

Happy Stitching!
Jen


Friday, December 22, 2017

Picked By Jen - Suite Life Yes

This months Picked By Jen is coming to you a bit late, but it's worth it! If you are like me, you have your fingers in a thousand pots right now, which is difficult, since we only have 10. This quick sew is worth it though. For peeks at what I'm working on follow me on Instagram.

I'm sharing the Suite Life Yes pattern from EvaPaige Quilt Designs. While the pattern is for a row of these fabulous guys, I made one. See above paragraph. ;)


I used my favorite color purple, and when Beth saw it, she asked if it was for the Vikings. Ummm, no, I'm a Steelers girl, however, I live in MN, so my youngest is definitely a Vikings fan. 


Which makes easy pickings for an awesome prop. 

I could totally see this guy in Black and Gold though, couldn't you? You could embroider your favorite team's emblem on the hat, and make a whole team. Seriously, I need a Steelers soldier, now that I have a Vikings one, because I will never NOT see Vikings when I look at this fellow. Ha! 


PS I totally faked the binding. No judging! Fingers and pots, people, fingers and pots!!  Did I mention no paper piecing? Totally had me at no paper piecing.

Would you make a team of Christmas soldiers or would you go more scrappy? I'm starting to see an awesome tree skirt with these guys. So many possibilities, so little time.

Happy Stitching!
Jen

Don't miss the 2018 Monthly Color Challenge! It starts January 1st and runs all year long, with some fabulous prizes.

Follow me on Instagram and Facebook for daily sneak peeks and updates.

I'm linking up with:

Saturday, August 19, 2017

Picked By Jen - Two-hand Casserole Pot Holder

This Picked By Jen is from Hey Lets Make Stuff. 

You can find the pattern and tutorial here: The Easy-Sew Two-Handed Casserole Pot Holder.

This really is a quick and easy sew and makes a great gift. In fact this Picked By Jen came about because my husband requested some like his mom's. Since his birthday was yesterday I thought it would be the perfect time to whip it up.


The instructions are easy to follow, but definitely take the time to cut slowly. I was in a hurry and my cuts weren't exactly equal. I made my seam allowance larger to accommodate. Looking at this picture I think it's time I finally bite the bullet and get a pair of pinking shears. What do you think?


Now, because I was in a hurry I pinned just one side, stitched to the other, laid the second side layers together and stitched, only to find out I hadn't paid close enough attention to the sequence. Isn't that the way it goes? When you are in a hurry you will always end up taking out the seam ripper.  You could always twist it in the middle to have the mitts work, but I wanted to make sure I gave him something nice, since he actually asked for it.


  See the opening where you pull it all through right side out? I always back stitch each side, that way if I have to put it all back, and then pull it right side out again, the stitching stays. I can guarantee that works, because I always have to go back and fix something.


Top stitched and ready to use. They turned out great, mistakes and all, and he loved the gift. I will definitely be making this one again, but I will be making it a bit wider and the mitt part a bit longer to fit "man sized" hands.

Fun Fact in Minnesota the casserole is known as a hot dish. What do you call it? 

Happy Stitching!
Jen

Friday, July 21, 2017

Picked By Jen ~ Fabric Basket from Pink Penguin

It has been a long time since I've done a Picked By Jen post. 
Picked By Jen is simply a pattern/tutorial that I have found, and made, and choose to share with you. The Fabric Basket from Pink Penguin is my choice for today.  


I am part of a Quilting Bee this year with eleven other quilters. Each month we make a block of the Queen Bee's choice, she will end up with eleven blocks, 12"finished and it will make a great quilt. 

I send little zipper pouches or fabric baskets with each block. It's fun to step away from quilt tops to make something quick and easy. 


The pouches are made in the same fabrics as the block. It makes for a quick sew, because the fabric has already been pulled, and since those colors were picked by the Queen Bee I know they will like them. 


This fabric basket is super easy and super fast. Both pluses when needing or wanting a quick finish. 

Happy Stitching!
Jen

Tuesday, December 6, 2016

December Picked By Jen - Elf Stockings

Picked By Jen posts are posts where I show you something I have made from a chosen tutorial that I found "somewhere on the web". It has been a while since I've done one, and what could be more perfect for December than stockings? 

Not the greatest picture, but it still makes my heart smile.


I chose the Elf Stocking (you will need to scroll down the page a bit to get the free download) from Patty Young of MODKID. 


If you are looking for a quick, cute stocking pattern, this is it. Look at those elf toes!!


Since I made six stockings, I traced the pattern onto interfacing. That way I could cut several and it would still be in good shape. Once I was done with it, I was able to just stick it into a manila envelope for storage and not worry about the tape coming off, or the paper getting creased. Maybe, years from now, I'll need to make little stockings to match. Though the more likely scenario is that we'll lose one and I'll need to make another next year.


When I use interfacing as a pattern, I position it on the fabric like any other pattern and then use weights to hold it all in place. In this case it was cans of chili beans. 


Then I use my rotary cutter. Since I found PDF clothing patterns, I have been convinced that scissors are no longer necessary for cutting out any fabric. Rotary cutter all the way...usually.


Even for that small area I pulled out my little 18 mm rotary cutter, and it worked perfectly. Just go slow and easy and I think you will find you like it.


I made one stocking all the way through, to make sure I understood the instructions, then made the last 5 all at once. 


CUTE!!  (If I do say so myself.)

The only thing I changed was that I added a lining, simply because I didn't like the feel of the fleece.  Nancy Zimmerman also added a lining, you can see her sock, and get instructions for that, here.

If you want to make a quick, cute Elf Stocking, this one really was quick, and I think completely adorable. 

Happy Stitching!
Jen


Saturday, July 16, 2016

July Picked By Jen ~ Thread catcher

I had to do it. It was time. Past time even. I had to make a thread catcher. I chose Man Sewing - with Rob Appell's Weighted Pin Cushion with Scrap Bag.


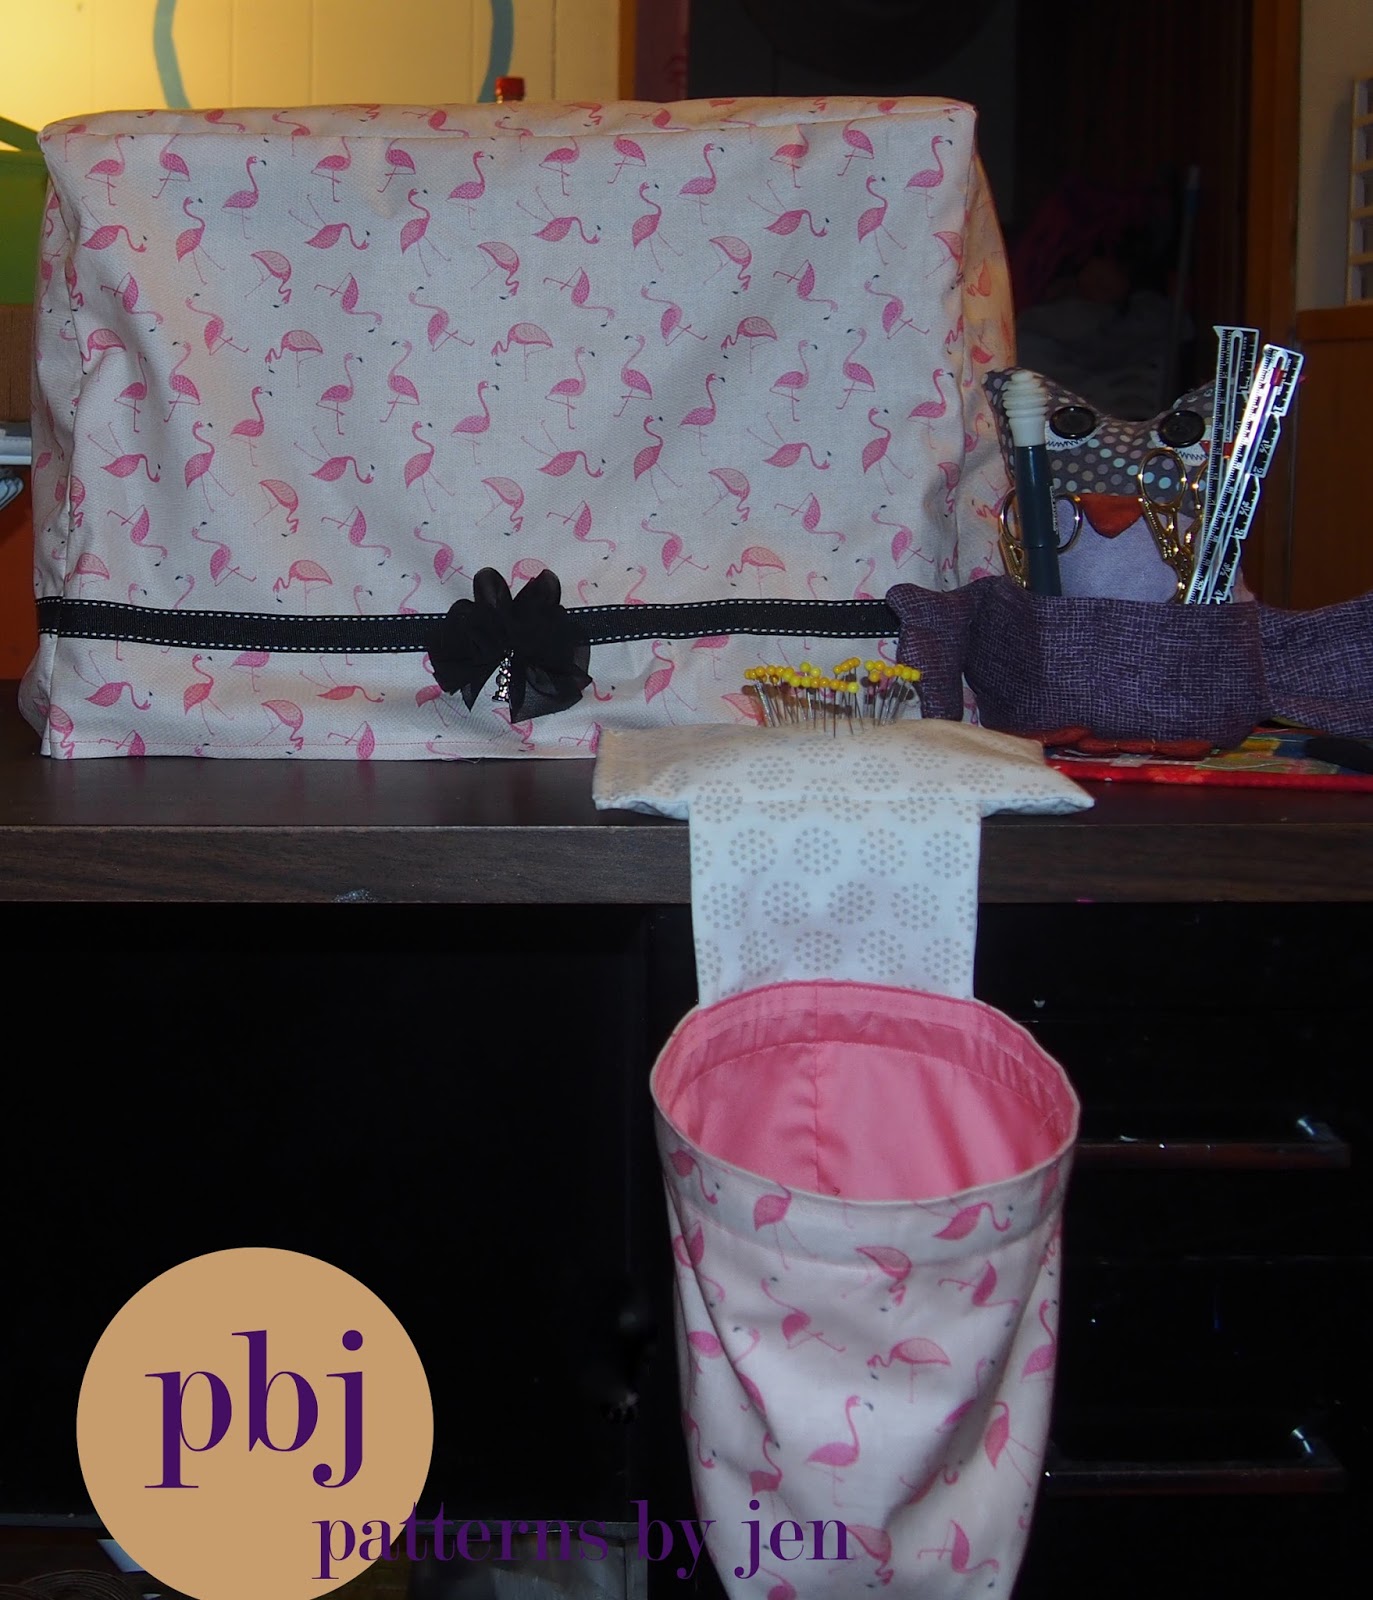
A quick and easy sew. I used my new favorite flamingo fabric, this time the fat quarter bundle, from Phat Quarters, as well as emery sand to fill the pin cushion. Y

I followed the instructions from Man Sewing, but I did add an extra piece to hold the emery sand. It's pretty fine, and I wanted an extra layer. 


It looks like a little pillow. Awwww.

I put this pillow into the pin cushion section when the walnut shells are added in the tutorial. 


It works perfectly. 


This was not a set up. My poor Owl You Need Sewing Buddy, found in this PBJ here, was in desperate need of saving. 


Where they should be.


Now I have a set, June's PBJ was the sewing machine tutorial, find out more here. My helpful little owl is all cleaned up and happy again, and only holding helpful tools, not clipped threads.

Find your flamingo fabric at Phat Quarters, and don't forget to use the code JPG25 to receive 25% off of orders $20 or more. This code is good through the end of July.

Happy Stitching!
Jen


Wednesday, July 13, 2016

June Picked By Jen

Remember when I said June was busy? It was so busy, I forgot about the Picked By Jen post! Which actually works out, because I can do two Picked By Jen posts in a week, and they match. So cute! The first one is for a sewing machine cover. I chose the tutorial from Purls and Pleats.


There are many, many tutorials out there, but I wanted simple. That's kind of my theme, simple, easy, quick. 

Marrie, does a great job walking you through the steps of this sewing machine cover. I did add a touch of my own, because, well, I could. Ha! So can you!


The first change I made, was that I hemmed all the pieces right away, before attaching them. There is no real reason for this, other then I didn't want to mess with the cover when it was put together. Lazy stitcher here. Its definitely a cleaner finish when you hem around the bottom last, though.


I pressed the hem before stitching, making it 3/8" wide, just so I could use my 1/4" foot and not have to worry about catching the fabric.

Who knew I had so many pinks to choose from for the top stitching?


Next, I chose some ribbon to go around the bottom part of the cover. Once hemmed, I measured and marked 2" from the bottom for my ribbon. I marked both sides and front and back.

Black ribbon or...


pink?


Don't forget to change your thread color!!! (There is even dust in there, this cover was needed yesterday!)


Lining up my ribbon along the marked line I stitched one end (look how I can use my foot as a guide, easy peasy).


Then flipped it around and stitched the top end. How you stitch this will just depend on the width of your ribbon. I could have just stitched once down the middle and been done with it.


I cut my ribbon about 1/8" longer then my pieces so that I could match them up when I sewed up the side seams.


Once the sides were stitched and my ribbons were matching perfectly, I trimmed the excess ribbon. If I was really truly lazy, I would have just left them, but I think it would have bothered me.

I was hoping to find a cute flamingo button to go on this, but I want it to be perfect, so I chose a sewing charm for now. Still extremly cute!


This is the one picture I took outside, it shows off the pretty pink flamingos much better. I think lighting needs to be next on my list, especially as we inch closer to cold winter days when we can't go outside.

If you are a flamingo lover, or fabric lover, head over to Phat Quarters and use the coupon code PBJ25, which is still good until the end of July, and receive 25% off orders of $20 or more.


Now I have my own, cute, totally flamingo sewing cover! Short and sweet.

Happy Stitching!
Jen


Sunday, May 29, 2016

May's Picked By Jen - Missouri Quilt Company's Self Binding Receiving Blanket

My next Picked By Jen is my favorite, go-to baby gift. The receiving blanket. Nobody does it better then Jenny Doan at Missouri Star Quilt Company. If you haven't seen it yet, she has a fabulous YouTube video here that explains the whole process. 


With all of the cute flannel out there, it is hard to justify making anything else. When you can give a favorite book, like Guess How Much I Love You, with a matching receiving blanket... you've just hit quilter gift giving heaven. 

I bought yards of this gorgeous flannel in pink and blue (and I think I need to get some of the cream) from my LQS, Fabrics Plus, in Marshall, MN. It is the Guess How Much I Love You TM line from Clothworks. If you can find it, I highly recommend picking some up. It is so soft and easy to work with, and too darn cute!


These receiving blankets also give you the chance to use those fancy stitches on your machine. I love that I can just guide it and the machine does all of the work. After all, I work hard, somebody else should pull their weight once in a while. 


A sweet, simple gift for sweet, simple bundles of joy.

Happy Stitching!
Jen

There is no affiliation with any of the links shared on this page, just me sharing what information I have.